10 | NORD STAGE 3 USER MANUAL OS V1.X
3
GETTING STARTED
Let’s spend a few minutes getting acquainted with the most fundamental features of the Nord
Stage 3! In this chapter the most common scenarios and tasks will be described in a step-wise
fashion, hopefully serving as a good starting point for further editing and more advanced set-ups
as well.
HOOKING IT UP
1 Connect the Nord Stage 3 power cord to the unit and a mains power supply, connect the
sustain pedal and a set of headphones or a sound system.
2 Make sure to turn on the Nord Stage 3 first, before the sound system. Please be careful with
the output volume.
For more information on all the connections on the Stage 3, have a look in the Connections
section on page 57.
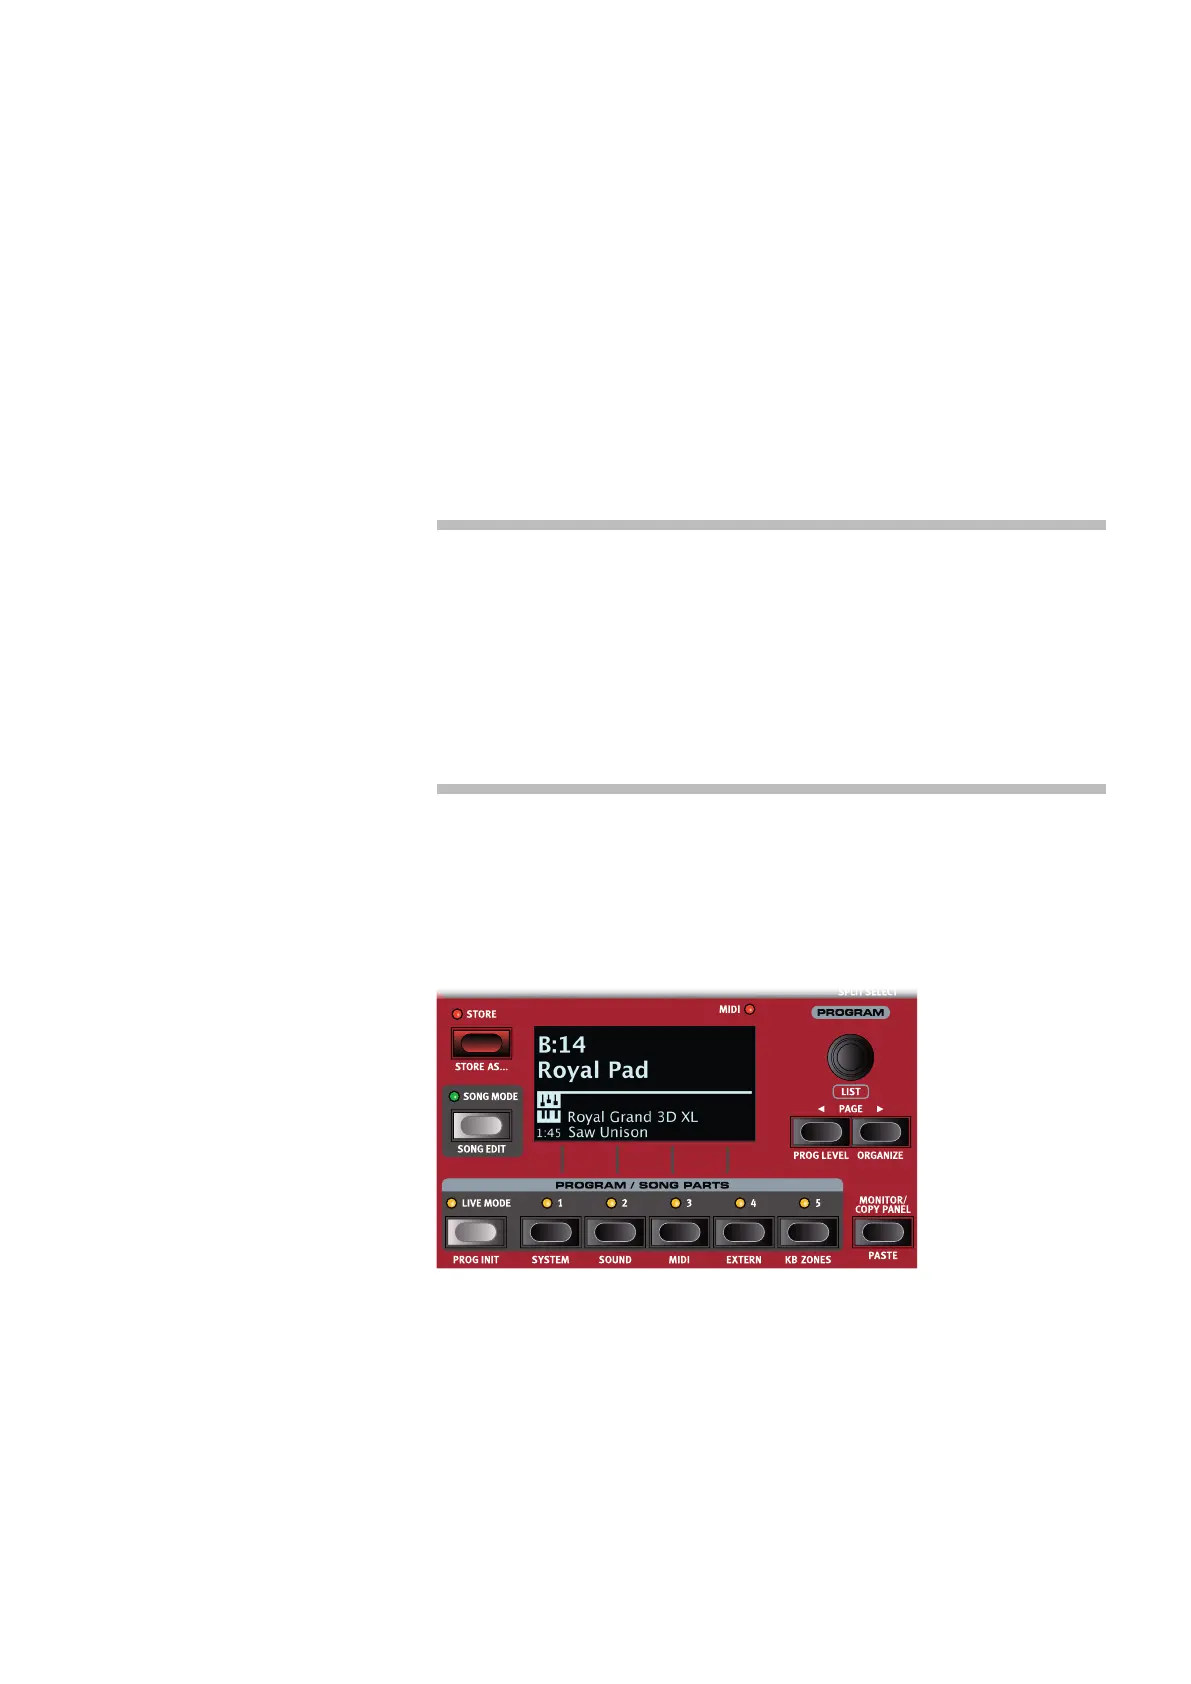
PROGRAMS
The Program area is located at the center of the panel and has an OLED display in the middle.
Complete settings of every parameter on the panel are stored in the program memory of the
Nord Stage 3, with enough room for 400 programs.
Programs are organized into 8 banks, labeled A-H. All programs can be edited and replaced as
you wish.
M A complete set of the factory programs is available on the www.nordkeyboards.com web
site. This means that the program memory can always be restored to its original state.
SELECT A PROGRAM
1 Programs are selected by pressing any of the five PROGRAM buttons, located below the dis-
play. The PAGE 3/4 buttons are used to navigate program pages – a page being a group
of 5 programs. A Program bank on the Nord Stage 3 can contain up to 50 programs divided
into 10 program pages.
Some of the factory programs are labeled with MW or AT. This indicates that the Mod Wheel
or Aftertouch has an active part in the sound and invites you to use these performance
features.
2 Programs can also be navigated by simply turning the PROGRAM dial.
 Loading...