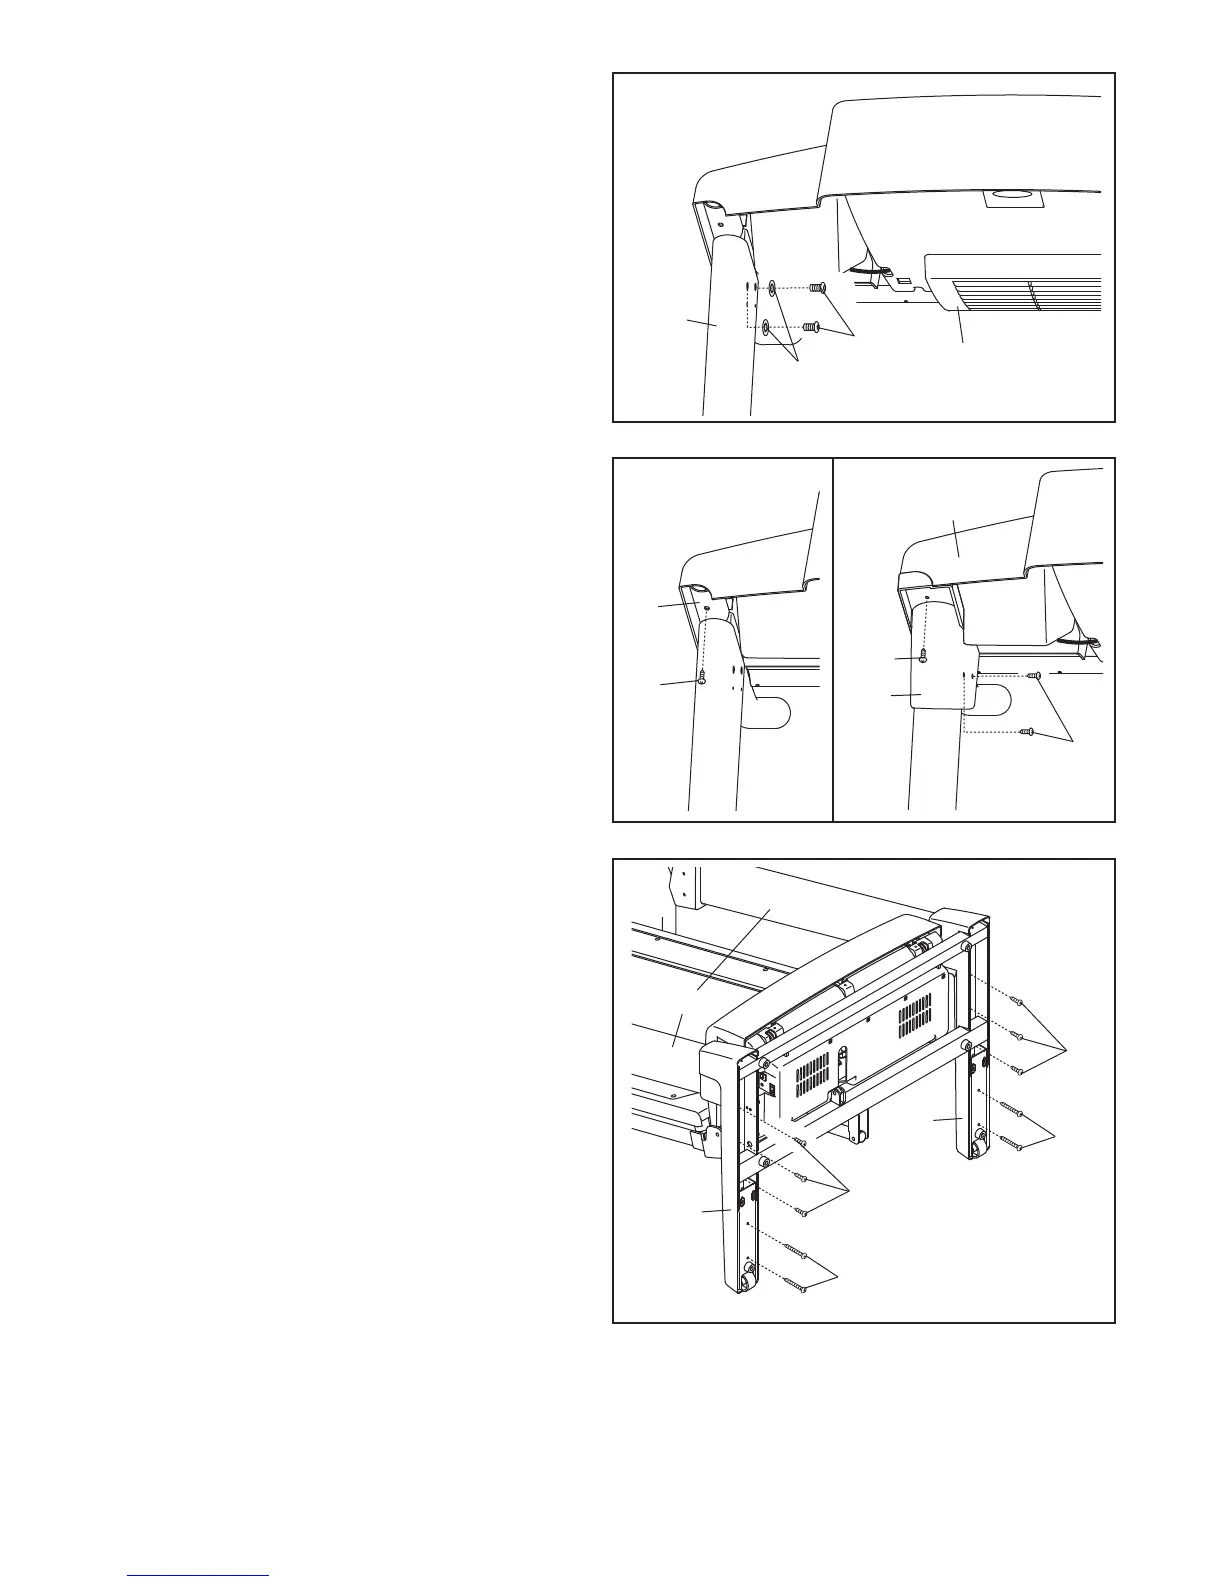
9
9. See drawing 9a. Remove the indicated 3/4”
Screw (7) from the right Handrail (70).
See drawing 9b. Slide the Right Upright Sleeve
(9) up to the console assembly. Attach the Right
Upright Sleeve with two 1” Tek Screws (82) and
the 3/4” Screw (7) as shown.
Attach the Left Upright Sleeve (not shown) in the
same way.
9
7
7
70
82
Console
Assembly
9a
9b
8. Attach the console assembly to the Uprights (85)
with four Console Bolts (72) and four 3/8” Star
W
ashers (67) (only one side is shown). S
tart all
four Console Bolts before tightening any of
t
hem.
67
72
85
Console
Assembly
8
11.Make sure that all parts are properly tightened before you use the treadmill. Keep the included hex key
in a secure place. The hex key is used to adjust the walking belt (see page 28). To protect the floor or car-
pet from damage, place a mat under the treadmill.
10.With the help of a second person, carefully lower
the Uprights (85) to a vertival position.
Attach the Right Base Cover (86) with three 3/4”
Screws (7) and two Base Cover Screws (63).
Start all five Base Cover Screws before tight-
ening them. Be careful not to overtighten the
Base Cover Screws. Attach the Left Base
Cover (88) in the same way.
With the help of a second person, carefully raise
the Uprights (85).
63
7
88
86
63
7
85
10
 Loading...