Installation
A1-33
E 2000 Nordson Corporation
All rights reserved
41-3000V
Issued 5/00
A3EN-04-[3V-A-AAXP]-12
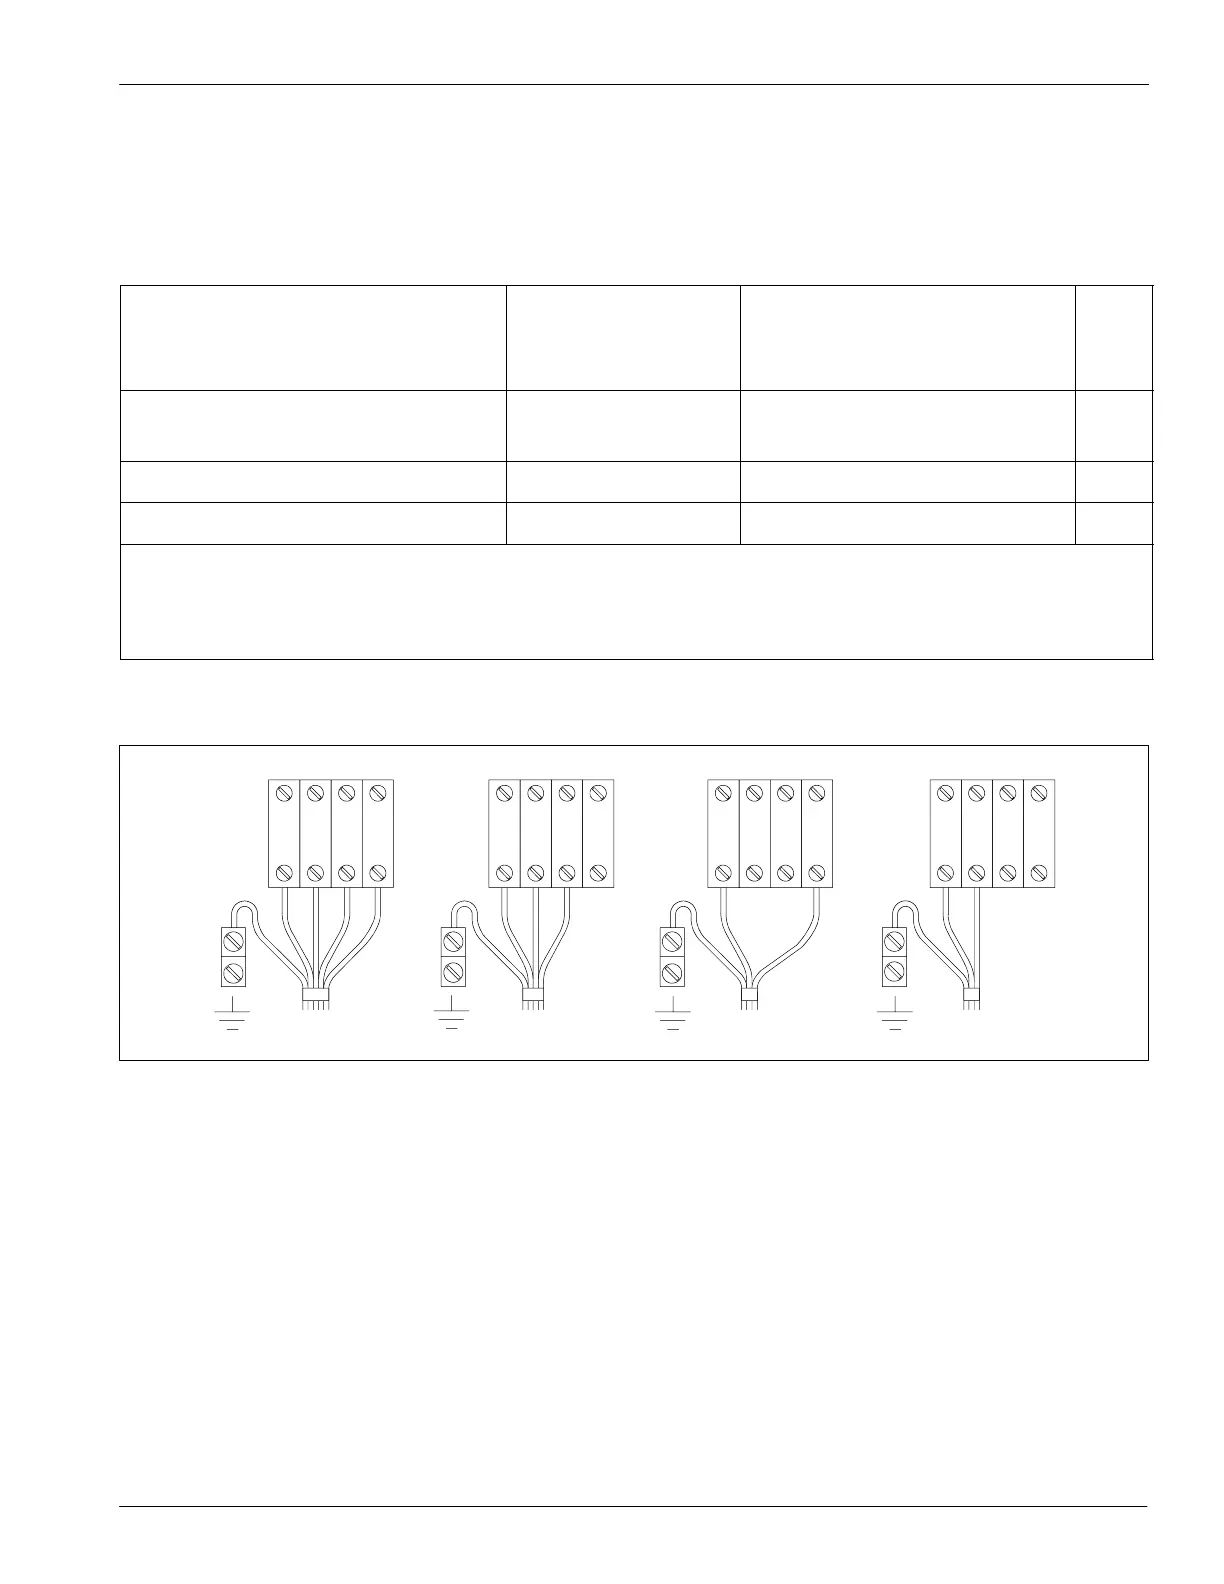
11. Connect the remaining wires of the electrical service line to TB1 as
shown in Figure A 1-23. Refer to Table A 1-8 to determine which
illustration in Figure A 1-23 shows the type of service line you are
connecting.
Table A 1-8 Key to Illustrations in Figure A 1-23
Number of Wires in Your Service Line
(excluding the ground wire)
Type of Service
Illustration in Figure A 1 -23 to
Use for Connecting Service
See
Note
Four wires (including a neutral) 400/230 VAC 3 Illustration A
Three wires (without a neutral) 200--240 VAC 3
400 VAC 3
Illustration B
Two wires (including a neutral) 230 VAC 1 Illustration C A
Two wires (without a neutral) 200--240 VAC 1 Illustration D B
NOTE A: If the VOLTS (ac) label on your unit is 3/N/PE AC 400/230V (voltage code 2), your unit is designed to
accept two wires with a neutral. Check the identification plate on your unit for the VOLTS (ac) label.
B: If the VOLTS (ac) label on your unit is 3 AC 230 V (voltage code 1), your unit is designed to accept two
wires without a neutral. Check the identification plate on your unit for the VOLTS (ac) label.
L1 L2 L3 NL1 L2 L3 NL1 L2 L3 N
4130766
AB
CD
L1 L2 L3 N
Fig. A 1 -23 Electrical Service Connections at TB1 (with ground wire shown)
12. If you connected three-phase power to the unit, go to Closing the
Electrical Enclosure in this section. If you connected single-phase
power to the unit, go to the next procedure, Preparing the Unit for
Single-Phase Operation.

 Loading...


