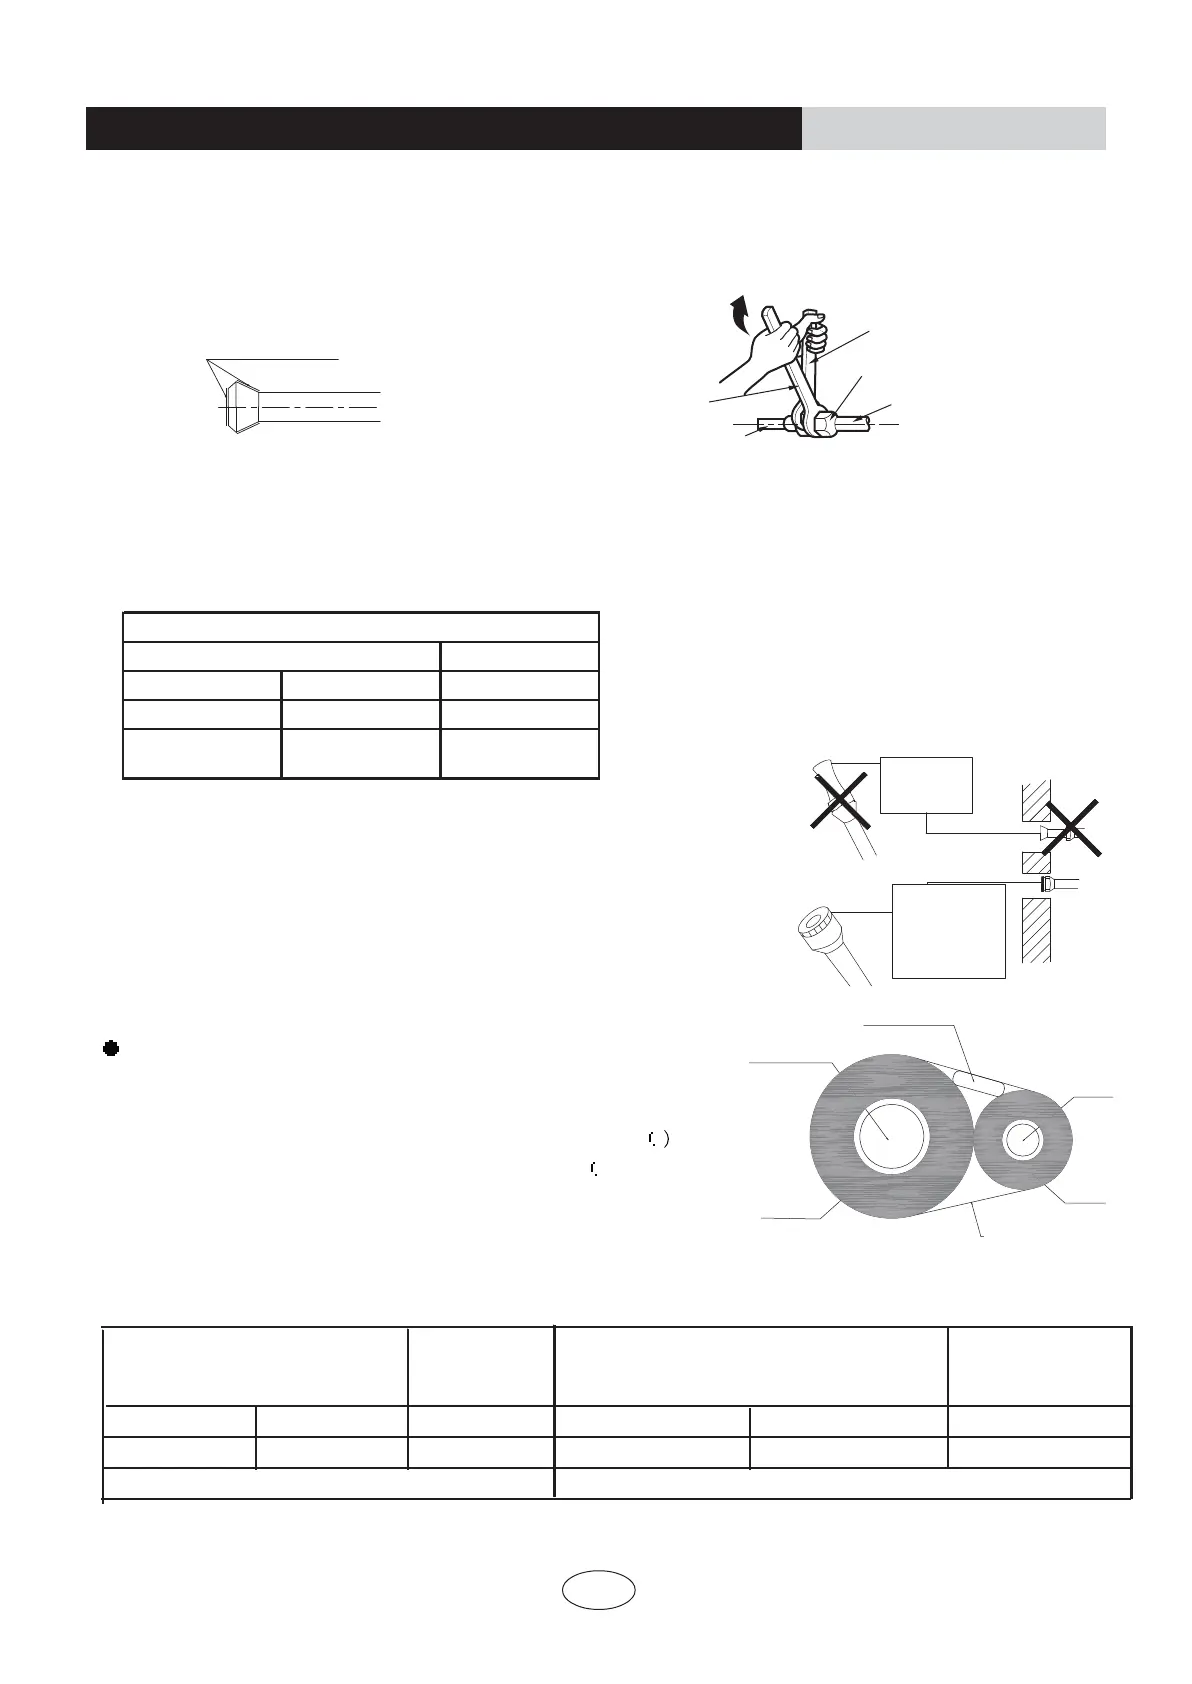
Connecting the refrigerant pipe
Wrench
Indoor unit tubing
Open-end wrench (fixed)
Connection pipe
Flare nut
1)Use torque wrenches when tightening the flare nuts to prevent damage to the flare nuts and gas leaks.
Coat here with refrigeration oil
AligntheFHQWHUVofbothflaresandtightentheflaresandtightentheflarenuts3or4turnsbyhand.
Then
tightenthemfullywiththetorquewrenches.
Topreventgasleakage,applyrefrigerationoilonbothinnerandoutersurfacesintheflare.(Userefrigerationoilfor
R410A.)
Liquid side
09K/12K
09K/12K
18K
09K
18K
09K/12K/18K18K
3/8 inch 1/2 inch 1/4 inch
31 -35
N.m
50 -55
N.m 15 -20
N.m
Flare nut tightening torque
Gas side
Caution on piping handling
Protecttheopenendofthepipeagainstdustandmoisture.
Allpipebendsshouldbeasgentleaspossible.Useapipebenderfor
bending.
(Bending
radiusshouldbeWRPPWRLQorlarger.)
Gas pipe
Gas pipe
insulstion
Finising tape
Inter-unit wiring
Liquid pipe
Liquid pipe
insulation
Selection of copper and heat insulation materials
When
usingcommercialcopperpipesandfittings,observethe
following:
1)Insulation
material:Polyethylenefoam
Heat
transferrate:0.041to0.052W/mK(0.035to0.045kca/(mh
Refrigerantgaspipe’ssurfacetemperaturereaches110
)
max.Chooseheatinsulationmaterialsthatwillwithstandthis
temperature.
2)Be sure to insulate both the gas and liquid piping and to provide insulation dimensions as below.
Liquidside
Liquidpipe
thermalinsulation
O.D.12.7mmLQ
O.D.6.4mmLQ
GaspipethermalinsulationGasside
Thickness10mmMin.Thickness0.8mm
3)Use separate thermal insulation pipes for gas and liquid refrigerant pipes.
Be sure to
place a cap.
If no flare cap is
available,cover
the flare mouth
with tape to keep
dirt or water out.
INSTALLATION INSTRUCTIONS
Installation of indoor unit
O.D.9.55mmLQ
I.D.12-15mm
LQ
I.D.14-16mm
LQ
I.D.8-10mm
LQ
 Loading...