Do you have a question about the North Star NSC42 and is the answer not in the manual?
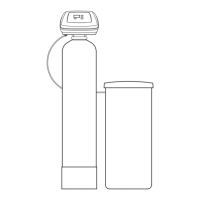
Lists all components included with the water softener unit for installation.
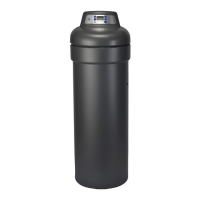
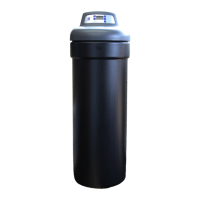
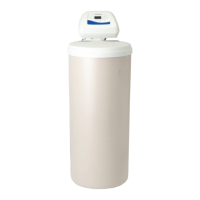
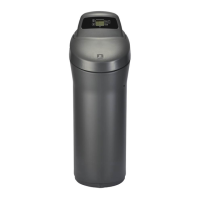
Provides the physical measurements (height, width, depth) of the water softener.
Explains common water contaminants like iron and sediment and their effects.
Guidelines for choosing a suitable installation site for the water softener.
Emphasizes adherence to national, state, and local plumbing regulations.
Ensures proper drainage and prevents backflow into the water softener.
Specifies requirements for connecting the drain hose for regeneration discharge.
Describes various methods for connecting water supply and outlet lines to the unit.
Provides a general overview of the water softener installation process.
Details the steps to safely shut off the water supply before installation.
Instructions for assembling the main components of the water softener.
Guidance on safely positioning the water softener in its installation location.
Connects the water lines to the softener's inlet and outlet ports.
Electrical grounding requirements for safe operation of the unit.
Correct procedure for attaching and routing the valve drain hose.
Connecting the overflow hose to the salt storage tank.
Procedures to verify the installation for any water leaks.
Instructions for filling the salt tank with water and salt.
Details on connecting the unit to the electrical power source.
Initial setup and programming of the water softener's control unit.
Steps to sanitize the unit for hygiene and prevent bacterial growth.
Instructions for restarting the household water heater.
Explains the meaning of the control panel's status indicator light for operation.
General overview of the sequence for programming the softener settings.
Procedure to set the current time on the controller for accurate scheduling.
Setting the water hardness level in grains per gallon for optimal performance.
Configuring the automatic regeneration schedule to occur at a desired time.
Selecting the type of salt used (NaCl or KCI) for proper regeneration.
Options for manually initiating a regeneration cycle when needed.
How to start an immediate regeneration cycle for the softener.
How to schedule regeneration to occur later that night.
System for monitoring and indicating salt levels in the storage tank.
Feature to optimize salt and water usage during regeneration cycles.
Feature for enhanced cleaning of the resin bed, beneficial for certain water conditions.
Adjusting the duration of the clean feature's backwash cycle.
Enables regeneration when 97% of the softener's capacity is used.
Setting the clock display format to either 12-hour or 24-hour.
Choosing between gallons or liters for displaying water usage data.
Setting a forced regeneration interval to maintain resin bed cleanliness.
Adjusting the duration of backwash and fast rinse cycles for optimal performance.
Function to view the current water flow rate in liters or gallons per minute.
Displays the average daily water consumption calculated by the controller.
Shows recharge status and the current position of internal valves.
Information about the light inside the salt storage tank that activates when the lid is opened.
How the controller retains settings during electrical power interruptions.
Guidance on checking and refilling salt levels in the brine tank.
How to resolve salt bridging issues that prevent brine formation.
Procedure for cleaning critical internal components of the control valve.
Steps to prevent damage from freezing temperatures by draining the unit.
Information on self-diagnostic error codes displayed by the unit.
Steps to clear error codes from the controller's display.
Performing manual diagnostic checks to isolate system issues.
Restoring the electronic controller to its original factory settings.
Verifying the proper operation of various regeneration cycles.
The North Star NSC42 is a demand-controlled water softener designed to reduce hardness and improve water quality in residential settings. It operates on 24V DC electrical power, supplied by a direct plug-in power supply. The system is certified by NSF International against NSF/ANSI Standard 44 for hardness reduction and efficiency, and to NSF/ANSI Standard 372. It is also certified by the Water Quality Association against CSA B483.1.
The primary function of the NSC42 water softener is to remove hardness minerals (calcium and magnesium) from water through an ion exchange process. It is a demand-initiated regeneration (D.I.R.) system, meaning it regenerates based on actual water usage, which helps minimize regenerant brine and water consumption. The system can also reduce moderate amounts of clear water iron, with a capacity substantiated by laboratory test data. For every 1 ppm of ferrous (clear water) iron, 5 grains should be added to the hardness setting during programming. However, it does not remove ferric (red water), bacterial, organically bound, or colloidal iron, nor does it remove sediment.
| Brand | North Star |
|---|---|
| Model | NSC42 |
| Category | Water Dispenser |
| Language | English |