Do you have a question about the Nortik Scubi 2 and is the answer not in the manual?
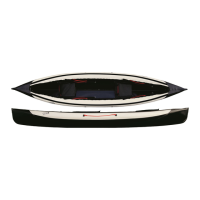
Details the main hull and the two identical stem elements (bow and stern).
Identifies the four keel rods used for the kayak's structure.
Describes the front and back seat cross ribs, noting specific types.
Lists the packing bag, repair kit, and double action pump.
Explains keel rod arrow direction and the purpose of counter clips for cross rib installation.
Unfold the hull and select a stem element, orienting its arrow towards the bow.
Insert the marked keel rod into the hull sleeve and clip it to the bow stem element.
Ensure all inserted rods and elements are positioned centrally for proper assembly.
Fold the support rod upwards and clip it securely into the cross tube.
Take the stern element and the keel rod, ensuring the arrow marking points towards the bow.
Insert the stern keel rod through the hull sleeve and clip it to the stern stem element.
Clip the flexible rod upwards into the cross-tube located in the hull.
Take the final two keel rods and ensure their arrow markings point towards the bow.
Place keel rods under seats, slide through sleeves, and clip to bow/stern sections.
Ensure bow/stern elements are central, remove split pin, and pull up middle keel rods.
Connect keel rod sections, ensuring they remain upright and do not twist during assembly.
Push connected rods down into the hull to create longitudinal tension, avoiding twists.
Insert the split pin through the connected rods and secure it with the rubber band.
Take the closed cross rib for the front seat and prepare for installation.
Place the closed front cross rib diagonally onto the keel rod clip behind the front seat.
Orient the cross rib upright, ensuring clips interlock, then attach seat bars to its back.
Take the open cross rib for the front seat and clip it to the seat bars on both sides.
Press the C-Clip onto the keel rod to secure the cross rib assembly.
Repeat the process using the specified cross ribs for the back seat assembly.
Attach the adapter from the repair kit to the double action pump and screw into the valve.
Understand valve positions for inflation and deflation; use the push/turn mechanism.
Inflate lower sponsons to 50% on each side, then fully inflate in turns, then repeat for upper sponsons.
Maintain pressure between 0.2-0.25 bar (2.9-3.63psi) and do not exceed this limit.
To paddle solo, use the stern as the bow and reposition the front seat backrest.
A dedicated solo deck accessory is available for enhanced solo use.
Mount the deck starting from the stern, ensuring it covers the Velcro on the boat.
Mount the deck completely, tauten it, and tuck the overlap underneath the stern's black cover.
Note the two small tubes for rudder system tripping lines if the rudder is to be used.
The deck is now fully installed and ready for sprayskirt attachment.
Diagram shows components: pull-up rope, steering ropes, bar, blade, shackles, carabiner, and extensions.
Remove the security ring, open the wing nut, insert the distance piece, and reclose the wing nut.
Place the rudder onto the stern cavity and secure it with the pin, fastening the pin at the bottom.
Take the pull-up clip and lead the pull-up line through it.
Lead steering ropes through the cross beam holes; they will lock when tensioned.
Route steering line extensions with chains under the middle seat's cross rib.
Lead the entire extension through the loop, connecting it to the cross rib.
Route steering lines from behind through the D-rings where the backrest is attached.
Knot steering line to extension, adjust length, position steering bar, and secure with shackles.
Lay the hull flat, fully drain air from sponsons using the pump's suction function.
Fold the sides of the hull in the middle, lengthwise, as shown in subsequent pictures.
Continue folding the hull as shown in the images to fit it back into the storage bag.
Use 'CorroFilm' on rods for salt water. Clean hull with fresh water after brackish/salt water use.
Deflate sponsons for storage, ensure hull/rods are dry, and build up/remove boat yearly.
Be cautious of sand/stones causing abrasion. Support boat from bottom when carrying.
Always wear a life jacket. Be aware of weather changes.
Check sponson pressure, especially when heated. Use overpressure valves cautiously.
Store built up or disassembled. Avoid prolonged exposure to heat.
Repair skin with the kit. Consider additional reinforcements at stressed points.
| Material | PVC |
|---|---|
| Number of Persons / Capacity / Passenger Capacity | 2 |
| Air Chambers | 3 |
| Length | 4.50 m |
| Width | 0.90 m |