HLS PS25 & HLS PS50 User Manual
MN-DT-1305I_B 6
1.5 Back Box HLS PS Series fixing
When a suitable location has been found for installing the HLS PS Series, proceed as follows:
1. Hold the back box assembly in the required position against the wall and mark the position of the
fixing holes, while ensuring the panel is level.
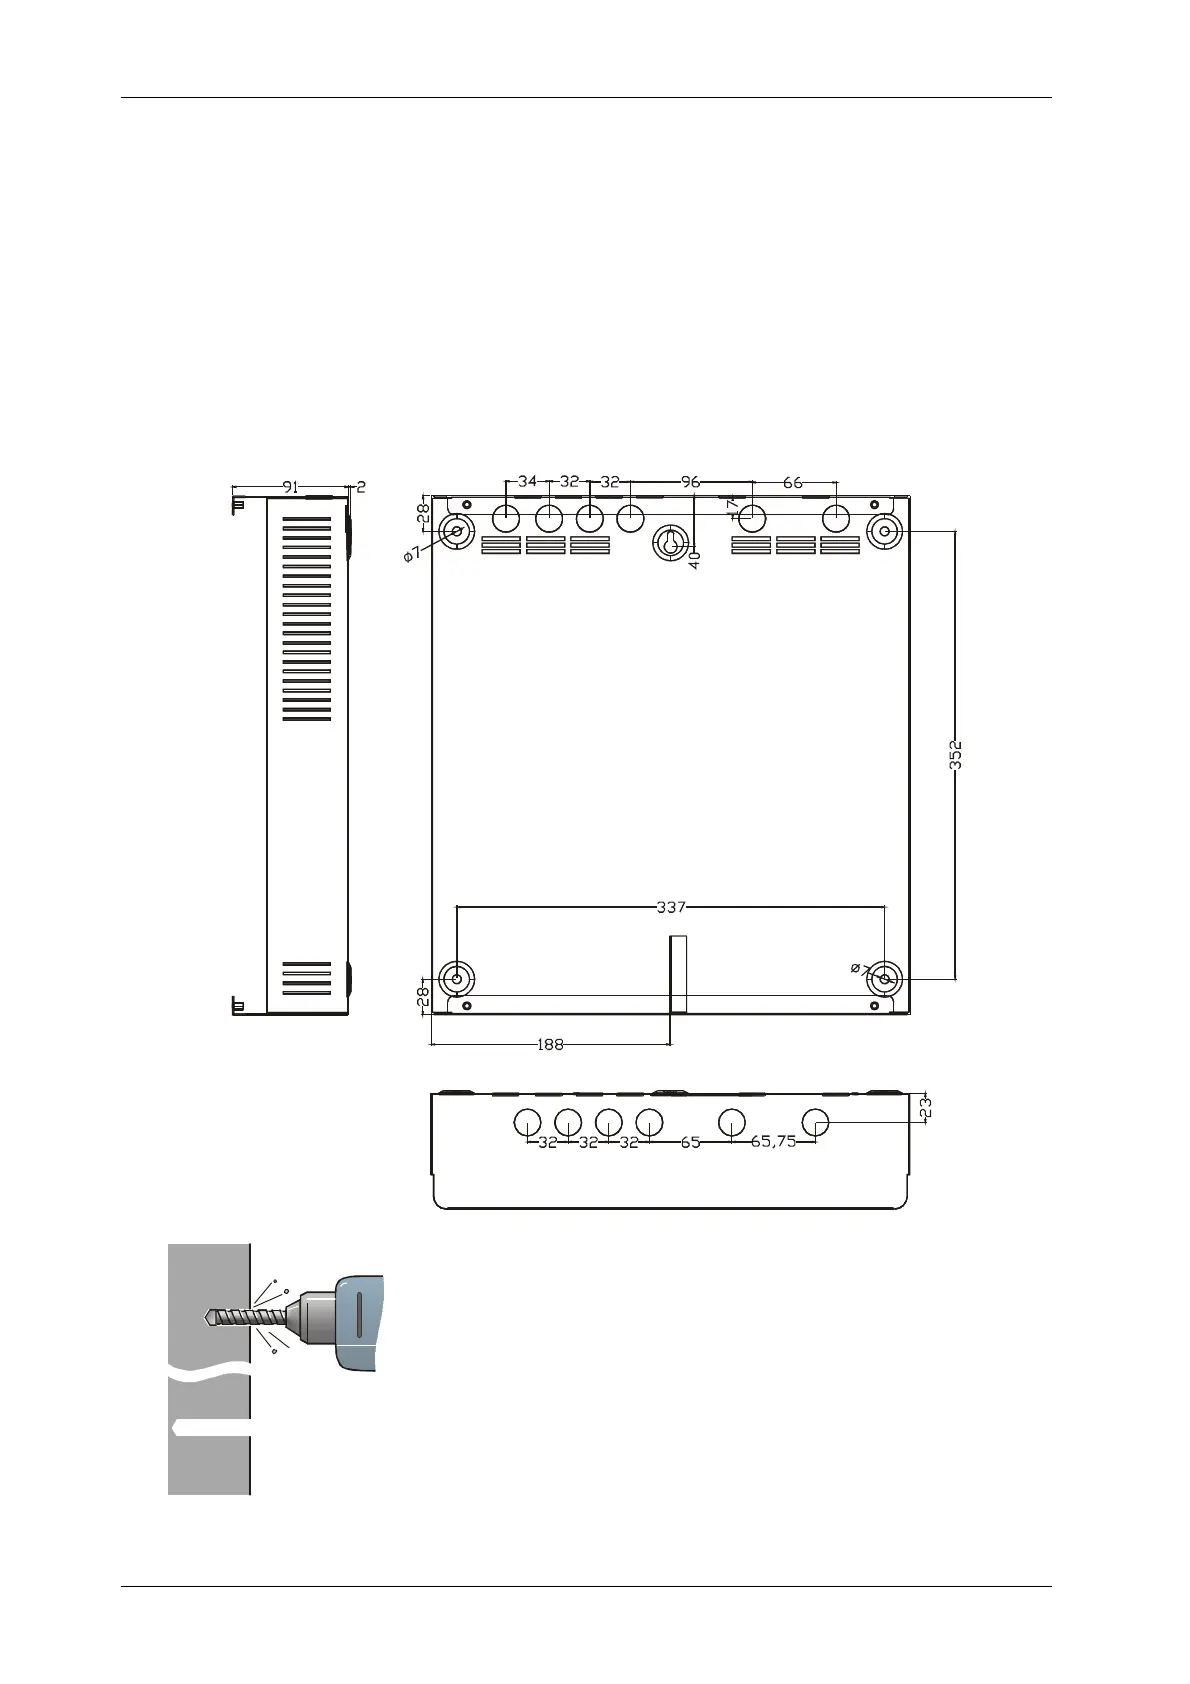
The drawing below shows the position of the fixing holes at the back box.
Do NOT use the back box as a guide when drilling!
2. Drill and plug the wall.
3. Prepare apertures required for cable access.
4. Screw the back box to the wall using the fixing holes
and appropriate-sized screws.