NOTTINGHAM ANALOGUE STUDIO
128 CORDY LANE, UNDERWOOD, NOTTINGHAM NG16 5FD
Design and Manufacture of Quality Audio Equipment
Telephone: +(44) (0) 1773 762947
Fax: +(44) (0) 1773 533566
V.A.T. REGISTRATION NO. 667 3729 92
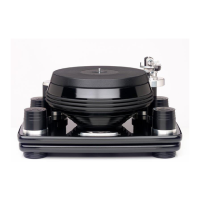
ASSEMBLY INSTRUCTIONS FOR THE HORIZON SE TURNTABLE
Put approximately ½ of a capful of oil into the bearing well. Lower the platter assembly into the
bearing well and allow it to settle. This may take a few minutes. Attach pulley onto motor
spindle.
Place the motor/pulley assembly on the left side of the plinth with the cutout to the front and cable
to the rear. The height can be adjusted by gently pushing the motor cassette up/down as
required using hand pressure. Do not adjust by pushing/pulling the pulley.
VERY CAREFULLY lower the main body/platter assembly over the motor/pulley assembly. The
cutout of the motor assembly base should be in line with the left leg of the main body, but not
touching it. Using a combination of adjusting the motor cassette height and leveling feet, the
platter and pulley can be lined up and leveled. Place the drive belt provided around the platter
and pulley using the appropriate grooves for the desired speed.
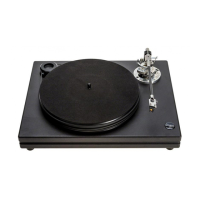
Fit the arm into the armbase and adjust using the protractor provided after you have fitted your
choice of cartridge.
Gently push the platter to start the turntable. It will adjust itself to the correct speed.
Happy listening!