10
137-01-2305
128-0621-003
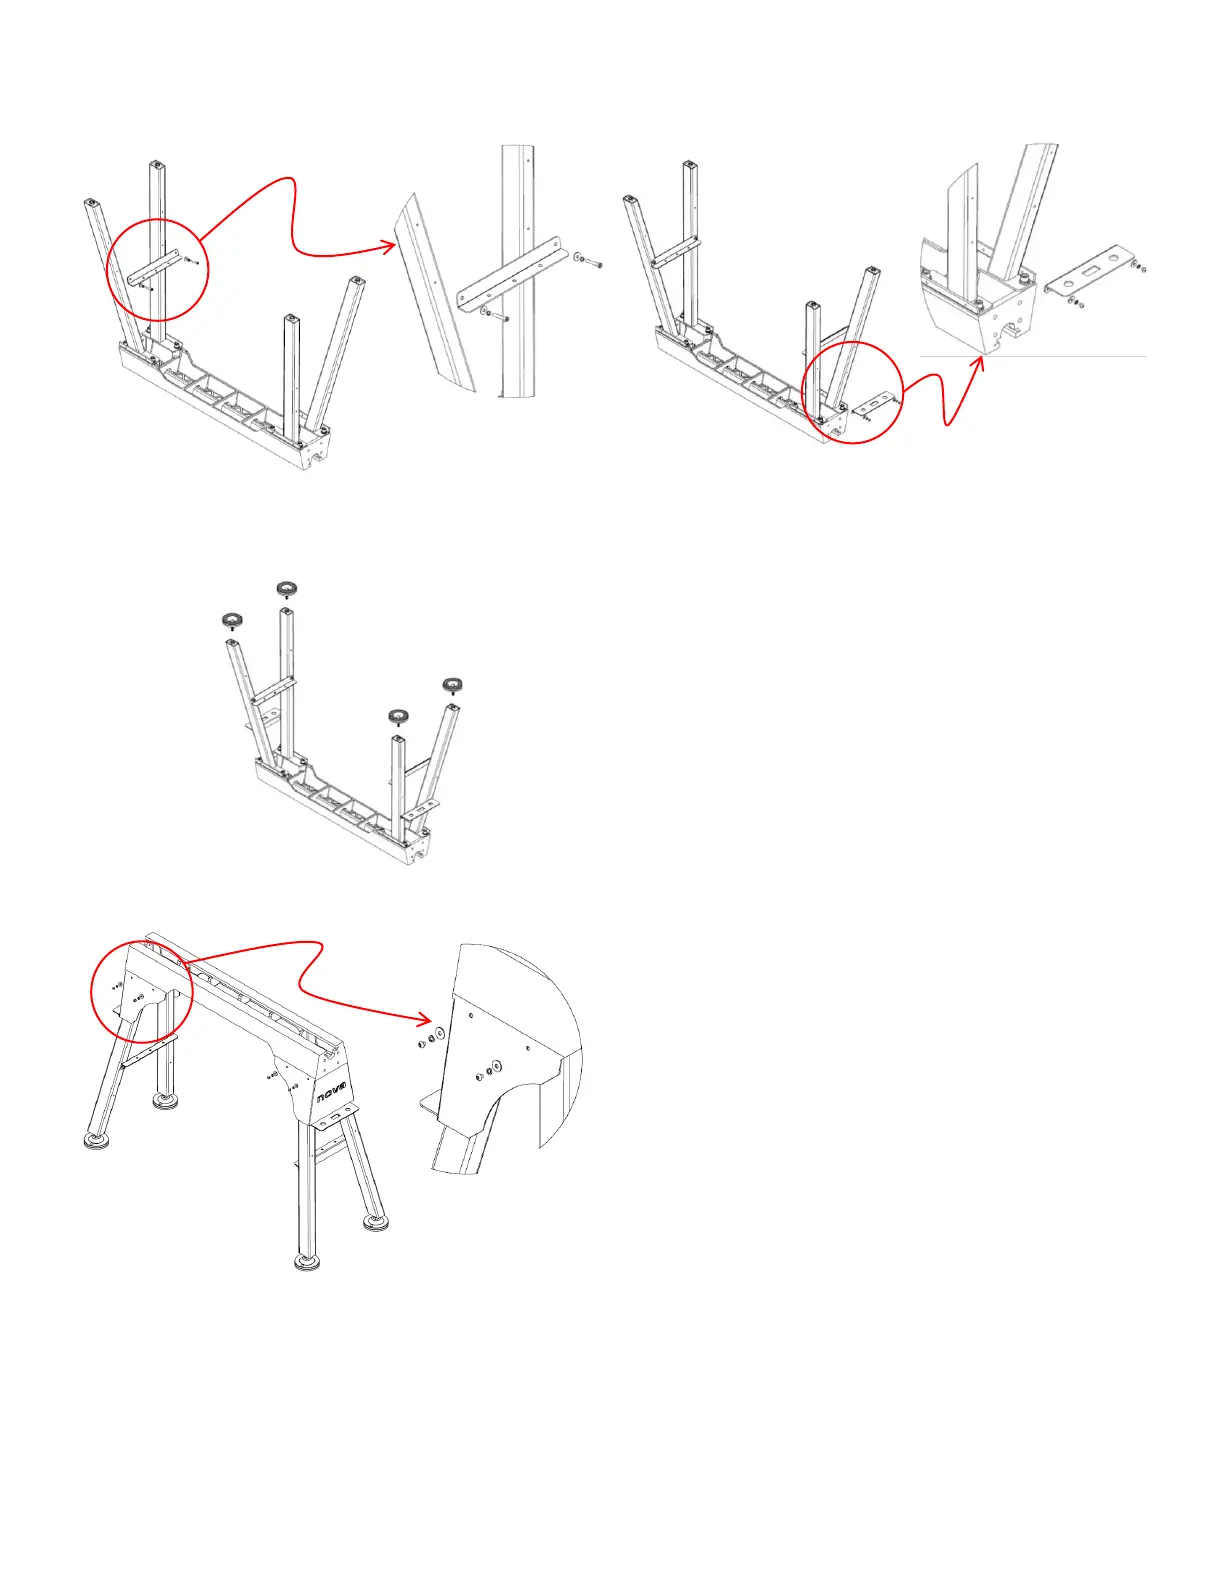
Step 3:
Align the cross plate with the holes on the inside of the legs. Fasten in
place.
DO NOT OVER TIGHTEN AT THIS STAGE.
Step 4:
Align the tool tray with the holes on the outside of the legs. Fasten in
place.
DO NOT OVER TIGHTEN AT THIS STAGE.
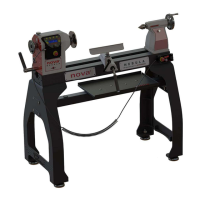
Step 5:
Fully tighten the M12 cap screws assembled in Step 2, followed by the M6 cap screws and the M6 button head cap screws assembled in Step 3
and Step 4 respectively.
Step 6:
Attach the feet to the base of the legs.
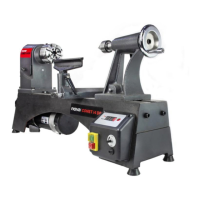
Step 7:
Flip the stand over onto its feet so that it is right side up.
WARNING: Due to the weight of the stand, it is recommended that a
second person helps lift the stand.
Step 8:
Align the cover plate with the holes on the side of the stand. Fasten in
place.
Step 9:
To balance the stand, adjust the feet accordingly by
screwing/unscrewing the feet from the base of the stand. Secure in
place by fastening the nut tightly against the base of the leg.