In the preview mode: press it to zoom out an image.
In the main menu: press it to downward select a menu.
In secondary menu: press it to set reducing related
parameters.
2 Installation & Instruction
2.1 Installation
The product needs to be installed before using. Please follow the steps as
below:
a) Connect the C type optical interface to the lens mount (C-Mount) located in
the Handheld Main Unit, clockwise rotate it to tighten it up.
b) Open the lock of the optical interface, connect the endoscope, and release
the lock to fix it.
9
⑤
④
⑥
⑨
⑩
⑧
⑦
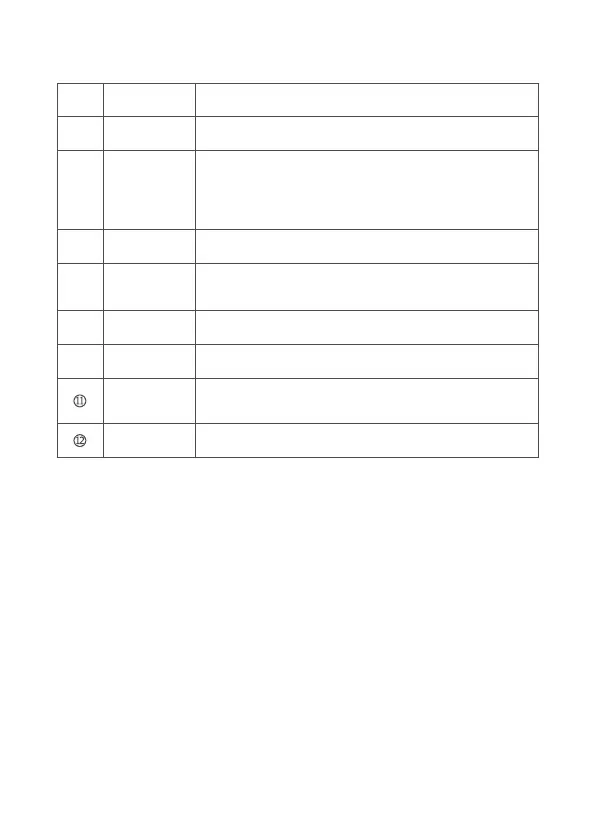
Press it to enter the main menu, or confirm the selection.Menu / Set
Press it to enter photo mode, and to shoot the current view.
Downward
button
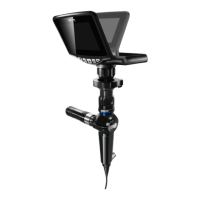
The screen can be turned between 0°~120°.Rotatable part
Open it to remove the battery.Battery cover
Press it to switch on or off the device.Power switch
Indicates the location of SD card. Open the battery cover,
remove the battery, you can see the slot of Micro SD card.
Icon of Micro
SD card
Indicator lights on when recharging.
Indicator lights off when fully charged.
Charging
indicator
Use to recharge the battery when connect to the power.Power interface
Photo button