SOLO 400-632-000-A 2008-09-19 2/7
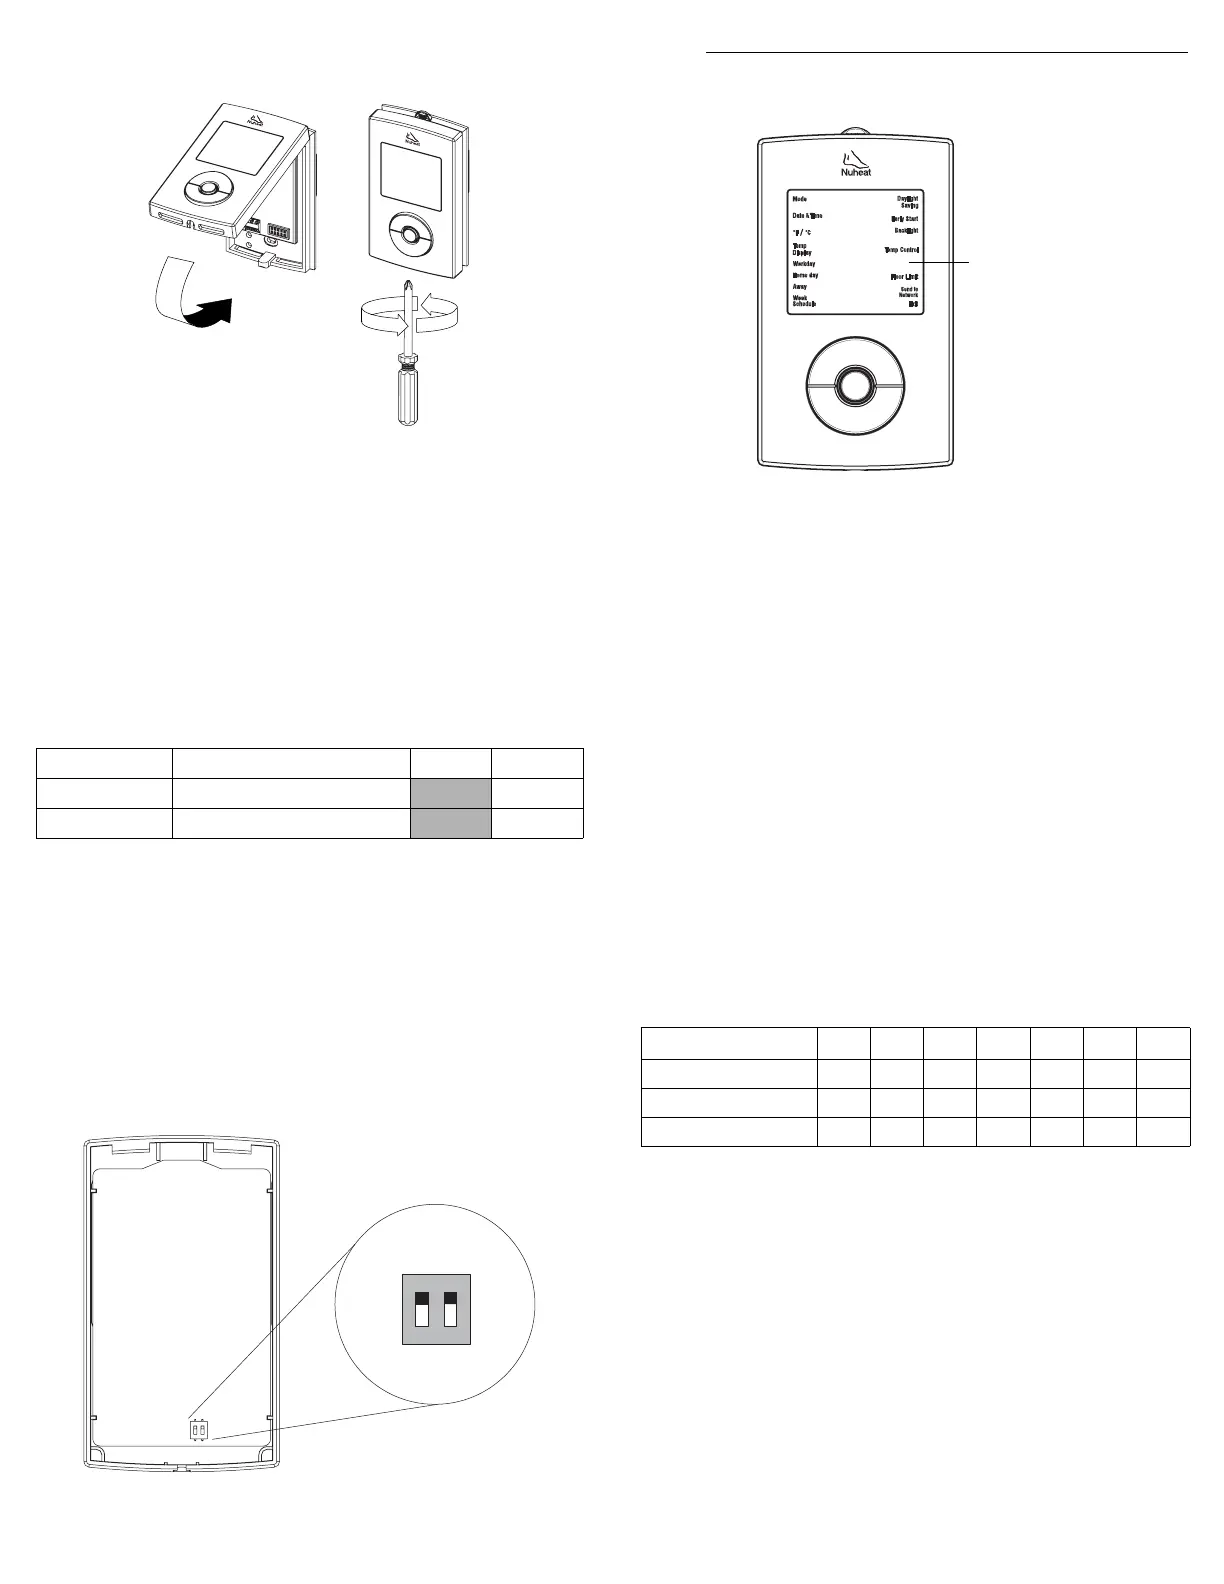
s Reinstall the thermostat faceplate on its base and secure it with
the screw. If there is a sticker on the screen, peel it off.
t Apply power to the heating system. Verify the installation by
making sure that the heating system can be turned on or off by
increasing or decreasing the setpoint respectively.
u Test the GFCI (refer to section 6).
NOTE: Keep the air vents of thermostat clean and unobstructed at all
times.
2.1 DIP Switch Settings
Set the DIP switches on the back of the thermostat faceplate for your
specific application. Refer to Table 1:
Table 1
DIP switch 1
Leave in “Slave” if you are not connecting the thermostat to a
network (refer to section 9) or are not connecting the outdoor sensor
AC629 (refer to section 10).
DIP switch 2
Set according to your floor type. For laminate or engineered wood
floor, you must set DIP Switch 1 to 'Wood' to limit the maximum floor
temperature to 82°F (28°C).
3.1 Setting the Time and Date
n
Press and hold the Select button for 2 seconds to enter the
Programming Menu.
o Using the Up or Down button, go to Date+Time and press the
Select button.
p Using the Up or Down button, choose the time format and press
the Select button.
q Set the hour and press the Select button.
r Set the minutes and press the Select button.
s Set the year and press the Select button.
t Set the month and press the Select button.
u Set the day and press the Select button. You will automatically
be returned to the Programming Menu.
3.2 Setting the Week Schedule
Set the week schedule by assigning a Day Type (workday / home
day / away day) for each day of the week. The default Day Type for
each day is shown in Table 2:
Table 2
To change the Day Type:
n Press and hold the Select button for 2 seconds to enter the
Programming Menu.
o Using the Up or Down button, go to Week Schedule and press
the Select button.
p Using the Up or Down button, go to the day that you wish to
modify and press the Select button.
q Choose the Day Type (Workday / Home day / Away) and press
the Select button.
r Repeat steps 3 and 4 if you wish to modify another day.
s When done, press the Up or Down button until Exit is flashing
and press the Select button to return to the Programming Menu.
DIP Switch Function Up Down
1 Master/Slave selection
Slave Master
2 Floor type selection
Tile Wood
NOTE: The default settings are shown inside the grey cells.
1
2
p
Programming
3.
Day Type MO TU WE TH FR SA SU
Workday
√√√√√
Home day
√√
Away
Programming Menu
NOTE: To return to the
previous menu at any
time, press and hold
the Select button for 2
seconds.
400-632-000-A (Nuheat OEM632) ENG.fm Page 2 Friday, September 19, 2008 4:35 PM