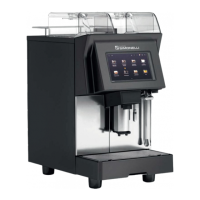
INSTALLATION CHECKLIST
Check if weight and dimensions are compatible with the installation location
(330x520x600mm WxDxH; 37Kg net weight)
Check if machine power is compatible with the installation location
(Voltage: 220V, Frequency: 50Hz or 60Hz; Absorption 2400W
Check if the water pressure in the installation location is less then 4 bars (Direct
Connection machine only)
Connect the water inlet pipe (Direct Connection machine only)
Fill up the water tank (Water tank machine only)
Connect the drainage pipe and close the lateral holes of the conveyer (optional)
Drill the drip tray to permit water to flow out (optional)
Connect the direct grounds discharge pipe and drawer (optional)
Plug-in the machine
Fill manually the coffee boiler tank
(press for UP and Down keys and switch on the machine with the main switch holding
pressed for 5 seconds the two keys)
Lubricate the movement guides, bushes and movement screw inside the hole behind the
scoop cam
Lubricate the movement screw bearing and lower piston with silicon grease
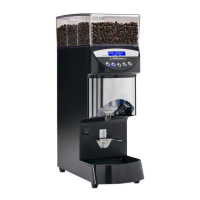
Open the grinder chutes and check if the copper tabs are opened
Remove the metal plate in the rear part of the nozzle and open (top/bottom) a little bit.
(the metal plate must have a small game to remain all time attached into the two magnet)
Open the coffee nozzle and check if the the white pipe of the milk frother is oriented on
the back of the nozzle
Switch off the machine to quit for manual movement and switch on to start heating phase.
Filling coffee bean containers and open the containers tabs
Insert the temperature regulator in the milk pipe
Put the fridge on side of the machine e insert the milk silicon pipe into the fridge
Check that the milk pipe is not bended
Check the length of the milk pipe and cut if necessary creating a V cut at the end
Use a large milk container to stabilize milk foam quality and volume
Change products name with requested products
Enter the program (hold down the ► key approx. 5 seconds until the display shows:
LANGUAGE)
Set the language of the machine
After language insert technical password keys 2-2-2-2-2
Beverages programming
NOTE: set a minimum of 2 sec on the parameter “NO AIR TIME” to permit a faster
sucking of the milk.
Set programming