EN
EN
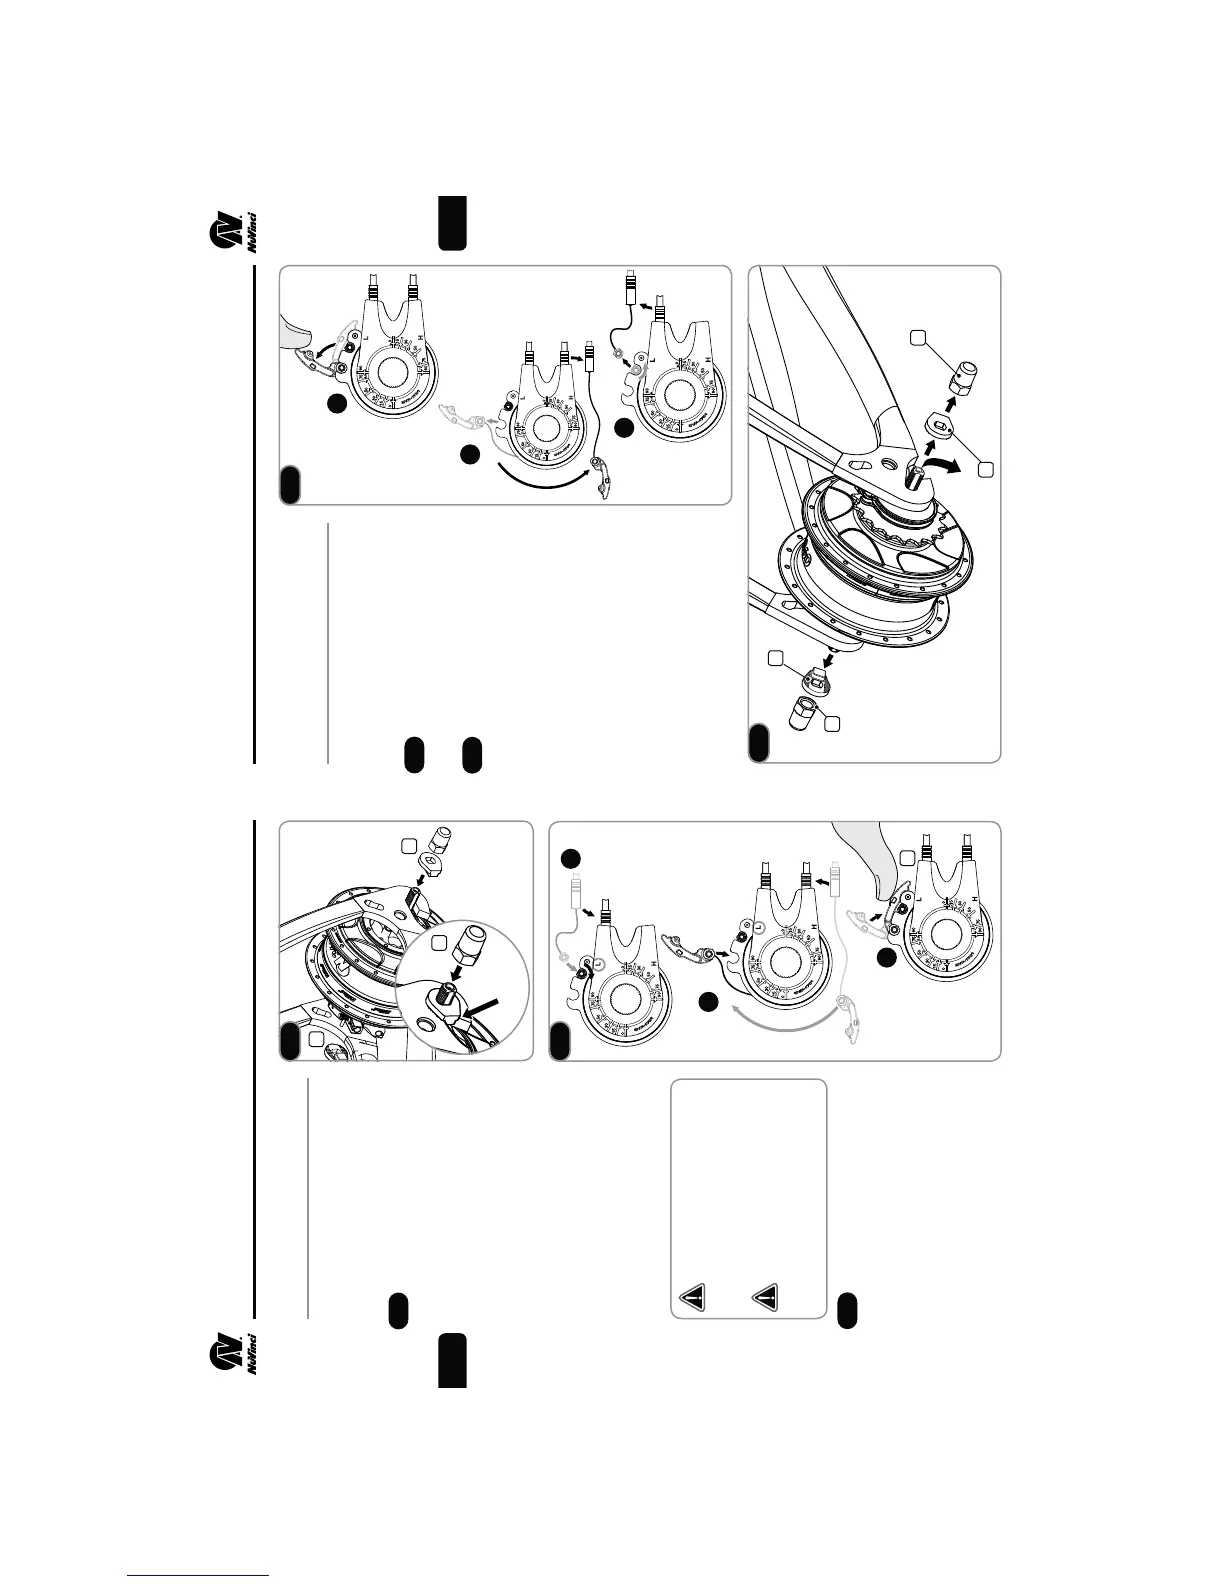
Install the shift cable hardware
following steps A, B and C.
3. REAR WHEEL INSTALLATION/REMOVAL
Fitting the Rear Wheel
fPlace the rear wheel into the
rear frame, making sure not to
obstruct shift cables.
Slide one no-turn washer (1)
each onto each axle end. The
serrations of the no-turn washer
must bear against the dropout of
the frame. The rectangular boss
must engage in the dropout of the
frame.
fMount the axle nuts (2).
Tightening torque 30 – 40 Nm
(266-350 in-lbs).
fFor rim and roller brake appli-
cations, connect the rear brake
according to the manufacturer’s
instructions.
Improper installation of the
no-turn washer will result in
damage to the dropout and
the hub.
Over-tightening may damage
parts. Under-tightening can
result in the axle sliding in the
dropouts.
3. REAR WHEEL INSTALLATION/REMOVAL
Disconnecting the Rear
Wheel
f Shift to a position that allows
easy access to the shift cable
hardware.
Remove shift cable hardware
following steps A, B and C.
Loosen and/or remove the
axle nuts (3) and the no-turn
washers (4).
f
For rim or roller brake applica-
tions, disconnect the rear brake
according to the manufacturer’s
instructions.
f Remove the rear wheel.
11
12
3.1
3.2
3.3
3.4
1
2
Boss
1
A
B
C
3
3.1
3.2
A
B
C
3.3
3
4
3
4
3.4