EOS SERVICE PROCEDURE 12-2810-R02 (10/3/10)
!"##$%&'(&$))*+%,,'((-..*/01*0/-0(2(+34 '((15.*167*1/./(2(,839)'((:;<=>?;@A?;BC>?D:BE?AF 9
H3"&9$G'(+B>QD<;(RA(BQ>UC(RN;(?AFTAC;CR :(T<;?>:;QP(B:(O;:?<>d;O(FBP(T<;=;CR(RN;(#ATT;R(W 05Y(S<AF(;CUBU>CU(RN;(Q;U:(
AS(RN;(K;FBCO();=; <(W_-Y(<;CO;<>CU(RN;(DC>R(>CAT;<BdQ;E(
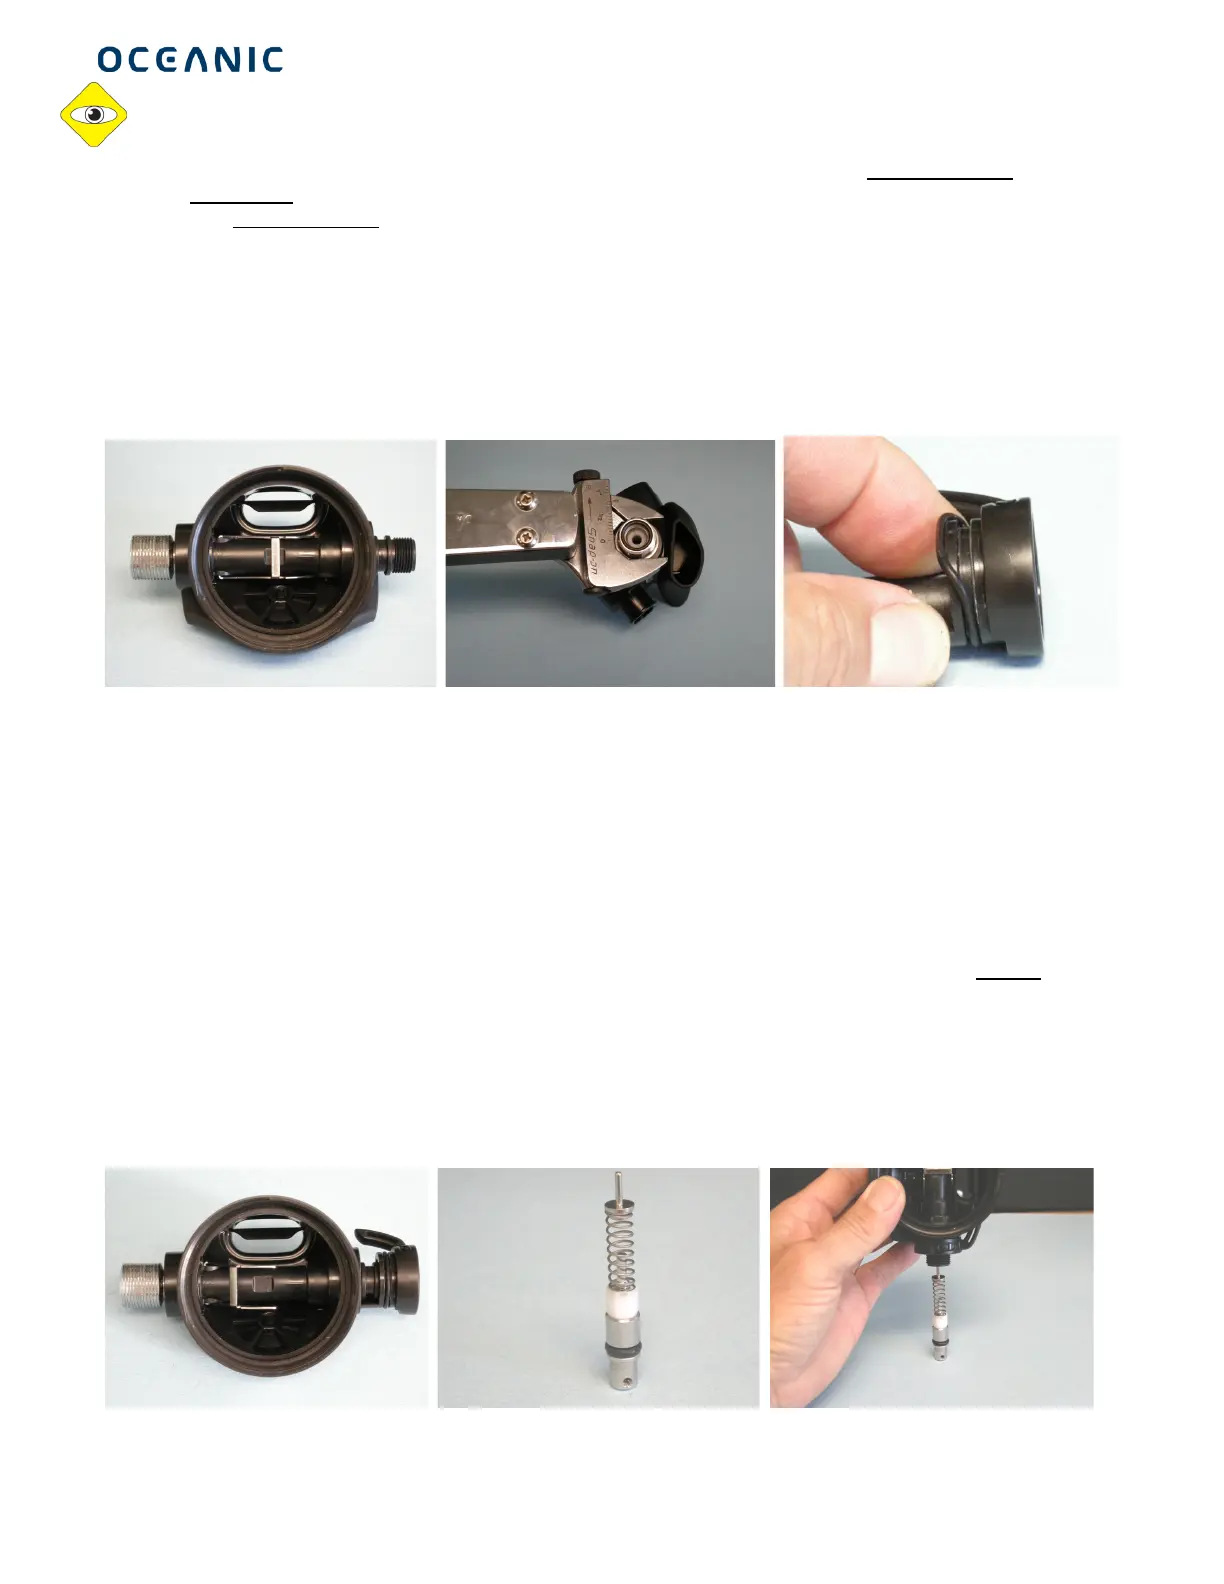
12. Install!the!3OhD :RF;CR(&Dd;(W55Y(onto!the!MBQ=;(ZAD:>CU( W_\(A<(//Y!by!screwing!it!on!count er!clockwise; !the!thread!
is!le ft!handed.!!Insert!a!5 /16”!hex!driver!attached!to!a! calibrated!torque!wrench!into!the!3OhD:RF;CR(&Dd;(W55Y(and!
torque!counter!clockwise!to!56*5 \(>CXQd:(while!holding!the!square! end! of!the!MBQ=;(ZAD:>CU(W_\( A<(//Y(with!a n!
11/16”!open!end!wrench!W+>UE(_6Y.!
13. Insert!the!MBQ=;(ZAD:>CUX3OhD:RF;CR(&D d;(3::;FdQP(through!the!rou nd!hole!of!the!ZAD:>CU(W6Y!while!depressing!
the! K;FBCO();= ;<(W_-Y!W+>UE(_\Y(a nd!push!until!fully!seated;!the!square !broach!of!the!MBQ=;( ZAD:>CU( W_\(A<(//Y(will!
engage!the!square!hole!of!the!ZAD:>C U(W6Y (and!the!K;FBCO();=;<(W _-Y(will!face!upwards!W+>UE(_-Y.!
14. Install!the!MBQ=;(ZAD:>C U(GDR(W06Y(onto!the!MBQ=;(ZAD:>CU(W_\(A<(//Y(by!turning!clo ckwise!with!an!adjustable!crows!
foot!wrench !attached!to! a!calibra ted!torque!wrench!and!torqu e!to!_1*_\(>CXQd:( W+>U(_7Y.!
! ! !
!!! !!!+>UE(_-(( ( ( ((((+>UE(_7(( ( ( ((((((((((((((((((((((+>UE(0.(
15. Install!the!M;CRD<>(&Dd;(!V> R?N($*<>CU(W0 /Y!on!the!groove!of!the!M;CRD<>(!V>R?N(W+>UE(0.Y.!
16. While!hold ing!the!ZAD:>CU(W 6Y(fa cing!up,! install!the!M;CRD <>(&Dd;(!V>R?N(W01Y(onto!the!3OhD:RF;CR(&Dd; (W55Y !and!
into!the !ZAD:>CU (W6Y(W+>UE( 05Y.!
17. The!components!of!the!3OhD:RF;CR(!NBSR(W5\Y(as sembly!must!be!first! asse mbled!prior!to!installation!into!the!
3OhD:RF;CR(&Dd;(W55Y.(Lightly!lubrica te!and!instal l!the!3Oh D:RF;CR(!NBSR($*<>CU(W5-Y(onto!the!groove!on! the!
3OhD:RF;CR(!NBSR(W5\Y.!
18. If!r emo ved,!inst all!the!!T<>CU(+AQQAV;<(W56Y!flat!side!first!onto!the!3OhD:RF ;CR(!NBSR(W5\Y,!screwing!b y!hand!c ounter!
clockwise!until!it!sto ps;!do!not!tighten!wi th!a!wrench!or!any!tool.!Insure!that!you!d o!not!cross!thread!during!
assembly.!
19. Place!the!3 OhD:RF;CR(!NBSR(W5\Y! subassembly!large!side!down !on!a!lev el!flat!surface!with!the!pointed!end!facing!up. !
Lightly!lubricate!both!ends!o f!the!#ATT;R(!T<> CU(W51Y!a nd!place!ont o!the!3OhD:RF;C R(!NBSR(W5\Y!with!one! end!of!the!
spring!seated!into!the!recess!in!the!face!of!the!!T<>CU(+AQQAV;<(W56Y.!Place!the!JBQBC ?;(!NBSR(W5/Y(larg e!side!first!
centered!onto!the(#ATT;R(!T<>CU(W51Y(W+>UE(0_Y .!
! ! !
! +>UE(05( ( ( ( ((((((( ((((((+>UE(0_( ( ( ( ((((((+>UE(00!