EN
13
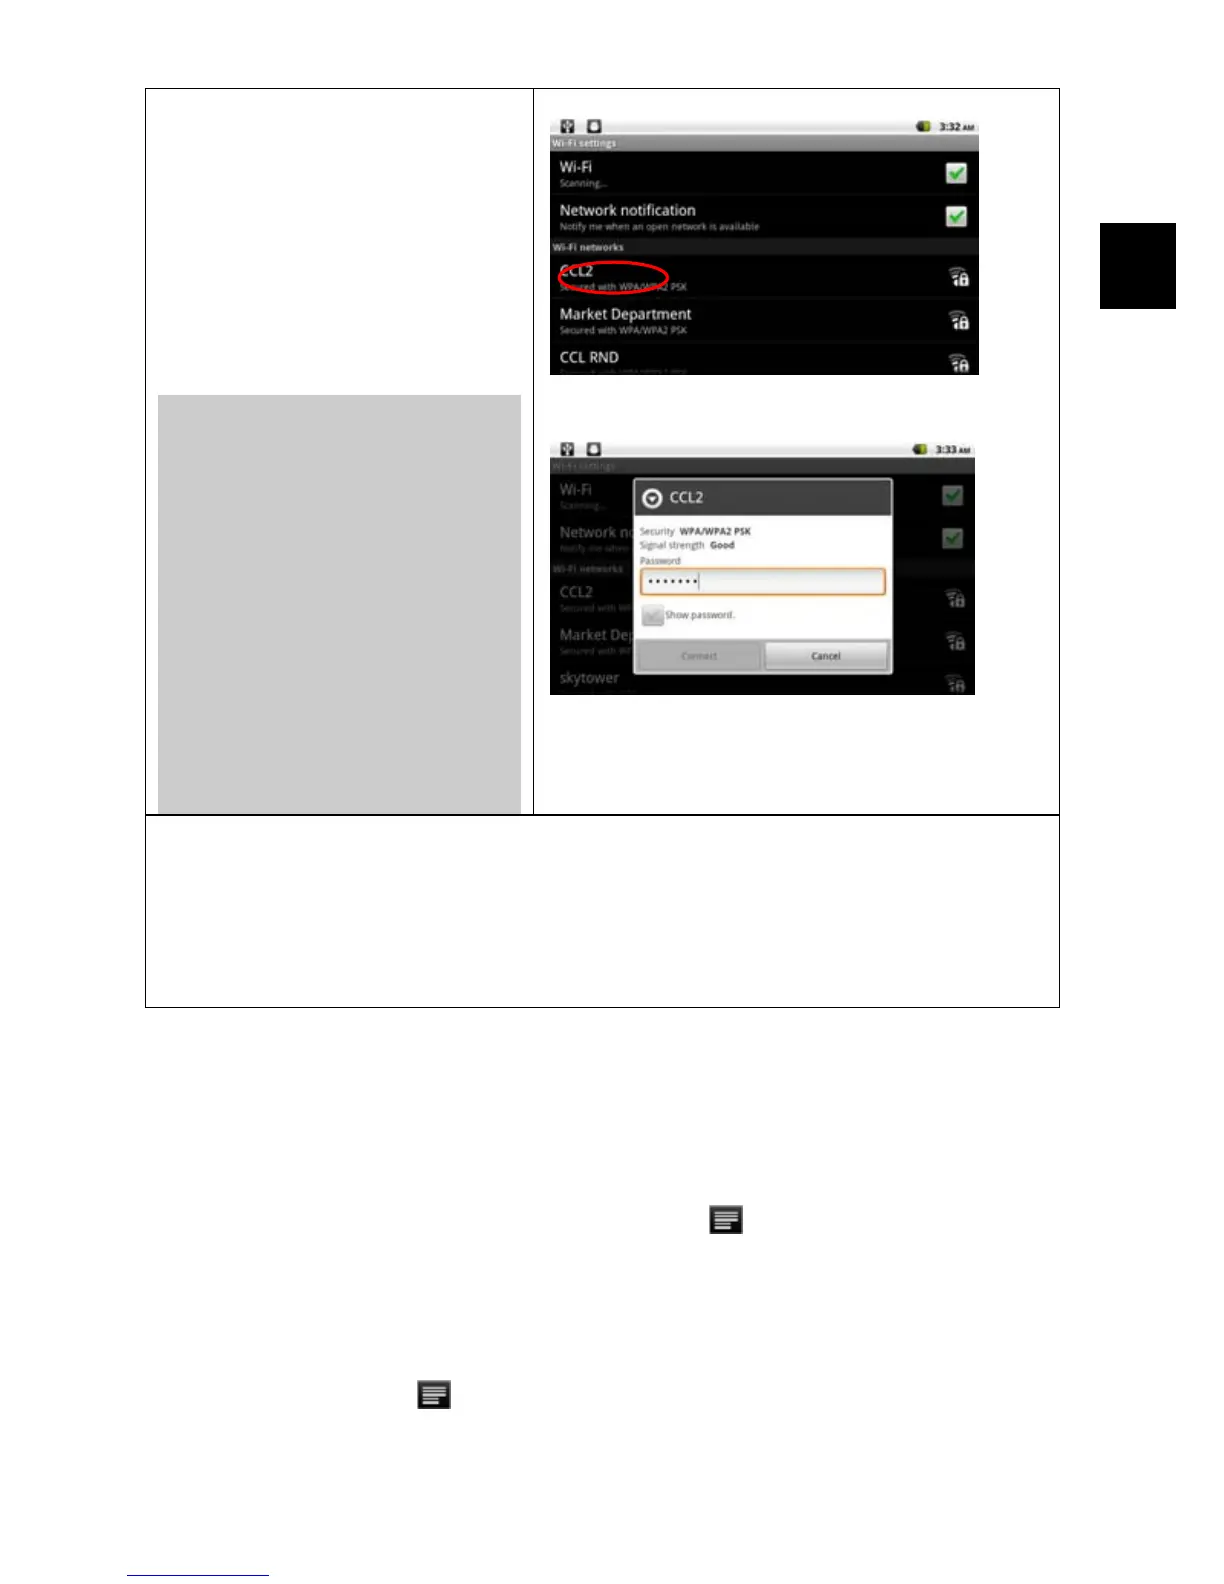
(3)Tap the “Wi-Fi settings”,
your Tablet will scan
automatically for available WiFi
networks and display them.
The list of available networks
shows all the wireless
networks in range of your
device.
Note:
a) The available network list is
constantly refreshed
automatically.
b) When the Wi-Fi is enabled,
Your Tablet will connect
automatically to your configured
networks when they are in
range.
c) If Your Tablet finds a network
that has never been configured,
it will display a notification icon.
(4)Tap on the network you want to connect to, enter the required network
information (password) and then tap on “Connect”. Your Tablet will now
attempt to establish a connection to that WiFi hot spot with the network
parameters you entered. If the connection is successful, the message
Connected to XXX will appear under the WIFI setting.
Advanced Connection
To manually scan for available Wi-Fi networks,
(1) In the “Wi-Fi settings” screen, tap the Menu icon , and then tap “Scan.”
(2) If the Wi-Fi network you want to connect to does not appear in the list, scroll down
the screen, then tap “Add a Wi-Fi network.” Enter the required settings, then tap
“Save.”
To access the advanced network parameters (“Regulatory domain,” “IP address,”
etc), tap the Menu icon , and then tap “Advanced.” Other parameters will appear.
The required information can be obtained from the person who manages the
network.