Calibration
3. Select the View Pull down menu and select RUT.
4. Select the File Pull down menu and select New then 9800.
5. Select the Connect pull down menu, and click on System. When asked if you want the forms updated with data retrieved
from the system, select Yes. As data is retrieved from the system, you will see the serial and barcode numbers for the
system appear on the form.
6. Select the Monitor Calibration form.
7. From the Display Test Patterns Pull down, select Gray Scales. The Gray Scale pattern will be displayed on the left monitor.
8. Select the Enable Monitor Adjustment turn off light sensor button.
9. Select the Enable Minimum Adjust.
10. Select one of the minimum brightness or contrast sliders.
Note: Click on top of the pointer on the slider. This will help prevent inadvertently changing the setting when you select it.
When a slider is selected it will have a dotted box around it allowing you to use the right and left arrows on the laptop
keyboard to make fine adjustments.
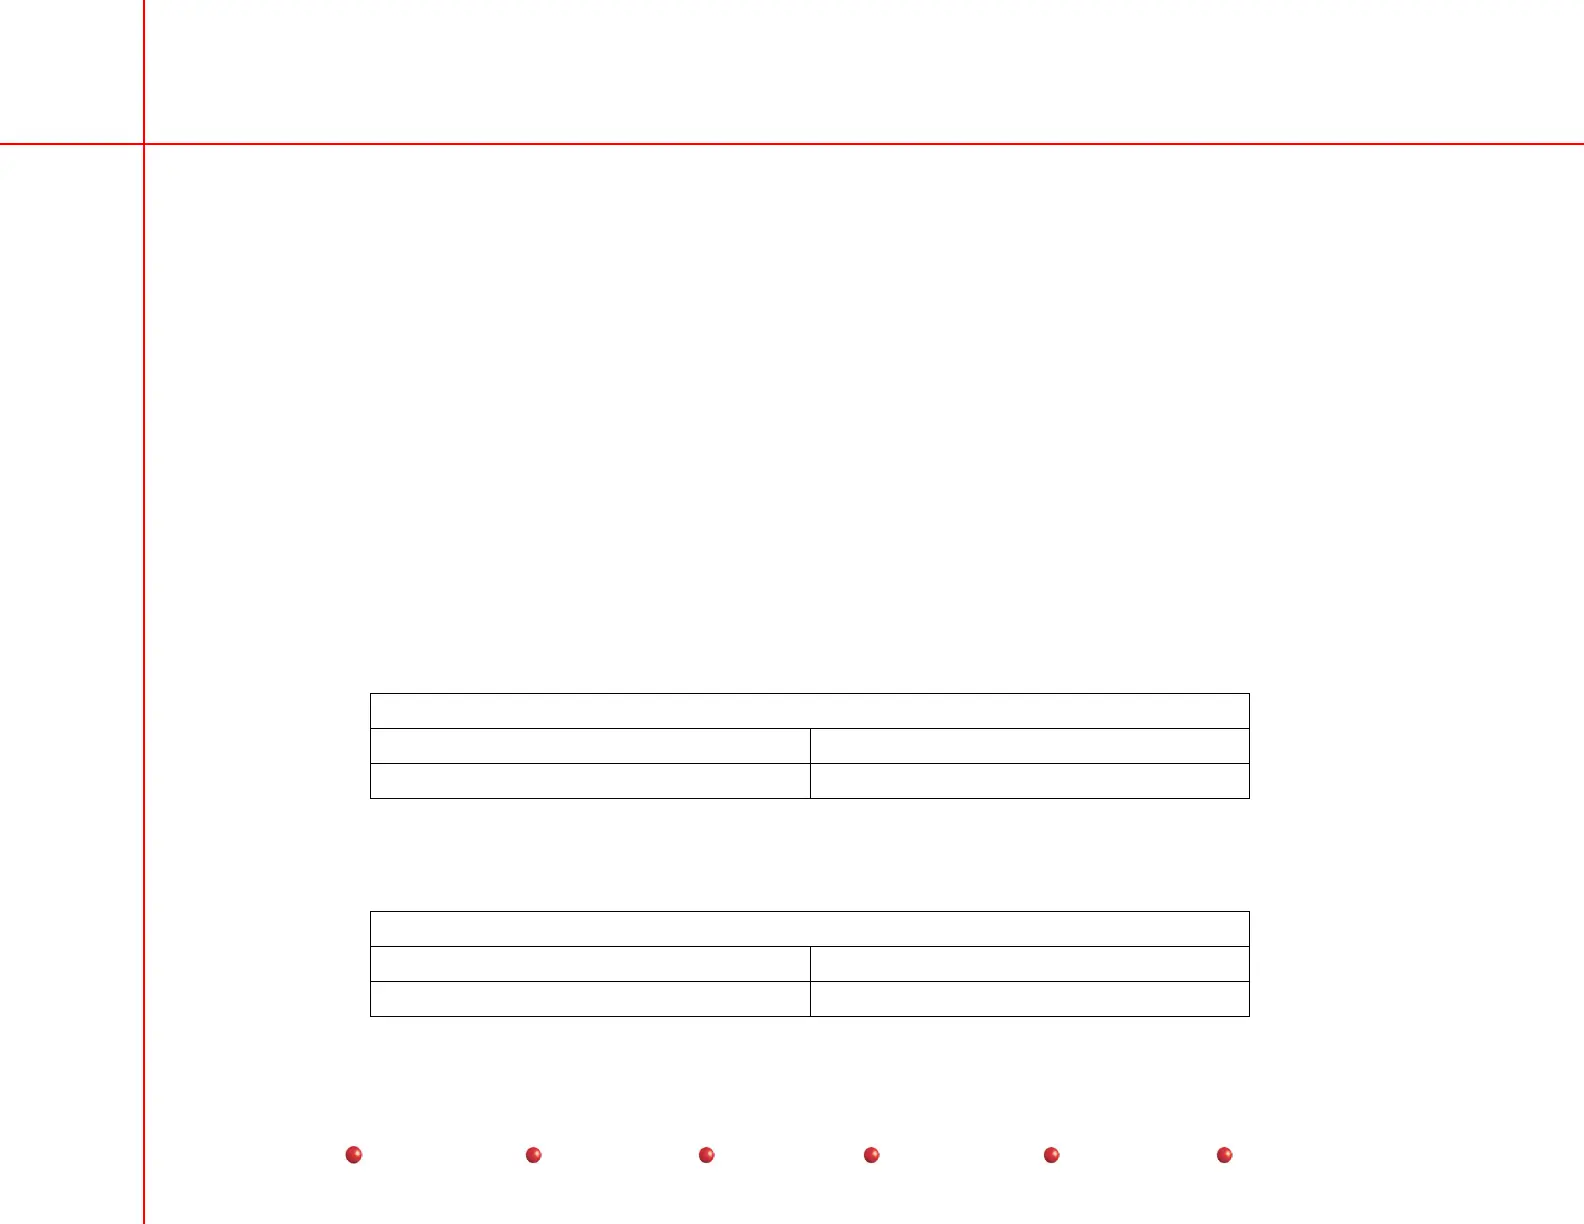
11. Using a light meter, verify that the black and white panels on the center of the monitor produce the following light levels:
Minimum Light Settings
Black Panel light level White Panel light level
0.70 to .085 Foot Lamberts 145 to 155 Foot Lamberts
12. Carefully (see Note of step 10) select the Enable Max Adjust by selecting one of the maximum brightness or contrast sliders.
13. Using a light meter verify that the black and white panels on the center of the monitor produce the following light levels:
Maximum Light Settings
Black Panel light level White Panel light level
1.1 to 1.25 Foot Lamberts 195 to 205 Foot Lamberts
75
Service
Periodic Maintenance
Contents
Schematics
Illustrated Parts
Installation
 Loading...


