5
Operating Instructions and Parts Manual 24669
4/18
2018 OEMTOOLS
™
3/8" DRILL
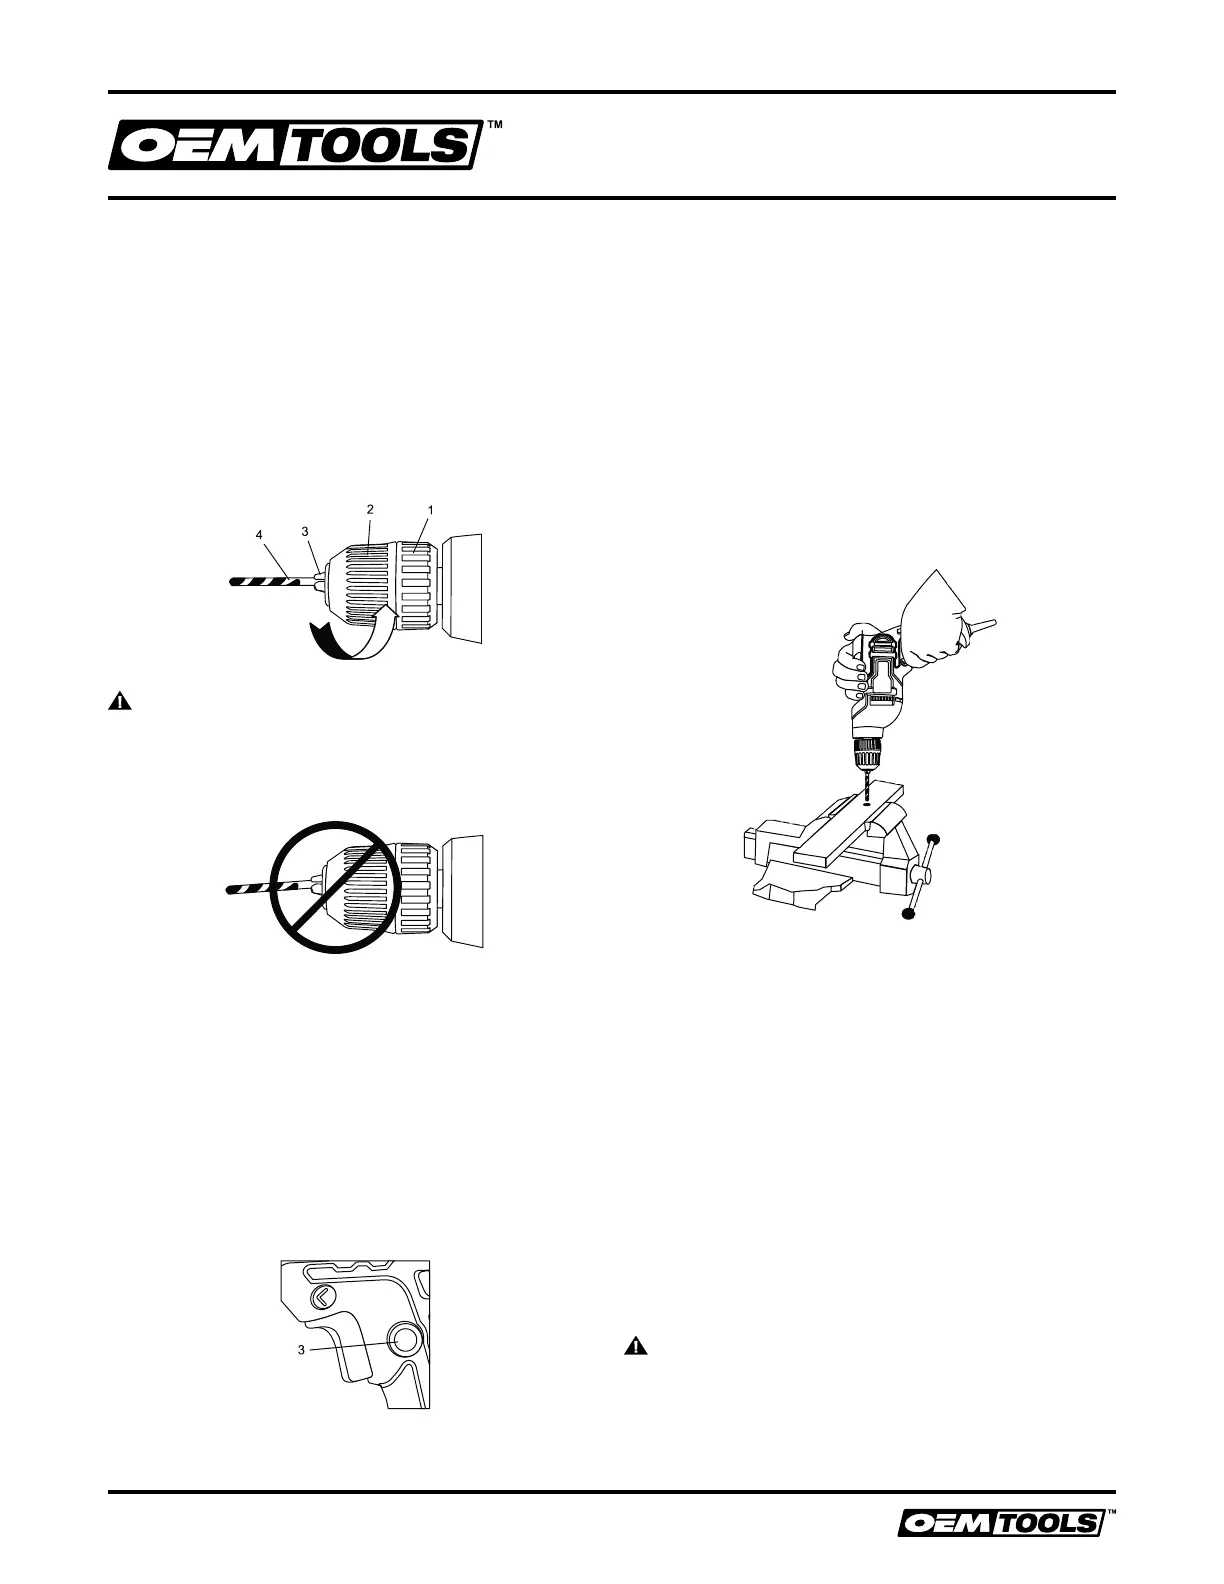
2. Insert the bit into the chuck the full length of the jaws or
until the spiral portion of the bit is near the chuck jaws.
Raise the front of your drill slightly to prevent the bit
from falling out of the chuck jaws.
3. Tighten the chuck jaws onto the bit by turning the
chuck body in a clockwise direction.
NOTE: Make sure the bit is properly aligned in the jaws
and NOT at an angle. An improperly aligned bit could be
thrown from the chuck when the drill is started.
4. Finish tightening the chuck jaws by holding the chuck
collar with one hand and firmly tightening the chuck
body by rotating it in a clockwise direction.
NOTE: Hand tighten the chuck jaws. DO NOT use pliers.
WARNING: DO NOT insert the drill bit into the chuck
and tighten as shown in Fig. 4. The drill bit MUST be
properly inserted with all three of the chuck jaws holding the
bit centered in the chuck. Failure to properly insert the drill
bit could cause the drill bit to be thrown from the chuck, and
could result in serious injury or damage to the chuck.
REMOVING DRILL BITS
1. To open the keyless drill chuck, grasp and hold the
chuck collar with one hand. Rotate the chuck body in
a counterclockwise direction until the chuck jaws open
wide enough to release the bit.
2. Remove the bit.
TRIGGER SWITCH LOCK
The trigger switch lock-on feature allows the trigger
switch to be locked in the ON position at full speed when
continuous operation for extended periods of time is
required (Fig. 5).
To lock the trigger switch in the ON position, pull back on
the trigger switch to start the drill. Continue to squeeze
the trigger until the drill reaches its maximum speed. Push
the trigger switch lock button (3) into the drill handle.
Release the trigger switch while holding the trigger switch
lock button into the drill handle. The drill will continue to
run at full speed. To release the trigger switch lock button,
pull the trigger switch back and then release the trigger.
DRILLING
When drilling into smooth, hard surfaces such as metal,
use a center punch to mark the desired hole location.
This will prevent the drill bit from slipping off center as the
hole is started.
The workpiece to be drilled should be secured in a vice or
with clamps to keep it from turning as the drill bit rotates
(Fig. 6).
1. Check the drill bit to make sure it is firmly locked into
the drill chuck, and verify that the forward/reverse
switch is in the forward position.
2. Hold the drill firmly with both hands whenever possible.
Use one hand to grasp the handle and switch.
NOTE: Make sure the hand placed on the body of the
drill does not cover the air vents. Covering these air
vents will reduce motor cooling, and possibly lead to
overheating the motor.
3. While holding the drill firmly, place the point of the drill
bit at the point to be drilled.
4. Squeeze the switch trigger to start the drill.
NOTE: Always use a higher drill speed when drilling small
holes. Use a slower drill speed when drilling large holes.
5. Move the drill bit into the workpiece applying only enough
pressure to keep the bit cutting. DO NOT force the drill bit
or apply sideways pressure to elongate the hole.
WARNING: Be prepared for binding and bit breakthrough.
When these situations occur, the drill bit has a tendency to
grab the workpiece. This action will kick the drill opposite
to the direction of the drill bit rotation, and could cause loss
of control when breaking through material as you complete
drilling the hole. If you are not prepared, this loss of control
can result in serious injury.
Fig. 5
Fig. 6
Fig. 4
Fig. 3
 Loading...