
R
rachelchristensenAug 20, 2025
How to turn on OHAUS Adventurer Pro Grain Scales?
- WWilliam LeeAug 20, 2025
If your OHAUS scale will not turn on, the AC power may not be connected. Ensure the AC adapter is properly connected.
How to turn on OHAUS Adventurer Pro Grain Scales?
If your OHAUS scale will not turn on, the AC power may not be connected. Ensure the AC adapter is properly connected.
Why can't I calibrate my OHAUS Adventurer Pro Grain Scales?
If you cannot calibrate the OHAUS scale, it might be because the calibration menu is locked. Turn off the Calibration menu lock. Also, check if LFT is set to on; if so, turn LFT off. Unstable weight reading can also prevent calibration, so eliminate vibration and drafts.
What to do if my OHAUS Scales show Error 8.3?
If the OHAUS scale displays 'Error 8.3', it means the weight reading exceeds the overload limit. You should clear the pan.
What does Error 8.1 mean on OHAUS Adventurer Pro Grain and how to fix it?
If the OHAUS scale displays 'Error 8.1', it indicates that the weight reading exceeds the Power On Zero limit. To resolve this, clear the pan.
What to do if my OHAUS Adventurer Pro Grain show Error 8.2?
If the OHAUS scale displays 'Error 8.2', it means the weight reading is below the Power On Zero limit. To fix this, put the pan on the scale.
What does Error 8.4 mean on OHAUS Adventurer Pro Grain Scales and how can I resolve it?
If the OHAUS scale displays 'Error 8.4', it indicates that the weight reading is below the underload limit. To correct this, place the pan on the scale.
Why OHAUS Adventurer Pro Grain does not display accurately?
If your OHAUS scale is not displaying accurately, it might be due to improper calibration. In this case, you should perform a calibration. Alternatively, the issue could stem from an unstable environment. Try moving the scale to a more suitable, stable location.
What does Error 7.0 mean on OHAUS Adventurer Pro Grain Scales?
If you encounter Error 7.0 on your OHAUS scale, it means there's an unstable weight reading when defining the reference weight. To resolve this, eliminate any vibration and drafts affecting the scale.
Why can't I change Menu settings on OHAUS Scales?
If you cannot change the menu settings on your OHAUS scale, it could be because the submenu is locked. Try unlocking the submenu. Another reason could be that LFT is set to on; if so, turn LFT off.
What does Error 9.8 mean on OHAUS Adventurer Pro Grain and how can I resolve it?
If the OHAUS scale displays 'Error 9.8', it means user calibration data is not present, which is required when LFT is ON. To resolve this, calibrate the scale.
Details compliance with UL, CSA, FCC, and ICES standards.
Information on Ohaus's ISO 9001 registration status.
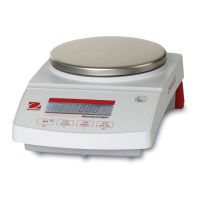
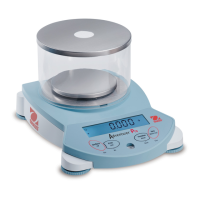
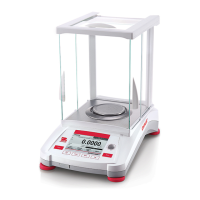
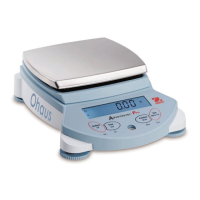
Overview of the Adventurer Pro Grain Test Scale, its capacity, and available features.
Essential safety guidelines for operating the Adventurer Pro Grain Test Scale.
Instructions for safely unpacking and assembling the scale's components prior to use.
Covers selecting location, leveling, connecting power, and initial calibration procedures.
Overview of the scale's physical controls and digital display functions.
Details button operations, including primary, secondary, and menu functions, and common uses.
Explains the menu structure, navigation, and how to change various scale settings.
Covers the Weighing, Test Weight, and Dockage modes, including specific operational details for each.
Step-by-step guide on how to enter, navigate, and change settings within the scale's menus.
Instructions for using the Weighing and Test Weight modes, including density measurement.
Instructions for using the Dockage mode to determine the percentage of waste material in a sample.
How to recall stored dockage reference weights and understand the percent dockage display.
Describes the three calibration methods: Span, Linearity, and Calibration Test.
Detailed procedure for performing a span calibration on the scale.
Instructions for performing linearity calibration, noting its requirement when linearity error exceeds tolerance.
Procedure for performing a calibration test to check stored calibration data against a known mass.
Lists the required calibration masses for different models and calibration types.
Configuration options for Legal Trade, Auto Off, Auto Zero level, and filter settings.
Selection of application modes and enabling/disabling of measurement units.
Guide to defining custom units using conversion factors and least significant digits.
Configuration of printing parameters for external devices, including output, content, and layout.
Configuration of baud rates, parity, and handshake settings for RS232 communication.
Setup for Good Laboratory Practice data, including User ID, Project ID, Time, Date, and print options.
Options to reset scale settings and select GLP items for printing.
Prevents unauthorized changes to menu settings by locking specific submenus.
Procedure to configure the scale for LFT and instructions on how to seal the scale.
Examples of printout formats for Weigh, Test Weight, and Dockage modes.
Examples of printouts for Span, Linearity, and Calibration Test results.
Guidance on verifying calibration and procedures for safe scale cleaning.
A table listing common symptoms, possible causes, and remedies for scale problems.
Troubleshooting specific error codes and information on obtaining service and parts.
Lists available replacement pans and accessories like security devices and cables.
Specifies the ambient conditions and power requirements for the scale.
Details materials used, protection ratings, and overall physical dimensions of the scale.
Lists comprehensive technical specifications including capacity, readability, and display type.
A table showing capacity and readability for different units and modes.
Lists available commands for controlling the scale via RS232 interface and their functions.
Details pin connections for RS232 COM1 and COM2 interfaces, and the USB connection.
Outlines Ohaus's warranty against defects and exclusions.
| Model | Adventurer Pro Grain |
|---|---|
| Readability | 0.1 g |
| Display | LCD with backlight |
| Calibration | External Calibration |
| Repeatability | ± 0.1 g |
| Interface | RS232 |
| Power Supply | AC adapter |
| Weighing Units | g, oz, lb |
| Operating Temperature | 10°C to 40°C (50°F to 104°F) |
| Weight | 2.2 lbs (1 kg) |
| Pan Size | Ø 5.1 in (130 mm) |