Oki Data CONFIDENTIAL
3. Parts replacement
44983601TH Rev.1
3-29 /
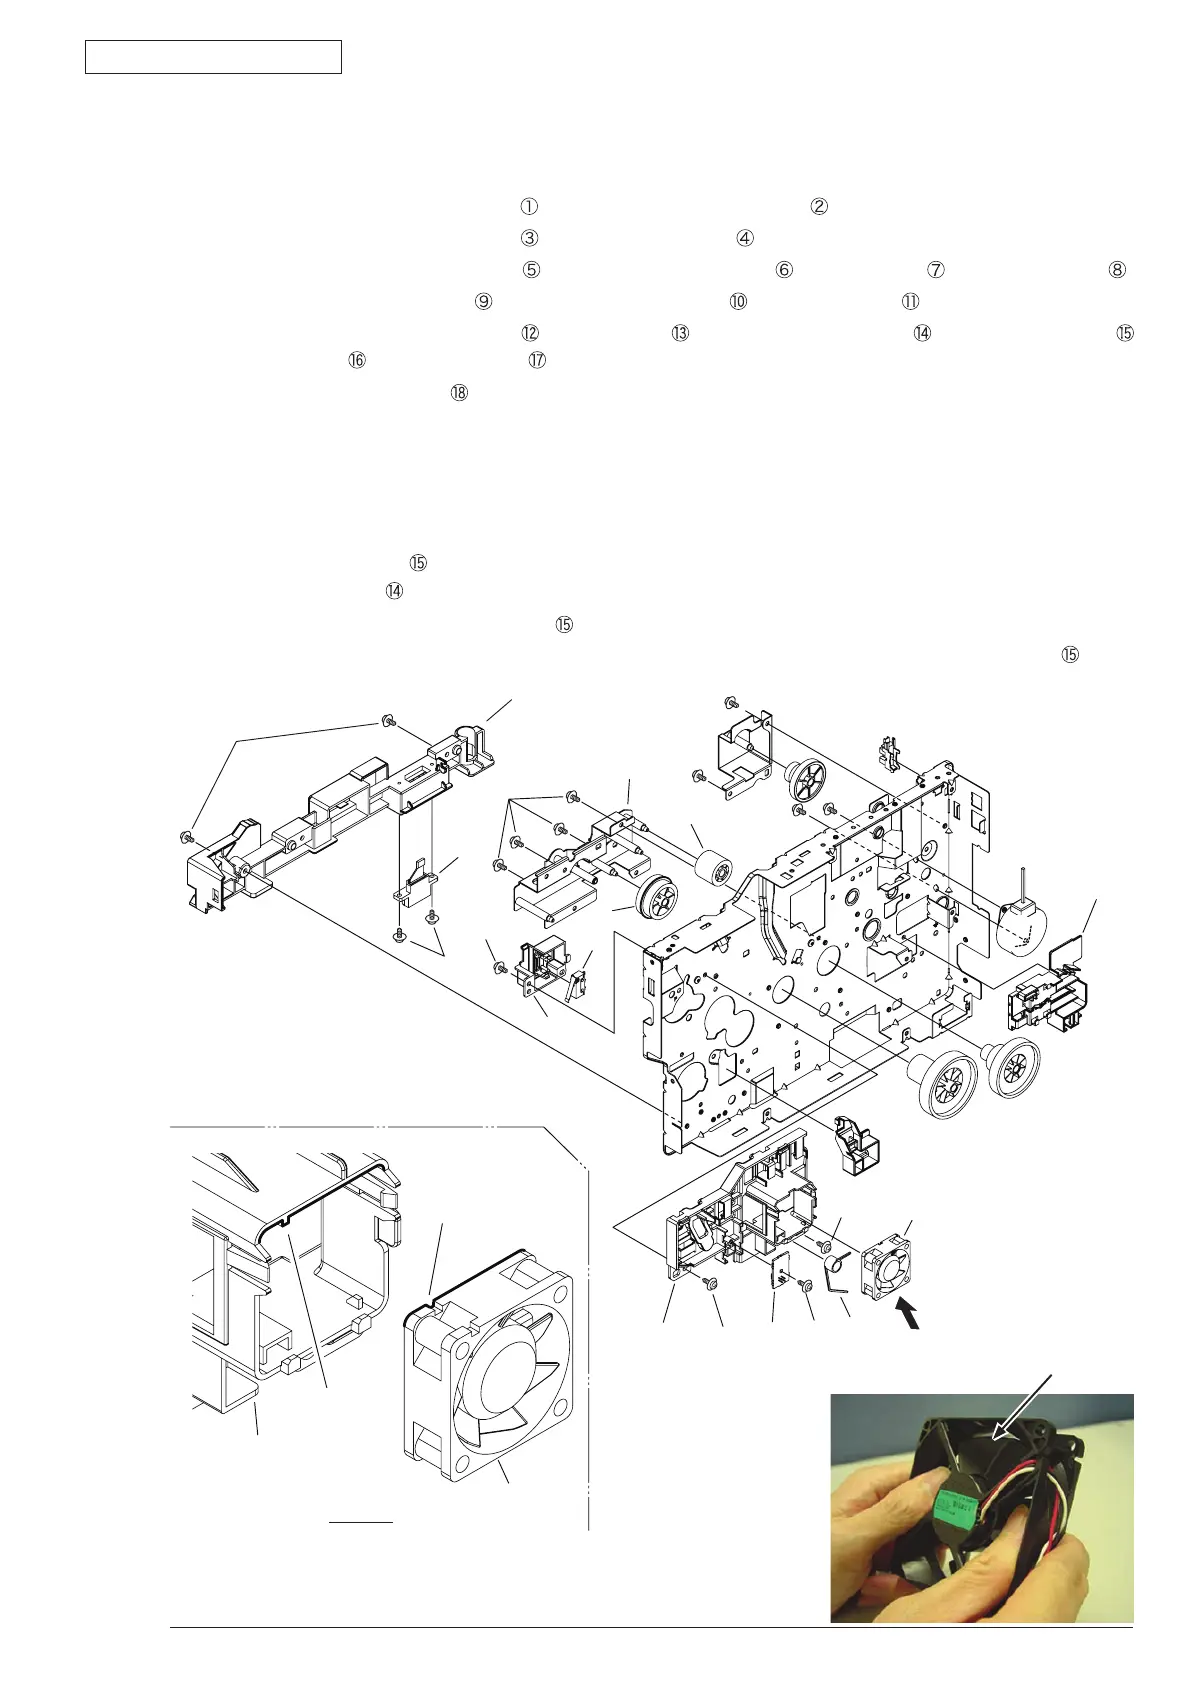
3.3.22 Plate Side R Assy
(1) Separate the Plate Side R Assy. (Refer to 3.3.20)
(2) Remove the two screws (Silver)
. Remove the
Guide-Cassette-R .
(3) Remove the two screws (Black)
. Remove the Connector .
(4) Remove the four screws (Silver)
. Remove the
Plate-ID-Gear , Gear-Idle-Z21 , Gear-Idle-Z30-33
.
(5) Remove the screw (Silver)
.
Remove the
Holder-Switch and Micro switch .
(6) Remove the two screws (Silver)
, screw (Black) . Remove the Guide-ID-R and Motor-Fan(X40)
,
Board-974
,
Spring-ID Lock R
.
(7)
Remove the Guide-Cable .
(8) Installing is performed by the inverse procedure with removing.
(Note on removing / installing)
1. Beware of not to touch the DC motor inattentively (Do not rotate motor).
2. Install Motor-FAN
with the label side inward and with its notch fitted to the appropriate projection
of Guide-ID-R .
3. While removing or installing FAN
, do not press impeller of the FAN as shown by the following
photo. In case of the impeller unfastened by mistake, do not reuse it and install a new FAN .
①
③
④
⑤
⑥
⑦
⑧
⑨
⑩
⑱
⑪
⑫
⑫
⑭⑯
⑰
⑮
⑬
⑭
⑮
ViewA
View A
Projection
Notch
Impeller