- 60 -
Supported Paper
2
2. Printing Basic Operation
Paper Loaded on the Tray
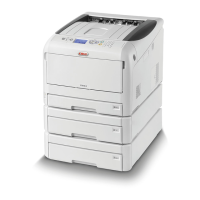
Your printer has two built-in trays (tray 1 and the MP tray) and an additional tray unit (tray 2/3/4).
Refer to the list below to check the supported paper and capacities of each tray.
Note
● Duplex printing can not be performed on paper indicated with an asterisk (*).
Tray Supported paper size Paper capacity Paper weight
Tray1 ● A3
● A4
● A5
● B4
● B5
● A6*
● Letter
● Legal 13
● Legal 13.5
● Legal 14
● Executive
● Tabloid
● 8K (260 x 368 mm)
● 8K (270 x 390 mm)
● 8K (273 x 394 mm)
● 16K (184 x 260 mm)
● 16K (195 x 270 mm)
● 16K (197 x 273 mm)
● Custom
300 sheets
(when paper weight is 80 g/m
2
)
● Light
(64 to 82 g/m
2
)
● Medium Light
(83 to 90 g/m
2
)
● Medium
(91 to 105 g/m
2
)
● Heavy
(106 to 128 g/m
2
)
● Ultra Heavy1
(129 to 188 g/m
2
)
● Ultra Heavy2
(189 to 220 g/m
2
)
Tray2/3/4
(option)
● A3
● A4
● A5
● B4
● B5
● Letter
● Legal 13
● Legal 13.5
● Legal 14
● Executive
● Tabloid
● 8K (260 x 368 mm)
● 8K (270 x 390 mm)
● 8K (273 x 394 mm)
● 16K (184 x 260 mm)
● 16K (195 x 270 mm)
● 16K (197 x 273 mm)
● Custom
530 sheets
(when paper weight is 80 g/m
2
)
● Light
(64 to 82 g/m
2
)
● Medium Light
(83 to 90 g/m
2
)
● Medium
(91 to 105 g/m
2
)
● Heavy
(106 to 128 g/m
2
)
● Ultra Heavy1
(129 to 188 g/m
2
)
● Ultra Heavy2
(189 to 220 g/m
2
)
Note
● Weight of paper loaded on an
additional tray unit is 64 to
176 g/m
2
.
● Weight of paper you can
print is up to 176 g/m
2
.