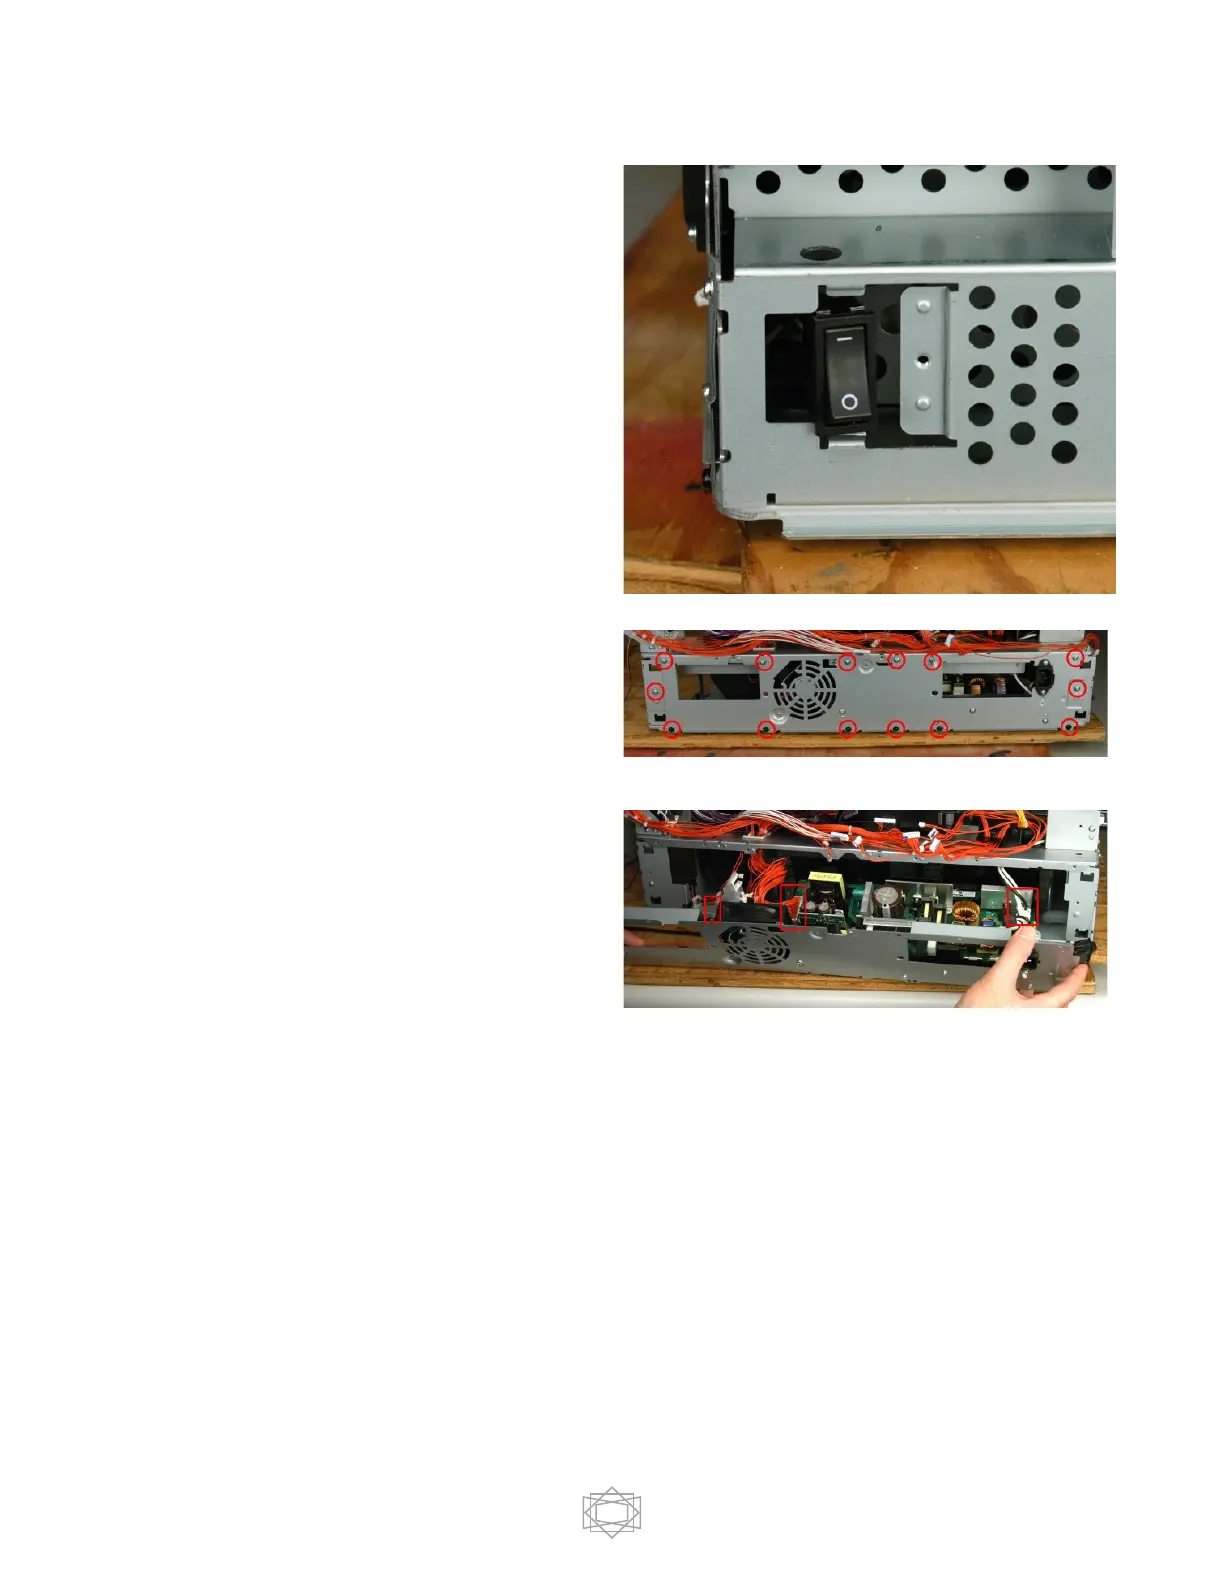
Gently release the power switch from the
frame.
Remove the 8 silver screws & 6 black
screws from the low voltage power supply.
As you pull the power supply out, you will
see 3 wire harnesses connected. Unplug
the harnesses and remove the low voltage
power supply assembly.
You Do Not need to remove the cables –
just reinstall the low voltage power supply.
FOLLOW THE DISASSEMBLY DIRECTIONS IN REVERSE TO REASSEMBLE THE PRINTER.
NOTES for a Successful Reassembly:
Ensure that you do not pinch / crimp wire harnesses as you reassemble the printer. Make sure that
you are replacing the correct screws into the correct assemblies. Do Not Switch Black and Silver
screws.
TAKE YOUR TIME! If you are unsure - Ask Questions!

 Loading...