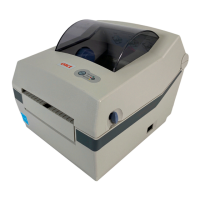
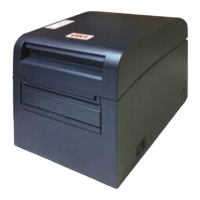
The LD620D is a direct thermal label printer designed for various label printing applications. This user's guide provides essential information for setup, operation, and maintenance, along with details on specific features and troubleshooting.
Function Description:
The LD620D is primarily a direct thermal label printer, meaning it uses heat to produce images on heat-sensitive paper, eliminating the need for ink or toner. It is designed to print labels for a variety of purposes, supporting different label types including Control Labels (PP) and Other Labels (PET). The printer can operate in various modes, including a standard print standby mode, a stand-alone configuration mode for advanced settings, and a data dump mode for diagnosing communication issues. It also features a peel-off function for automatic label separation and supports fan-fold paper for continuous printing.
Important Technical Specifications:
- Printing Method: Direct Thermal Printing
- Dot Density: 203 dpi (8 dot/mm)
- Printing Width: Max. 104 mm (Max. 4.09")
- Printing Speed: Max. 127 mm/sec (Max. 5ips). Note that printing speed can vary depending on data transmission speed and control commands.
- Roll Width: 42 ~ 106mm (1.65 ~ 4.17”)
- SMPS Input Voltage: AC 100~240V
- Frequency: 50/60 Hz
- SMPS Output Voltage: DC24V±5%
- SMPS Output Current: 2.5A
- Operating Temperature: 0 ~ 40 ℃
- Storage Temperature: -20 ~ 60 ℃
- Operating Humidity (except for paper): 10 ~ 80% RH
- Storage Humidity (except for paper): 10 ~ 90% RH
- Interfaces: RS-232C (Serial), IEEE1284 (Parallel), USB. Shielded cables are required for these connections, with specific length restrictions (less than 1.8m).
Usage Features:
- Power Connection: The printer connects to a power source via an AC adapter and power cord. Users must ensure the AC adapter voltage matches the power source.
- Interface Cable Connection: Supports RS-232C (Serial), IEEE1284 (Parallel), and USB connections. Specific cable types and lengths are recommended for EMC compliance.
- Paper Installation: Involves opening the paper cover, spreading the paper holder, inserting the paper roll, adjusting the paper guide to the width of the paper, and closing the paper cover until it clicks. The printing direction of the paper should be noted.
- LED Display: Provides visual feedback on the printer's status:
- Green LED on: Printer is in normal mode, waiting for data from the host (PC).
- Orange LED on: Indicates a paper gap sensing error or paper jam.
- Red LED on: Printer has stopped due to the FEED button being pressed; pressing it again resumes printing.
- Green LED blinking: Thermal Printing Head (TPH) is overheated, or the printer is waiting for button input to run Auto-Calibration.
- Orange LED blinking: No paper detected; ensure paper is loaded correctly.
- Red LED blinking: The printer cover is open.
- Feed Button Operations:
- Feed Label: A short press (less than 3 seconds) in Print Standby mode feeds one label.
- Stand-alone Configuration Mode: A long press (longer than 3 seconds) in Print Standby mode enters this mode, allowing access to various functions via LED status sequences.
- Pause/Resume Printing: Pressing the button while printing toggles between pause and resume.
- Self-Test: Checks printer functionality and prints current configuration information. It is initiated by turning on the power while holding down the FEED button for about 5 seconds.
- Media Length Measurement: The printer automatically measures the exact length of installed paper, feeding 2 or 3 labels, to ensure proper print image alignment. This occurs upon first installation or if detected label length differs from the measured value.
- Pause/Resume: Allows pausing and resuming print jobs by pressing the FEED button.
- Media Sensor Auto-Calibration: Used when the printer fails to detect gaps or black marks correctly, especially with special paper. It can be initiated via Stand-alone Configuration Mode (Sequence Number 2 for Gap Media, Sequence Number 3 for Black Mark Media).
- Gap Sensor Manual-Calibration: Provides detailed sensor parameter calibration using a utility program (available on the enclosed CD) when auto-calibration is insufficient. This involves selecting sensing type, inputting label length, checking sensing values, and saving optimal settings.
- Data Dump Mode: Diagnoses communication issues by dumping received data in hex format without processing. Activated via Stand-alone Configuration Mode (Sequence Number 5).
- Peel-Off Function: Automatically separates labels from the liner. It is for label paper only, and the peeler switch must be turned on. If the peeler switch is on, labels will not print until previous ones are removed. The printer should be turned off and back on after changing the peeler switch setting.
- Using Fan-Fold Paper: Involves inserting paper through the rear slot and guides, adjusting paper holders with a Fix Tool, and adjusting paper guides before closing the cover.
Maintenance Features:
- Cleaning Head: Essential for maintaining print quality. The printer head should be cleaned with a cleaning pen from the center to the edges after turning off the printer and allowing it to cool for 2-3 minutes. It is recommended to clean the head each time the paper roll is replaced.
- Cleaning Sensors, Roller, and Paper Path: Involves opening the paper cover, removing paper, and using a dry cloth or cotton swab to remove dust and foreign substances. For adhesive or pollution materials, a cloth or cotton swab soaked in medical alcohol can be used. The printer should not be used until all parts are completely dry (1-2 minutes). This cleaning is recommended when print quality or paper detection degrades.
Safety Precautions:
The manual emphasizes several safety precautions, including:
- Not plugging multiple products into one multi-outlet to prevent overheating and fire.
- Using only the supplied adapter.
- Not pulling the cable to unplug, as this can damage the cable.
- Keeping plastic bags out of children's reach.
- Not plugging/unplugging with wet hands to avoid electrocution.
- Not bending the cable forcefully or placing heavy objects on it.
- Unplugging the printer immediately if strange smoke, odor, or noise is observed.
- Being careful to avoid pinching fingers when opening/closing the paper cover or loading paper.
- Installing the printer on a stable surface.
- Using only approved accessories and not attempting to disassemble, repair, or remodel the printer.
- Not allowing water or foreign objects into the printer.
- Not using the printer if it is out of order.
- Turning off the printer and unplugging it before cleaning.
- Avoiding touching the heated portion of the print head or the blade of the manual cutter.