- 63 -
Scanning to Network PC
4
Scanning
Step 2-3 Conguring the
Computer for Scan to Network PC
With the Setup Information Form, create an
account and shared folder for the machine in the
computer.
Memo
● If the computer is in a domain, the procedure for adding a
user account may differ from the procedure below. Refer
to the Microsoft Windows manual.
For Windows 7, Windows Server 2008
R2, Windows 2008 and Windows
Vista
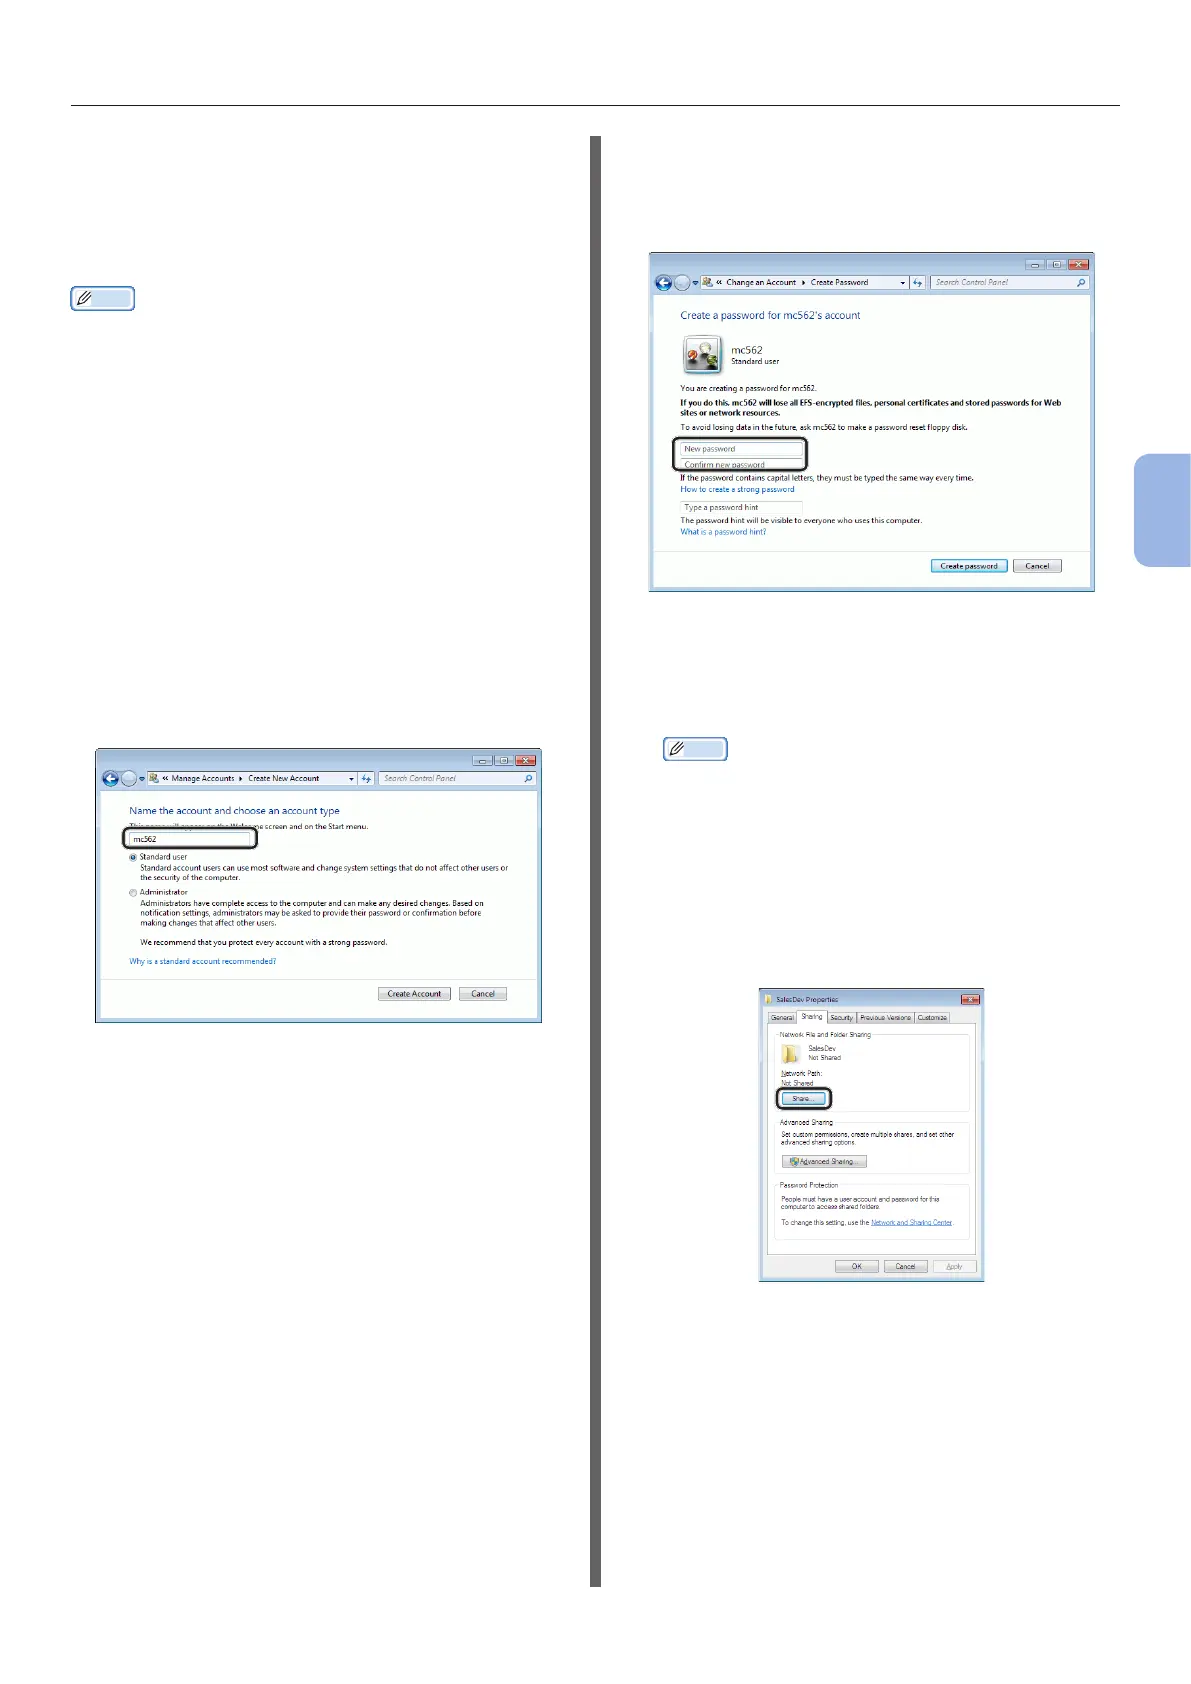
1 Click [Start] > [Control Panel].
2 Select [Add or remove user
accounts].
3 Select [Create a new account].
4 Enter the information in C-2 in the text
box.
5 Ensure that [Standard user] is
selected, and then click [Create
Account].
6 Click the icon of the user account
created in step 5.
7 Select [Create a password].
8 Enter the information in C-3 in [New
password] and [Conrm new
password], and then click [Create
password].
9 Close the Control Panel.
10 Create a new folder on the computer
with the name entered in C-5.
Memo
● It is recommended that the folder be created in the
local drive (C drive or D drive), not on the desktop,
[Documents], or network drive.
11 Right-click the folder created in step 10
and select [Properties].
12 Select the [Sharing] tab and then click
[Share].