First time start up or how to prepare the SD card and boot
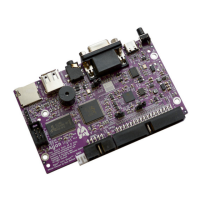
Important! Notice that AgonLight2 comes completely assembled, tested, and programmed with firmware.
The only thing you would need to do is prepare a microSD card with BBC basic and some examples, then
connect your display and peripherals and apply power supply. The board comes without micro SD card
which has to be purchased separately! You might need extra SD card writer.
1. Open a web browser and navigate to: https://github.com/OLIMEX/AgonLight2
2. Click on: “Code” → Download ZIP (in “Local” tab);
3. Extract the downloaded ZIP file in your PC;
4. Enter the folders “SOFTWARE” and then “1-SD-card-contents”, then copy the contents of the folder;
5. Attach a class-10 micro SD card to your PC (formatted in FAT32 and with a size of maximum 32GB);
6. Paste the contents of the folder “1-SD-card-contents” which you’ve copied in step 4, to the microSD card.
Files should be placed directly into main folder of the card;
7. Eject the micro SD card from your PC;
8. Insert the micro SD card into the AgonLight2 board;
9. Connect a VGA monitor and a PS/2 keyboard (or a PS/2-compatible USB keyboard,
via a PS/2 adapter) to the AgonLight2 unit;
10. Turn the AgonLight2 board on by connecting it to the USB cable.
More detailed info about the software can be found further below in the document.
AgonLight reference documents:
Links to original AgonLight manuals: AgonLight Hardware Manual, QuickStart Guide, and Firmware
Installation Guide.
7