min.
300mm
min.
300mm
min.
600mm
min.
300mm
min.
2000mm
min. 600mm
A
B
C
D
C
F
A
E
X3
X4
ENGLISH
EN - 18
2.6.1 - Heat pump appliances.
• During operation in heating mode, condensate is produced in the outdoor unit due to defrosting, which
must be able to run-off freely to prevent stagnation.
• Whenpositionedonaatsurface,adrainingchannelmustbecreatedaroundtheunitthatgoesdirectly
intotherainwatercollectionwellofthewaternetwork(gure15).
• In the case of installation on a balcony or terrace, it must be possible to position a recipient under the
unit,possiblyingalvanisedsheetorstainlesssteel(preferable),withdrainpipethatowsdirectlyintothe
gutter.
• Anotheroption(gure16)istopositionthegasket(6)onthetting(5)andtheninsertthelatterintothe
holemadeonthebottomoftheoutdoorunitandturnitby90°toxitsecurely.
• Connectarubberhose(notsupplied)tothetting(6)ifwaterisdrainedfromtheoutdoorunitinheating
mode.
2.6.2 - Outdoor unit assembly
Proceed as follows (as described in the previous paragraph), once the ideal position for installation of the
outdoorunithasbeenidentied:
a. Positiontheunitonthesupportbase,respectingthedrillingdistancesindicatedinthetableingureX4.
b. Screw any clamping nuts, without tightening completely.
c. Using a spirit level, check the unit is level; if necessary, adjust the support feet.
d. Tighten any clamping nuts correctly.
IN = air inlet - OUT = air outlet
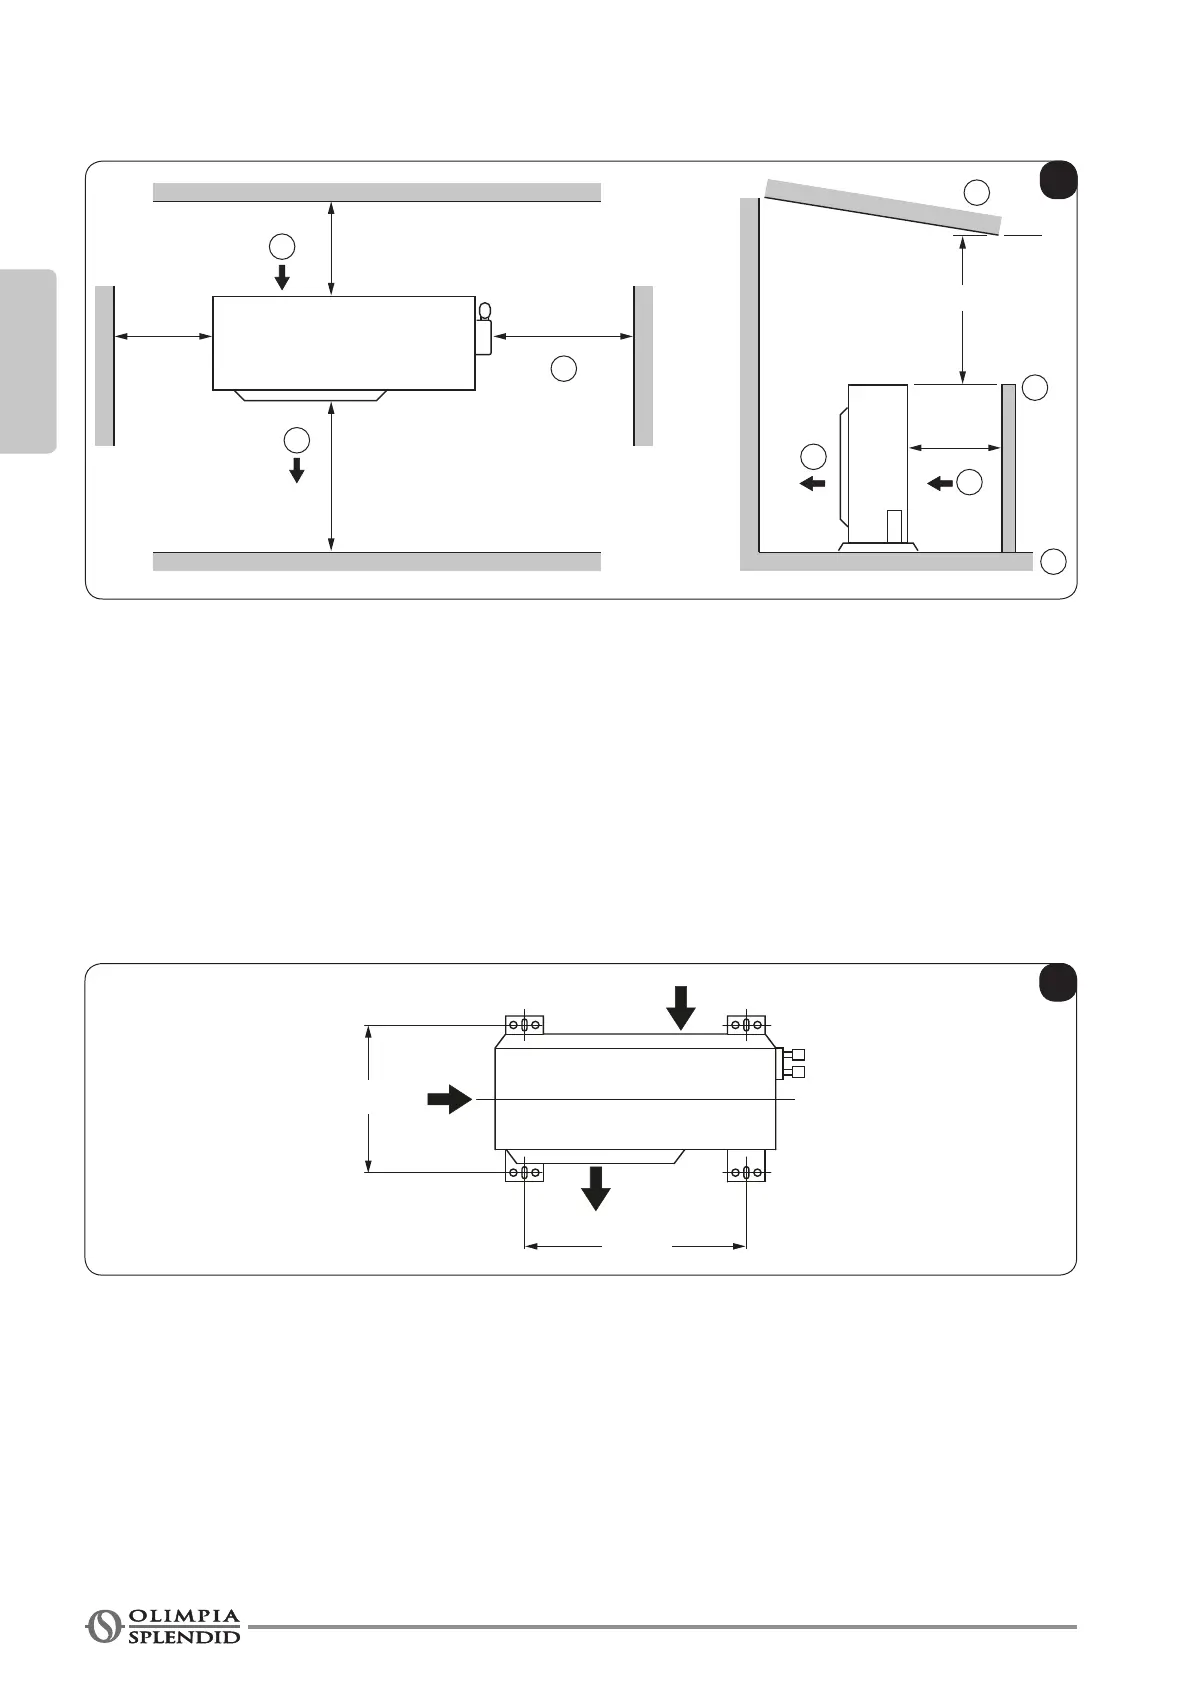
p. Make sure that there is the minimum space around the outdoor unit necessary to guarantee correct
operationandthecleaningandmaintenanceinterventions,asindicatedingureX3.




 To Next Page