steam button voltage
The M3Pro is dual voltage and works at 110/120 volts and
220/240 volts. It automatically adjusts to the correct voltage.
No switch necessary, just a plug adapter (not included).
voltage settings
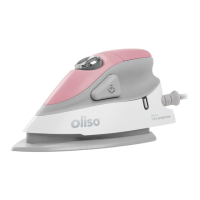
ProLight
™
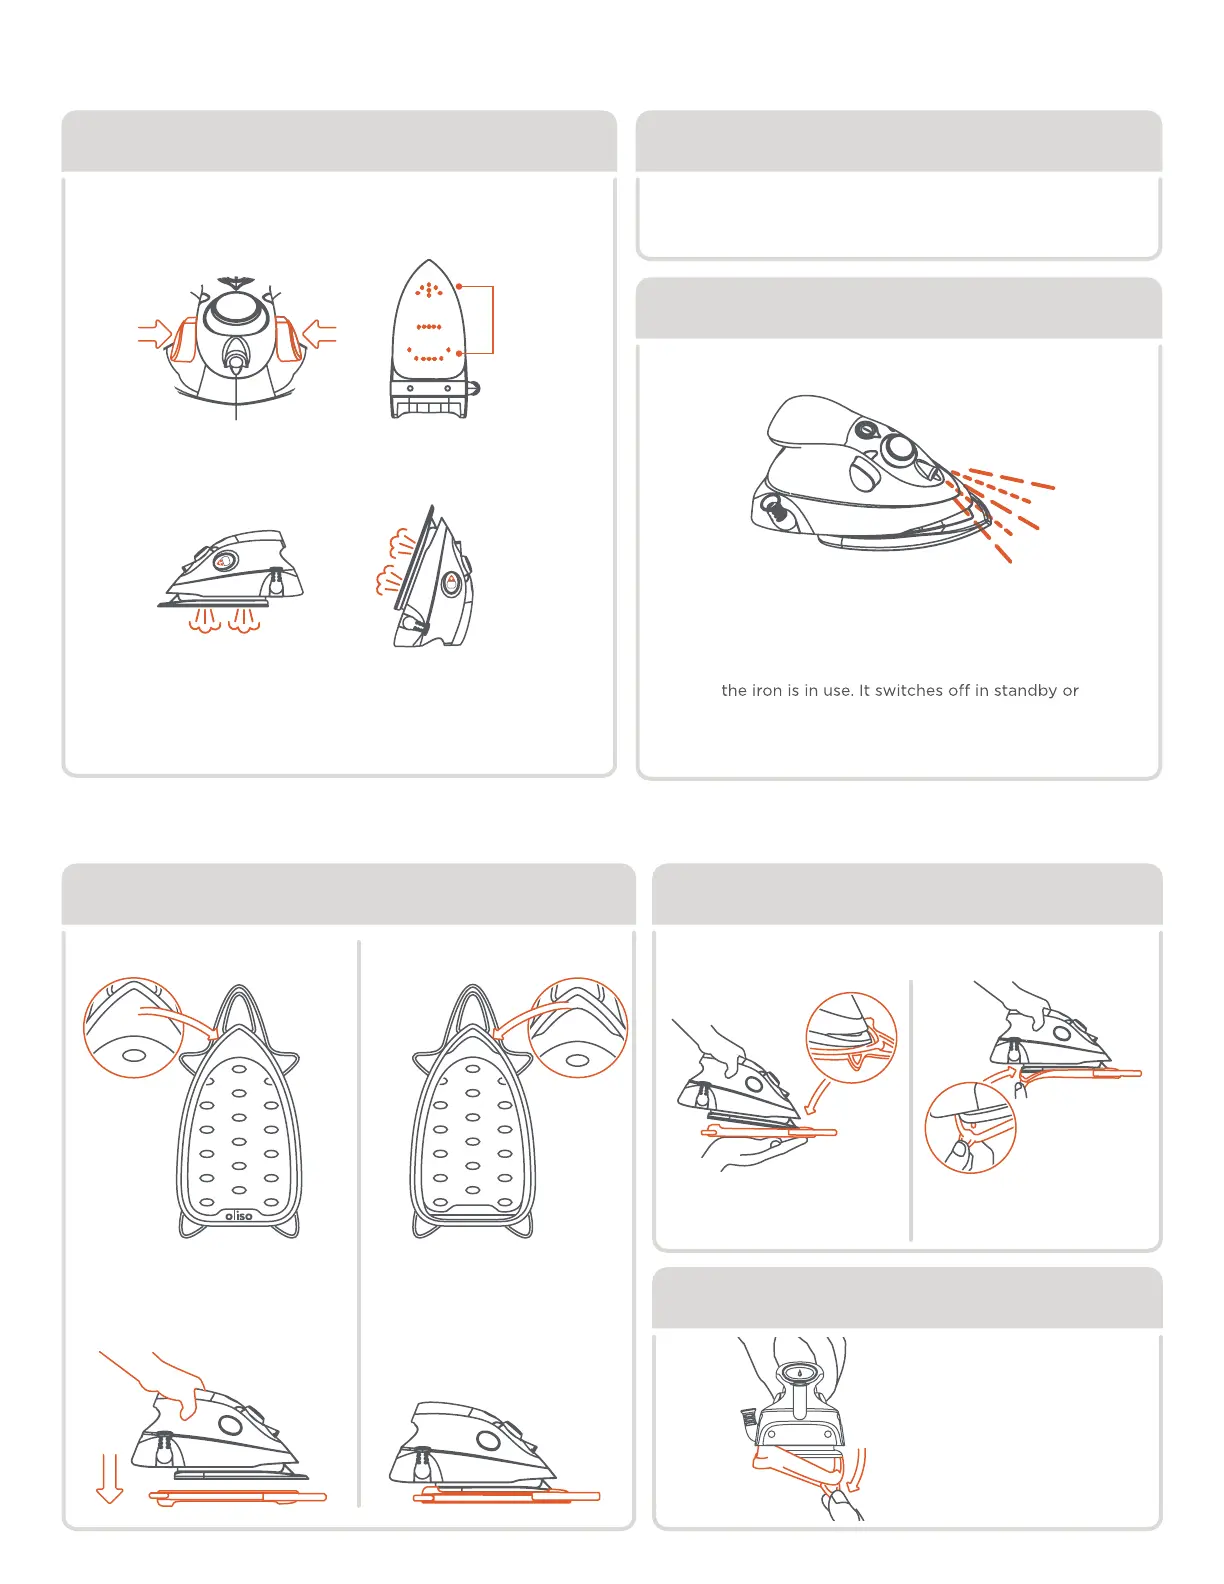
dual burst of steam
When using for the first time or after storage, press the steam
buttons several times to start steam flowing. Do this away from
fabric to avoid water droplets on fabric.
Fill with water and allow the iron
to heat up to setting
••• (solid status and steam lights)
before pressing the steam button.
Pressing the left button makes steam at the
front, the right button makes steam at the rear.
Push both together for an extra strong burst.
The ProLight™ illuminates the Detailer Tip and
fabric making it easier to see when pressing
your projects and ironing clothes.
The ProLight™ comes on automatically when
when vertical. It flashes if knocked over.
Burst works both horizontally and vertically.
Dual
steam
zones
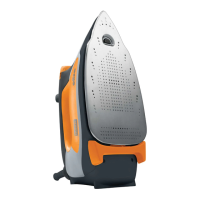
solemate
™
dual purpose solemate
™
step 1 step 2
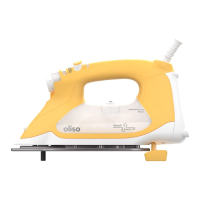
resting side
Lets the hot soleplate
safely rest every time
during ironing and
protects fabrics.
Pull down on tab at
back of solemate™
and remove
Insert front of soleplate
into front of solemate™
Wrap back tabs
around soleplate
attaching solemate
™
remove solemate
™
RESTING SIDE
side 1
PATENT PENDING
STORAGE
SIDE
storage side
Easily snaps to the
soleplate for easy
transportation + storage.
side 2
PATENT PENDING
STORAGE
SIDE
Note:
allow soleplate to cool
thoroughly before attaching solemate
™
back