○○○○○○○
○○○○○○○
○○○○○○○
QUICK START GUIDE
Thank you for purchasing an Olympus digital camera.
Please read the operation manual supplied with the camera carefully before using
your camera. We recommend that you become familiar with your camera by taking
a number of test shots before performing important shooting.
■ PACKAGE CONTENTS
Check that your digital camera comes complete with the items listed below in the specified
quantities.
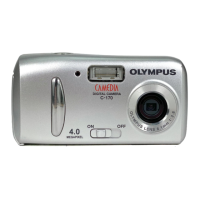
Digital camera ..................................................................................................... 1
Strap ................................................................................................................... 1
AA Alkaline batteries ........................................................................................... 2
SmartMedia card (16MB) .................................................................................... 1
USB cable ........................................................................................................... 1
CD-ROM (CAMEDIA Master and reference manual) ......................................... 1
Quick Start Guide ............................................................................................... 1
Basic Manual ...................................................................................................... 1
Warranty Card .................................................................................................... 1
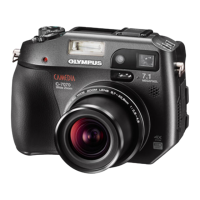
■ NAMES OF PARTS
1 Shutter button 8 Connector cover E Arrow pad
2 Lens barrier 9 USB connector F Tripod socket
3 Flash 0 DC-IN jack G Monitor button
4 Lens A Monitor H OK/Menu button
5 Self-timer lamp B Viewfinder I Battery compartment
6 Card cover C Orange lamp cover
7 Strap eyelet D Green lamp
■ ATTACHING THE STRAP
1 Pass the short end of the strap through the strap eyelet.
2 Pass the long end of the strap through the loop.
3 Pull tight and check that it is securely attached.
■ LOADING THE BATTERIES
Check that the lens barrier is closed and both the monitor and the orange lamp are
off.
1 Slide the battery compartment cover toward A and lift it up in the direction of B.
2 Insert the batteries as shown, making sure that they are correctly oriented.
3 Push down the battery compartment cover in the direction of the arrow C and close
firmly in the direction of D until it clicks.
0
A
E
F
D
G
I
H
1
2
3
4
78
9
6
5
✓
■ INSERTING THE SMARTMEDIA CARD
Check that the lens barrier is closed and both the monitor and the orange lamp
are off.
1 Open the card cover.
2 Insert the card in the direction shown in the figure.
There is a mark inside the card cover, indicating the direction in which the card should
be inserted.
3 Close the card cover securely until it clicks.
■ SETTING THE DATE AND TIME
1 Press the button to turn the monitor on.
2 Press the
button to display the menu.
3 Select [SETUP] using the
/ buttons and press the button.
4 Select [
] using the / buttons and press the button.
5 Select the date format “Y-M-D (Year-Month-Day)”, “M-D-Y (Month-Day-Year)” or “D-
M-Y (Day-Month-Year)” using the
/ buttons and press the button.
6 Set the first figure using the
/ buttons, and then proceed to the next figure
using the
button.
7 Repeat the above procedure until the date and time settings are adjusted.
8 Press the
button when the clock reaches 00 seconds.
9 Press the
button to turn the monitor off.
■ TAKING PICTURES
To turn the camera on : Open the lens barrier. (You are now ready to take pictures.)
To turn the camera off : Close the lens barrier.
Never attempt to open the card cover or remove the card or batteries while the
orange lamp is blinking. Otherwise, the image data on the card may be destroyed.
Remember that it is impossible to restore image data once it has been destroyed.
Press the shutter button halfway A and then press it fully B.
■ FLASH ( )
1 Open the lens barrier.
2 Check the current flash mode by pressing the
button.
3 To change the setting, press the
button until the appropriate flash mode is displayed.
Setting of the flash mode is completed.
Flash mode settings
Auto (AUTO) Automatically fires in low light or backlight
conditions.
Red-eye (
) Reduces the phenomenon of the subject’s eyes
appearing red in the image.
Fill In (
) Fires regardless of the light conditions.
Flash Off (
) Does not fire even in dark conditions.
Night Scene (
) For taking pictures at night.
Night Scene/Red-eye (
) For taking pictures of people against a night
background.
■ MACRO ( )
This mode is for taking close-up pictures at distance of 10cm-50cm (4in-1.6ft).
1 Open the lens barrier and press the
button to display the current setting [OFF].
2 Press the
button again to set the Macro ( ) mode.
3 Take a picture by looking at the monitor.
■ DIGITAL TELE
This mode enables you to take pictures in six magnifications: 1.6×, 2×, 2.5×, 3.2×, 4× and 5×.
1 Open the lens barrier and press the button to turn the monitor on.
2 The image is magnified in the sequence [1.6× → 2.0× → 2.5× → 3.2× → 4.0× → 5.0×]
each time the
button is pressed.
The image is zoomed out in the sequence [4.0× → 3.2× → 2.5× → 2.0× → 1.6× →
OFF] each time the
button is pressed.
3 Take a picture by looking at the monitor.
The image quality needs to be set to SQ2 to magnify 3.2×, 4× or 5×.
■ SELF-TIMER ( )
1 Press the button with the lens barrier open to display the Camera menu.
2 Select [CAMERA] using the
/ buttons and press the button.
3 Select [DRIVE] using the
/ buttons and press the button.
4 Select [
SELF-TIMER] using the / buttons and press the button.
5 Press the
button again to exit the menu.
6 Press the shutter button.
The self-timer lamp on the front of the camera lights up for 10 seconds and then blinks
for 2 seconds, before the picture is taken.
➜
AB
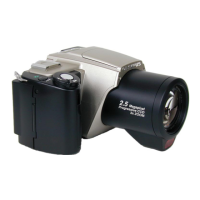
DIGITAL CAMERA
C-2
D-230
C
B
Card
insertion
direction
marking
12 3
➜➜
12 3
A
B
D
C
➜➜
C2-QSGuide-E.65E 8/9/01, 10:59 AM1