EasyManua.ls Logo

Olympus CAMEDIA C-4000 Zoom - User Manual

Olympus CAMEDIA C-4000 Zoom
2 pages
Print Icon
To Next Page IconTo Next Page
Loading...
Avoid opening the card cover, removing the SmartMedia card, or removing the
batteries while the camera is ON. Doing so could damage all pictures stored on the
SmartMedia card.
Olympus America, Inc.
Two Corporate Center Drive
Melville, NY 11747-3157
Need more help?
visit http://support.olympusamerica.com
for online automated help
START
HERE
It is strongly recommended
that you follow these step-
by-step numbered
instructions to set up and
quickly begin using your
new C-4000 Zoom digital
camera.
QuickStart Guide
C-4000 ZOOM
For more detailed instructions on advanced features, please refer
to the printed Basic Manual included in your package, or the
Reference Manual on the CD-ROM.
UNPACKING THE BOX CONTENTS
Gather your C-4000 Zoom and all the parts as shown in the illustrations. You'll need these to complete the steps for the
camera set-up procedures that follow.
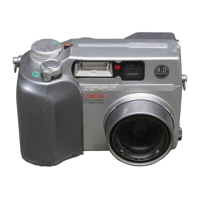
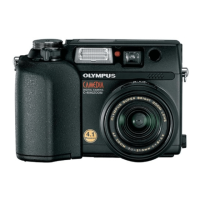
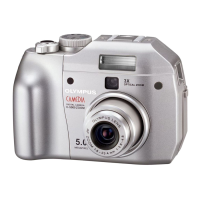
C-4000 Zoom
with lens cap
Lens cap
retainer string
Strap
Two CR-V3
lithium batteries
CAMEDIA
Master 4.0 CD-ROM
16MB SmartMedia card
with static-free case
and labels
USB cable
(beige color)
TIP: To maximize battery life, the C-4000 Zoom features a power saving mode in which the camera enters a sleep
mode after approximately three (3) minutes of non-use. Press the shutter button or zoom lever to wake up the camera.
Before you begin using your Olympus C-4000 Zoom Digital Camera…
The camera Power/Mode dial is used to select the various operation modes.
a.
b.
Insert the SmartMedia
Card
The SmartMedia card is where the camera stores your pictures. The pictures
you take remain on the SmartMedia card even when the camera is turned off
and/or the batteries are removed.
First, make sure the camera is OFF. Open the card cover door. Note the diagram on the inside of the
door. Match the orientation of the SmartMedia card to the diagram, and slide the card into the spring-
loaded slot as far as it will go. Close the cover until it locks into place; you will feel it snap closed.
Attach the carrying strap and lens cap retainer string (OPTIONAL)
We recommend that you attach the strap and lens cap retainer string at this time to make the
camera easier to handle and prevent loss of the lens cap. Attach the strap as illustrated.
To remove a SmartMedia card, push it into the camera, and then release it. The card partially ejects
and can now be removed.
c.
A
F
Z
O
O
M
6
.
5
-
1
9
.
5
M
M
1
:
2
.
8
O
L
Y
M
P
U
S
L
E
N
S
The following items are also included in the C-4000 Zoom package: Video cable, SmartMedia card instructions, Basic Manual,
warranty card, registration card, safety precautions booklet, and SmartMedia write-protect adhesive seals.
a.
Set the Date and Time (OPTIONAL)
Although this is not required, it is recommended that you set the date and time. This affects the way
image files are named, and each picture will be recorded with this information.
Set the mode dial to "P" and press . The monitor turns on and the top menu appears.
Press on the arrow pad to select MODE MENU.
To access the Date/Time menu, press three (3) times to scroll to the SET tab. Now press .
Press five (5) times to select , and then press .
Use the keys to select the desired date format (usually M, D, Y).
Press to proceed to the next field. Adjust the date and time in the appropriate fields using the
keys. Repeat the process until all date/time fields have been set.
Press twice to set the date and time and exit the menu.
c.
TURNING ON THE CAMERA
Turn the camera ON
Squeeze the tabs on the sides of the lens cap to remove it.
Turn the Power/Mode dial counter clock-wise to the "P" position.The monitor will activate briefly,
and then turn off.
b.
Note: Time is entered using the 24-hour format.
Note: Depending on
the camera settings,
not all indicators
will be displayed
Camera Diagram and Controls
Now take a moment to familiarize yourself with the key areas of camera controls by reviewing the illustrations.
A
F
Z
O
O
M
6
.
5
-
1
9
.
5
M
M
1
:
2
.
8
O
L
Y
M
P
U
S
L
E
N
S
DC-IN jack
VIDEO-OUT jack
Connector cover
Lens cap
and retainer
string
USB connector
5-pin external
flash socket
Self-timer lamp
Strap eyelet
Flash
Shutter button
Zoom lever
Mode dial
Lens
Diopter adjustment dial
Battery compartment lock
Battery compartment cover
Tripod socket
AF target mark
Macro/Spot button
Print button
Arrow pad
Flash mode button
Erase button
Monitor
Viewfinder
OK/Menu button
Manual focus button
Monitor button
Card access lamp
Custom button
Protect button
Rotation button
Camera Settings in Shooting Mode as shown in Monitor
Camera Settings in Playback Mode as shown in Monitor
Battery check
Exposure compensation
Protect
White balance
ISO
Date and time
File number
Record mode
Print reserve
Number of prints
Number of pixels
FILE: 100-0016
02.06.10 12:30
ISO400
SIZE: 1984X1488
X10
Battery check
Exposure compensation
Exposure differential
AF Target mark
Shooting mode
Flash stand-by/Camera movement warning
Flash charge
Green lamp
Flash mode
Memory gauge
Spot metering
Macro mode
Super macro mode
Number of storable
still pictures
Seconds remaining
F2.8 1/800
2288x1712
0.0
Drive mode
Self-timer
AE lock/AE memory
Shutter speed
Aperture
value
White balance
ISO
Record mode
Number of pixels
AEL
TIP: For best results, Olympus strongly recommends using four AA nickel metal
hydride (NiMH) rechargeable batteries. An optional Olympus AC adapter also
is available, and is recommended when downloading images to ensure a consistent
power supply.
See the C-4000 Zoom Basic Manual for more information on battery use.
PREPARE THE CAMERA FOR USE
Battery compartment lock
Load the batteries
The CR-V3 lithium batteries included with your C-4000 Zoom
are much more powerful than standard AA alkaline batteries.
Please note that they are not rechargeable.
Load the two CR-V3 lithium batteries. Note they can only be
inserted with the indentations facing each other. The contact terminals
must be inserted first, as shown at right. Never force battery insertion.
When loading CR-V3 batteries ignore the illustration on the camera body.
If you are loading four AA type batteries into the compartment, load them as
indicated in the illustration on the camera body. Close the cover and lock the
battery compartment door.
VT452702 Printed in Japan

Other manuals for Olympus CAMEDIA C-4000 Zoom

Questions and Answers

  • E
    elizabethsosaSep 10, 2025
    Why do the colors of my Olympus Digital Camera indoor pictures look unnatural?
    • S
      Sherri WiseSep 10, 2025
      If the colors of your Olympus Digital Camera indoor pictures look unnatural, it may be because indoor lighting can affect the picture’s colors, so set the white balance according to the lighting. If there is no white in the subject, try to include something white in the picture or shoot using the Fill-in flash mode. The white balance setting might also be wrong, so adjust it to the light source.
  • T
    Tonya KaufmanAug 23, 2025
    What to do if my Olympus CAMEDIA C-4000 Zoom Digital Camera doesn't take a picture when I press the shutter button?
    • T
      twilliamsAug 23, 2025
      If your Olympus Digital Camera isn't taking pictures, ensure the mode dial is set to a position other than . If the memory gauge is full, wait until there is room. If the flash hasn't finished charging, wait until the orange lamp stops blinking. If the card access lamp blinks after shooting in the mode, wait until it stops. Check the error code chart if there is a problem with the card. If the card is full, erase unwanted pictures or insert a new card. Also, replace the batteries if they ran out of power, or if the monitor indications disappear. Finally, ensure there is a card in the camera and that it isn't write-protected.
  • J
    Joseph JohnsonAug 25, 2025
    How to fix the flash if it does not fire on my Olympus CAMEDIA C-4000 Zoom?
    • A
      amberrobertsonAug 25, 2025
      If the flash on your Olympus Digital Camera doesn't fire, first check if the flash is set to the off mode and select another mode. If the subject is already well-lit, set the flash to Fill-In mode. Also, if sequential shooting is on, set the drive mode to single-frame shooting. Note that the flash will not fire when recording movies or when Panorama shooting is set. Finally, if FUNCTION is set to BLACK/WHITE BOARD, set FUNCTION to OFF.
  • D
    Dennis PattersonAug 27, 2025
    How to troubleshoot out of focus pictures with my Olympus CAMEDIA C-4000 Zoom?
    • B
      blairraymondAug 27, 2025
      If your Olympus Digital Camera pictures are out of focus, ensure you hold the camera correctly and press the shutter button steadily. Position the AF target mark on the subject, or use the focus lock. Clean the lens with a soft dry cloth if it's dirty. If using the self-timer, look into the viewfinder when pressing the shutter. If using manual focus, ensure the correct focal distance is set.
  • L
    Lindsey WernerAug 27, 2025
    Why can't I see the pictures I've taken on my Olympus CAMEDIA C-4000 Zoom's monitor?
    • C
      Crystal KellerAug 27, 2025
      If you can't see your pictures on the Olympus Digital Camera monitor, ensure the mode dial is set to . If NO PICTURE appears, record some pictures. Check the error code chart if there's a problem with the card. Note that the monitor does not function when the camera is connected to a TV.
  • R
    rhondaperezAug 29, 2025
    How to fix a blurry monitor on my Olympus CAMEDIA C-4000 Zoom?
    • J
      Joseph MorganAug 29, 2025
      If the monitor on your Olympus Digital Camera is not clear, adjust the brightness. If the monitor is exposed to direct sunlight, block the sunlight or move out of the sunlight.
  • M
    Mary HallSep 18, 2025
    What to do if a write-protect adhesive seal is affixed to the card in my Olympus CAMEDIA C-4000 Zoom Digital Camera?
    • T
      Timothy MurphySep 18, 2025
      Use the card after peeling off the seal. Do not reuse the write protect seal.
  • B
    Brett JonesSep 12, 2025
    Why do my subject’s eyes appear red in Olympus CAMEDIA C-4000 Zoom pictures taken with the flash?
    • C
      Christopher DillonSep 12, 2025
      The “red-eye phenomenon” occurs with all cameras when a flash is used. It is caused by light from the flash reflecting off the retina at the back of the eye. Red-eye varies depending on the individual and the shooting conditions such as ambient lighting. Use of the Red-eye reduction mode significantly reduces this phenomenon.
  • A
    Anthony ReedSep 8, 2025
    How to correct the date on my Olympus CAMEDIA C-4000 Zoom Digital Camera photos?
    • C
      Christine MarshallSep 8, 2025
      If the date recorded with your Olympus Digital Camera image data is wrong, set the date, as the clock adjustment is not factory-preset. If the camera has been left for too long with the batteries removed, set the date again.
  • E
    Ethan RobersonSep 5, 2025
    Why are my Olympus CAMEDIA C-4000 Zoom pictures too dark?
    • B
      bowmantaylorSep 5, 2025
      If your Olympus Digital Camera pictures are too dark, make sure your finger isn't blocking the flash. Ensure the subject is within the flash's working range. If the flash mode is set to Off, select another flash mode. If the subject is small and backlit, set the flash to Fill-In mode or use the spot metering mode. Note that using the sequential mode can result in darker pictures due to higher shutter speeds.

Summary

Start Here

Unpacking the Box Contents

Attach Carrying Strap and Lens Cap Retainer

Attach the strap and lens cap retainer string to make the camera easier to handle and prevent loss of the lens cap.

Prepare the Camera for Use

Load the Batteries

Load the two CR-V3 lithium batteries, noting indentations and contact terminals must be inserted first. AA batteries can also be used.

Insert the SmartMedia Card

Insert the SmartMedia card where the camera stores pictures. Pictures remain on the card even when the camera is turned off.

Turning On the Camera

Turn the Camera ON

Squeeze lens cap tabs, turn Power/Mode dial counter-clockwise to 'P'. Monitor activates briefly then turns off.

Set the Date and Time

Recommended to set date/time for image file naming. Access via SET tab and use arrow keys to adjust.

Camera Diagram and Controls

Familiarize yourself with key camera controls by reviewing the illustrations of buttons, dials, and displays.

Taking Pictures

Picture Taking with Viewfinder

Compose using viewfinder crosshairs. Press shutter halfway for focus/exposure confirmation, then fully to shoot.

Picture Taking with Monitor

Press IOI once. Frame subject on monitor. Press shutter halfway for confirmation, then fully to shoot.

Zooming

Use the zoom lever to get closer (telephoto, pull toward 'T') or capture wider shots (wide-angle, push toward 'W').

Flash Modes

Cycle through modes: Auto, Red-eye Reduction, Fill-in, Slow Sync, and Flash Off.

Number of Storable Pictures

Understand storage capacity (approx. 16 pictures in HQ mode) and how to check remaining frames.

Viewing and Erasing Pictures

Viewing Pictures

Access Playback mode by turning dial to or pressing twice. Use to scroll through images.

Erasing Pictures

Delete unwanted photos using Single-Frame Erase or All-Frame Erase. Once erased, pictures cannot be restored.

Connecting the Camera to a Computer

Installing the Camera Software

About the Olympus CAMEDIA Master 4.0 CD-ROM

The CD includes CAMEDIA Master 4.0, USB Driver for Windows 98, and Adobe Acrobat Reader.

Olympus CAMEDIA C-4000 Zoom Specifications

General IconGeneral
Optical Zoom3x
Digital Zoom4x
Storage MediaSmartMedia Card
Sensor Size1/1.8 inch
Image Sensor1/1.8 inch CCD
Display1.8-inch TFT LCD
ISO Range100, 200, 400
Battery4 x AA batteries
Image Resolution2272 x 1704
Aperture Rangef/2.8 - f/4.9
Shutter Speed1/1000

Related product manuals