16
EN
Preparing the camera and ow of operations
1
Setting the date/time
Date and time information is recorded on the card together with the images. The le
name is also included with the date and time information. Be sure to set the correct
date and time before using the camera. Some functions cannot be used if the date has
not been set.
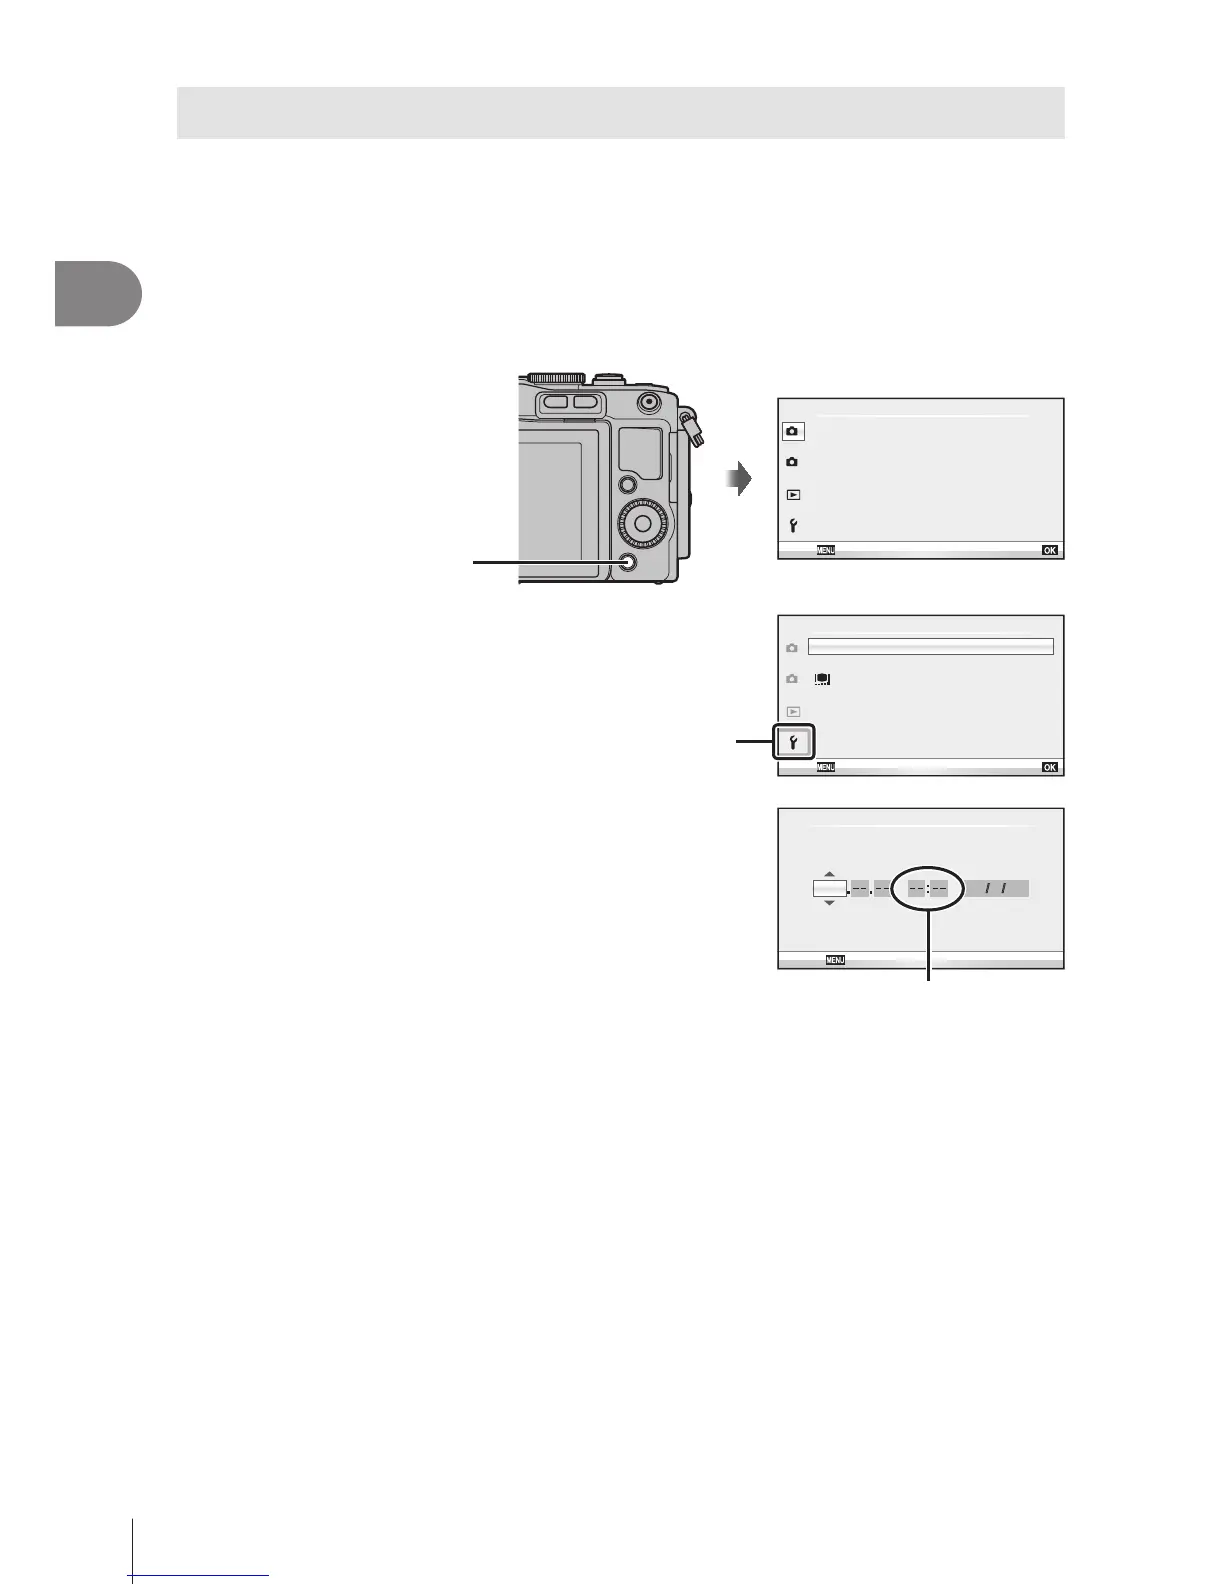
1
Display the menus.
• Press the MENU button to display the menus.
MENU button
4:3
j
D
2
1
Shooting Menu 1
Card Setup
Reset/Myset
Picture Mode
Image Aspect
Back Set
OnDigital Tele-converter
2
Select [X] in the [d] (setup) tab.
• Use FG on the arrow pad to select
[d] and press I.
• Select [X] and press I.
X
j
±0
k
±0
W
2
1
--.--.-- --:--
Setup Menu
English
5sec
c
/
#
Menu Display
Firmware
Rec View
Back Set
[d] tab
3
Set the date and time.
• Use HI to select items.
• Use FG to change the selected item.
• Use FG to select the date format.
X
Y M D Time
2013 Y/M/D
Cancel
The time is displayed
using a 24-hour clock.
4
Save settings and exit.
• Press Q to set the camera clock and exit to the main menu.
• Press the MENU button to exit the menus.