3
Quick Start Guide ENGLISH
Please note: Apple and the Apple logo are trademarks of
Apple Inc., registered in the U.S. and other countries.
App Store is a service mark of Apple Inc.
Google Play Store
https://play.google.com/store/apps/details?id=com.olympus.epview
Please note: Google Play is a trademark of Google LLC.
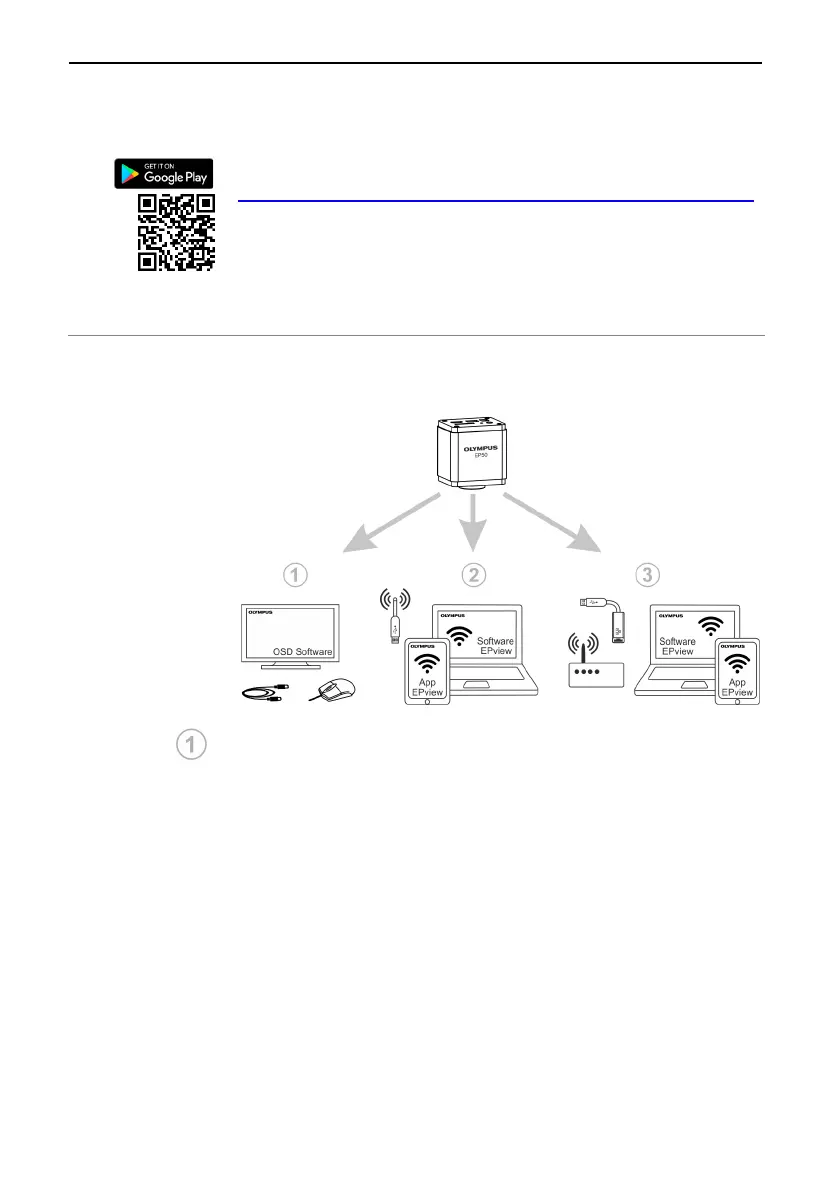
6 Application scenarios of the camera
You can use the OLYMPUS EP50 in different application
scenarios. Each application scenario requires a different hardware
environment.
Using the camera with OSD software
For this application scenario, apart from the camera and micro-
scope, you only need a monitor with an HDMI port, the supplied
USB mouse and the OLYMPUS EP50 OSD software that is
installed on the camera. A computer or a network connection is not
required to operate the camera.
OSD stands for On-Screen Display.
Setup overview
Connect the camera to a HDMI-capable monitor (or a
projector) using the supplied HDMI cable.
Connect the supplied USB mouse to the camera.
Insert the supplied SD card into the camera.
Connect the camera to the power supply and switch it on.
Switch on the monitor and view the live-image in the OSD
software.