EasyManua.ls Logo

Olympus EVIS EUS EU-ME3 - User Manual

Olympus EVIS EUS EU-ME3
2 pages
Print Icon
To Next Page IconTo Next Page
Loading...
Frequently Used Functions
Switching the Frequency
Press the Frequency [+] or [–] key to switch the ultrasound
transmission frequency.
This cannot be changed when using THE mode.
Adjusting Gain / Contrast
Press the [+] or [-] key for Gain or Contrast.
Turning the s-FOCUS On
s-FOCUS is a function that reduces the change in resolution with distance from the ultrasound transducer
surface (focus-dependent) by combining the received signals obtained from multiple transmissions
(aperture synthesis processing).
· This cannot be turned on or off while an ultrasound image is frozen.
· When s-FOCUS is turned on, the focus mark (leftward triangle “
” mark)
on the monitor display switches to the focus area mark (downward
triangle “ ” mark above the ultrasound image and upward triangle “
mark below it).
* Cannot be performed in CHE.
Turning Enhance On Switching to THE Mode
THE (THE-P / THE-R)
This uses the harmonic component bounced back from
the tissue for imaging.
Press the mode selector buttons to switch the mode.
THE-P THE mode that prioritizes penetration depth.
THE-R THE mode that prioritizes resolution.
Press a button in
ENHANCE section and
turn on ENHANCE.
STRUCTURE ENHANCE
Image processing that reduces speckle noise while
highlighting the boundaries of structures. Processing level
can be adjusted with the [+] or [–] key for Adjust key 1.
ECHO ENHANCE
Image processing that increases the overall contrast of
an image while reducing noise.
BRIGHTNESS ENHANCE
Image processing that increases contrast while
maintaining the brightness level of the entire image.
Adjusting the Display Range
Adjustable depth/range is variable depending on the type of product connected.
Ultrasound Probe: 2, 3, 4, 6, 9 & 12cm
Ultrasound Endoscope: 2, 3, 4, 5, 6, 7, 8, 9, 10, 11 & 12cm
Press the DEPTH/RANGE or key.
key: DEPTH/RANGE becomes smaller.
key: DEPTH/RANGE becomes larger.
ENDOSCOPIC ULTRASOUND CENTER OLYMPUS EU-ME3
Question and Answer IconNeed help?

Do you have a question about the Olympus EVIS EUS EU-ME3 and is the answer not in the manual?

Overview

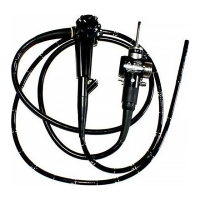
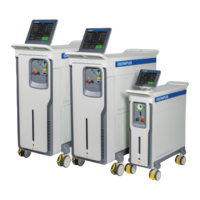
The Olympus EVIS EUS Endoscopic Ultrasound Center EU-ME3 is a sophisticated medical device designed for endoscopic ultrasound imaging, offering a range of functions to optimize image quality, facilitate measurements, and enhance user interaction.

Image Acquisition and Enhancement

Switching the Frequency: The device allows users to switch the ultrasound transmission frequency using the [+] or [-] keys. This feature is crucial for adapting the imaging to different tissue depths and desired resolutions. However, frequency adjustment is not possible when operating in THE mode.

Adjusting Gain / Contrast: Users can adjust the gain and contrast of the ultrasound image using the [+] or [-] keys. Gain controls the overall brightness of the image by amplifying the received signals, while contrast enhances the difference between light and dark areas, improving the visibility of structures.

Turning Enhance On: The ENHANCE section provides buttons to activate various image enhancement features:

  • STRUCTURE ENHANCE: This function reduces speckle noise while highlighting the boundaries of structures, making them clearer. The processing level can be adjusted using the [+] or [-] keys for Adjust key 1.
  • ECHO ENHANCE: This feature increases the overall contrast of the image and reduces noise, leading to a sharper and more defined ultrasound display.
  • BRIGHTNESS ENHANCE: This function increases contrast while maintaining the overall brightness level of the entire image, ensuring that details are visible without making the image too dark or too bright.

Switching to THE Mode (THE-P / THE-R): THE mode utilizes the harmonic components of the ultrasound signal reflected from tissue for imaging. This technique can improve image quality by reducing artifacts. The mode selector buttons allow users to switch between:

  • THE-P: This mode prioritizes penetration depth, making it suitable for visualizing deeper structures.
  • THE-R: This mode prioritizes resolution, offering finer detail for superficial structures.

Adjusting the Display Range: The depth/range of the ultrasound image can be adjusted using the [+] or [*] keys. The [→] key makes the depth/range smaller, while the [*] key makes it larger.

  • Adjustable Depth/Range: The available depth/range varies depending on the connected product.
    • Ultrasound Probe: 2, 3, 4, 6, 9 & 12cm
    • Ultrasound Endoscope: 2, 3, 4, 5, 6, 7, 8, 9, 10, 11 & 12cm

Turning the s-FOCUS On: s-FOCUS is an advanced function that reduces the change in resolution with distance from the ultrasound transducer surface (focus-dependent). It achieves this by combining received signals obtained from multiple transmissions through aperture synthesis processing.

  • Usage: This function cannot be turned on or off while an ultrasound image is frozen.
  • Visual Indicator: When s-FOCUS is active, the focus mark (leftward triangle) on the monitor display changes to a focus area mark (downward triangle above the ultrasound image and upward triangle below it).
  • Limitation: Cannot be performed in CHE mode.

Adjusting the Focus Number: The focus can be adjusted on the FOCUS MENU screen, accessible by pressing the FOCUS button on the B ADJUST tab.

  • AUTO Mode: Pressing the AUTO button automatically sets the focal position, PRESENT FOCUS, FOCUS NUM, and FOCUS LOCATION.
  • MANUAL Mode: Pressing the MANUAL button allows users to select the focal position using F1 to F12 buttons. Up to two focal points can be selected.

Adjusting the LE Reduction: This function suppresses low-level signals in received signals and adjusts the processing level to reduce noise. The processing level can be adjusted using the [+] or [-] keys for LE REDUCTION.

Adjusting the STC (Swept Gain Control): The STC allows users to adjust the brightness for specific distances using the brightness adjustment buttons ([+] and [-]). This helps compensate for signal attenuation at different depths. The STC can also be adjusted by tapping the brightness adjustment bar.

Measurement and Review

Using CINE REVIEW: This feature allows users to review previously acquired ultrasound images.

  • Process: Freeze the ultrasound image and press the CINE REVIEW key to switch to the image display.
  • Navigation:
    • Swiping or pressing to the right displays newer images (frame numbers increase).
    • Swiping or pressing to the left displays older images (frame numbers decrease).
  • Method: Image selection can be done via key operation or trackpad.

Distance Measurement: The device facilitates accurate distance measurements on the ultrasound image.

  • Process:
    1. Press the MEASURE key to display the measurement screen on the touch panel.
    2. A measurement mark (starting point) appears in the center of the ultrasound image.
    3. Swipe the trackpad to move the measurement mark to the desired starting point.
    4. Press the SET key or tap the trackpad to confirm the starting point. A second measurement mark (ending point) appears near the starting point.
  • Visuals: The measurement display area shows the measured distance (e.g., D1: 30.0mm), along with a measurement mark for the starting point, a measurement line, and a measurement mark for the ending point.

User Interaction and Customization

Enter Comments: Users can add comments to the ultrasound images.

  • Process:
    1. Press the COMMENT key to switch the touch panel to the comment input screen, where a cursor mark appears.
    2. Swipe the trackpad to move the cursor to the desired location for the comment.
    3. Use the keyboard buttons on the touch panel to enter the comment.
    4. Pressing the COMMENT key again confirms the comment.
  • Registered Comments: Registered comment buttons appear in the upper section of the comment input screen. Pressing a registered comment button displays the pre-saved comment on the monitor.

General Information

  • Disclaimer: This document serves as a quick reference guide. Users should refer to the relevant User's Manual(s) for detailed instructions, warnings, and cautions. It is intended for trained healthcare professionals.
  • Trademarks: Trademarks, product names, logos, or trade names used in this document are generally registered trademarks or trademarks of each company.
  • Specifications: Specifications, design, and accessories are subject to change without notice or obligation from the manufacturer.

Contact Information

  • Olympus Australia Pty Ltd:
    • Address: 3 Acacia Place, Notting Hill, Victoria, Australia 3168
    • Customer Service: 1300 132 992
    • Website: www.olympus.com.au
  • Olympus New Zealand Limited:
    • Address: 28 Corinthian Drive, Albany, Auckland NZ 0632
    • Customer Service: 0508 659 6787
    • Website: www.olympus.co.nz

Olympus EVIS EUS EU-ME3 Specifications

General IconGeneral
BrandOlympus
ModelEVIS EUS EU-ME3
CategoryMedical Equipment
LanguageEnglish

Related product manuals