Do you have a question about the Olympus EU-ME2 and is the answer not in the manual?
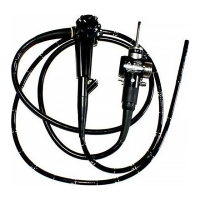
Insert mechanical or electronic scanning scopes into the appropriate sockets and tighten the connector lever.
Press the POWER switch and confirm the green indicator light is lit for system startup.
Press the VIDEO SOURCE key on the keyboard to toggle between US and EVIS imaging modes.
Press the ID INPUT key to access the Patient Data screen for entering examination details.
Choose B mode, FLOW mode, Pulse Wave Doppler, or Elastography mode via keyboard or touch panel.
Insert the Portable Memory into the port until it clicks and ensure the Access Indicator is lit.
Use the MOVE DATA key to select data types and initiate transfer, monitoring the progress bar.
Press the EXAM END key to return the EU-ME2 to its default original settings.
Turn off the POWER switch and detach the scope by turning the connector lever counterclockwise.
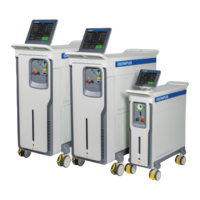
The Olympus EU-ME2 and EU-ME2 Premier Plus are advanced ultrasound processors designed for medical imaging, specifically for use with ultrasound endoscopes. These devices are integral to the EVIS EUS (Endoscopic Ultrasound) system, providing comprehensive functionality for diagnostic and interventional procedures.
The primary function of the EU-ME2 and EU-ME2 Premier Plus is to process ultrasound signals from endoscopes, generating high-quality images for medical professionals. They support both mechanical and electronic scanning endoscopes, offering versatility in clinical applications. The system allows for real-time visualization of internal structures, aiding in the diagnosis and staging of various conditions, particularly within the gastrointestinal tract and surrounding organs.
Key operational modes include:
The device integrates with a keyboard and a monitor to display patient data, ultrasound images, and system settings. It features an intuitive user interface with dedicated keys for various functions, simplifying operation during examinations.
The Olympus EU-ME2 and EU-ME2 Premier Plus are designed for efficient, reliable, and user-friendly operation in endoscopic ultrasound procedures, providing essential imaging capabilities for modern medical diagnostics.
| Brand | Olympus |
|---|---|
| Model | EU-ME2 |
| Category | Medical Equipment |
| Language | English |