ng
OLYMPUS
Master
2
System
requirements
and
installation
of
OLYMPUS
Il!!J!,~,'flt;
~,r.t'
"',
~t·
r<'%;¥ 'K1M2W.e
__
."iMIUlHlil;,."'"
Install the OLYMPUS Master 2 software by
referring to the included installation guide.
Windows
After the computer detects the camera, a
message indicating the completion
of
the
setting appears. Confirm the message and
click "OK". The camera is recognized as a
removable disk.
Connecting
the
camera
to
a
i.".~!l"llSIl
..
t@'m1@!jf;)fjsm"J!0vt#fj!J!¥NtJ!/!!mi@1/!!ffiiii~'ffii)%Vii'it«Ii@#M#
Mi
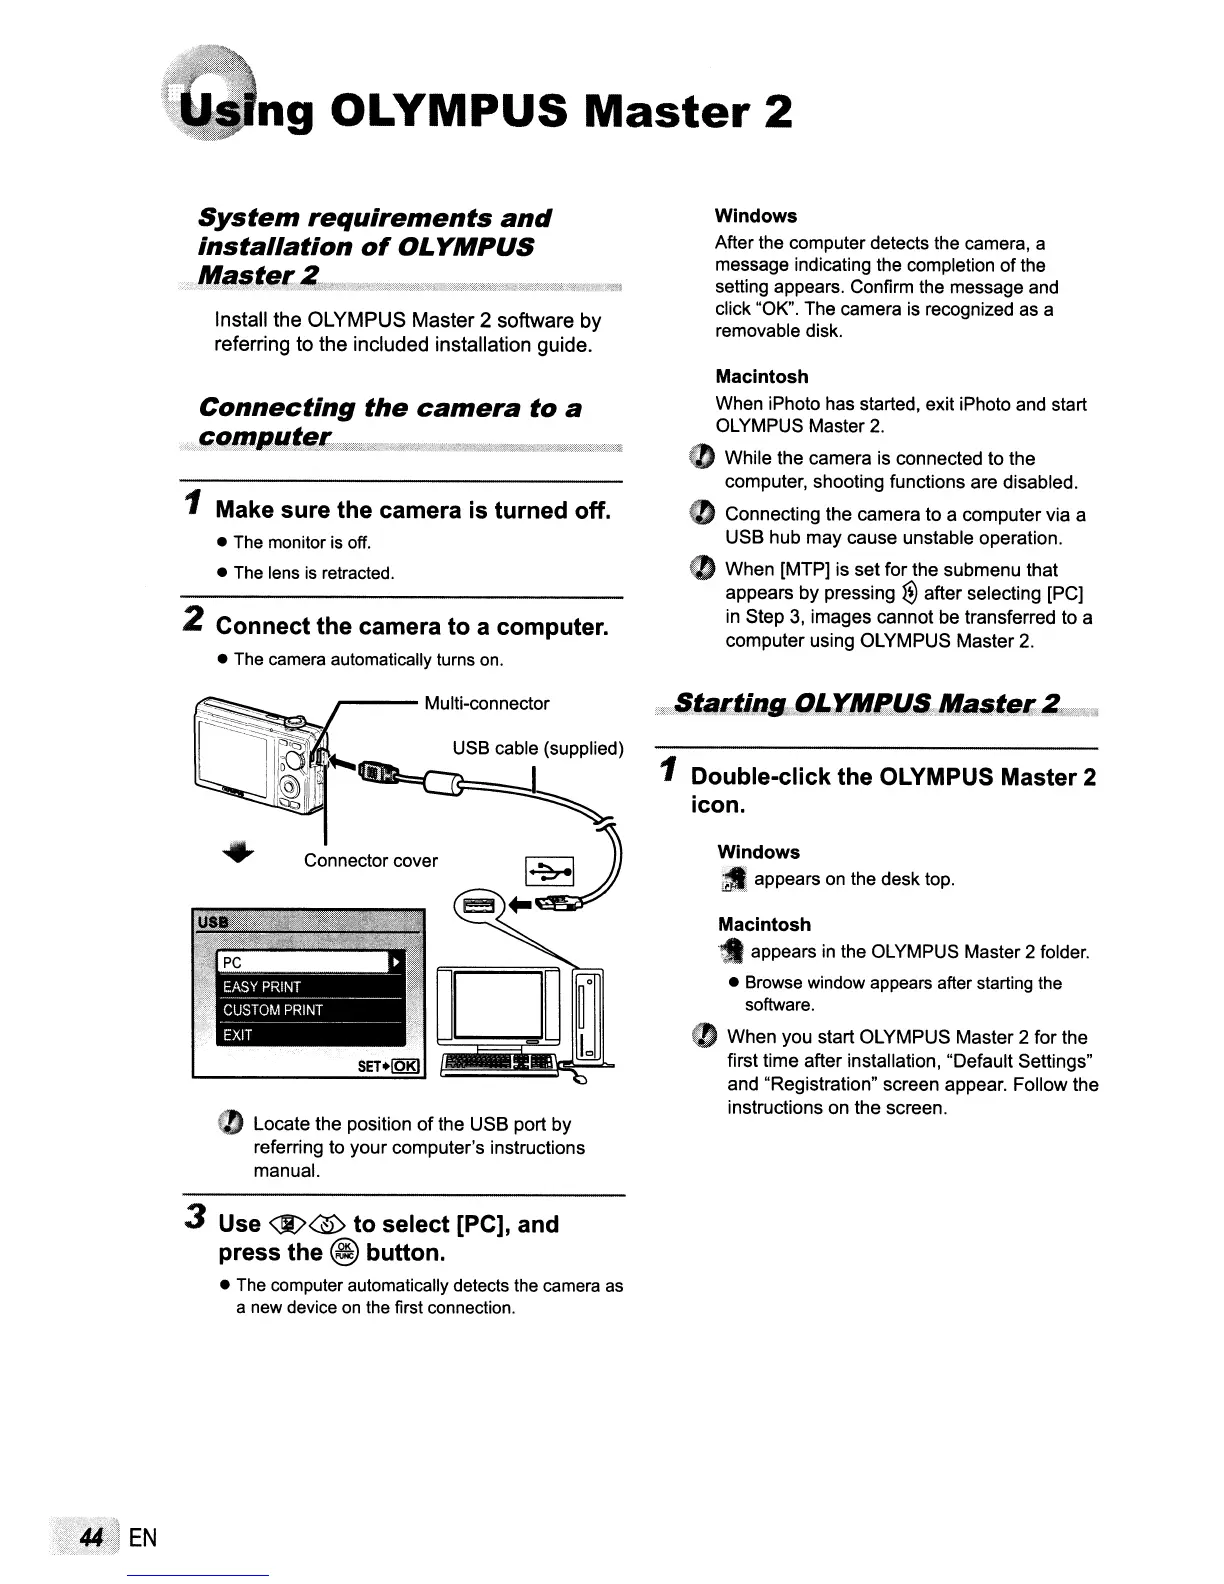
1 Make sure the camera is turned off.
• The monitor
is
off.
•
The
lens
is
retracted.
2 Connect the camera to a computer.
•
The
camera automatically turns
on.
Macintosh
When iPhoto has started, exit iPhoto and start
OLYMPUS Master
2.
CD
While the camera is connected to the
computer, shooting functions are disabled.
I)
Connecting the camera to a computer via a
USB hub
may
cause unstable operation.
CD
When [MTP] is
set
for the submenu that
appears by pressing
@after selecting [PC]
in Step
3,
images cannot be transferred to a
computer using OLYMPUS Master 2.
r----
Multi-connector
(t
Locate the position
of
the USB port by
referring to
your
computer's instructions
manual.
Windows
;dI;
appears on the desk top.
Macintosh
• appears in the OLYMPUS Master 2 folder.
• Browse window appears after starting
the
software.
<0
When you start OLYMPUS Master 2 for the
first time after installation, "Default Settings"
and "Registration" screen appear. Follow the
instructions on the screen.
1 Double-click the OLYMPUS Master 2
icon.
USB cable (supplied)
Connector cover
3 Use
<:1>$
to select [PC], and
press the
@ button.
•
The
computer automatically detects the camera
as
a
new
device
on
the
first connection.
EN