EN-2 OmniScan X3 — Getting Started Guide
• DC power adaptor
• Power cord (model varies according to country)
•Microfiber cloths
• USB key (16 GB)
• Wireless LAN dongle (optional item, sold separately—availability depends on your location)
• USB flash drive (key), which contains:
—Instrument software
— OmniScan X3 Getting Started Guide
— OmniScan X3 User’s Manual
— OmniScan MXU Software User’s Manual
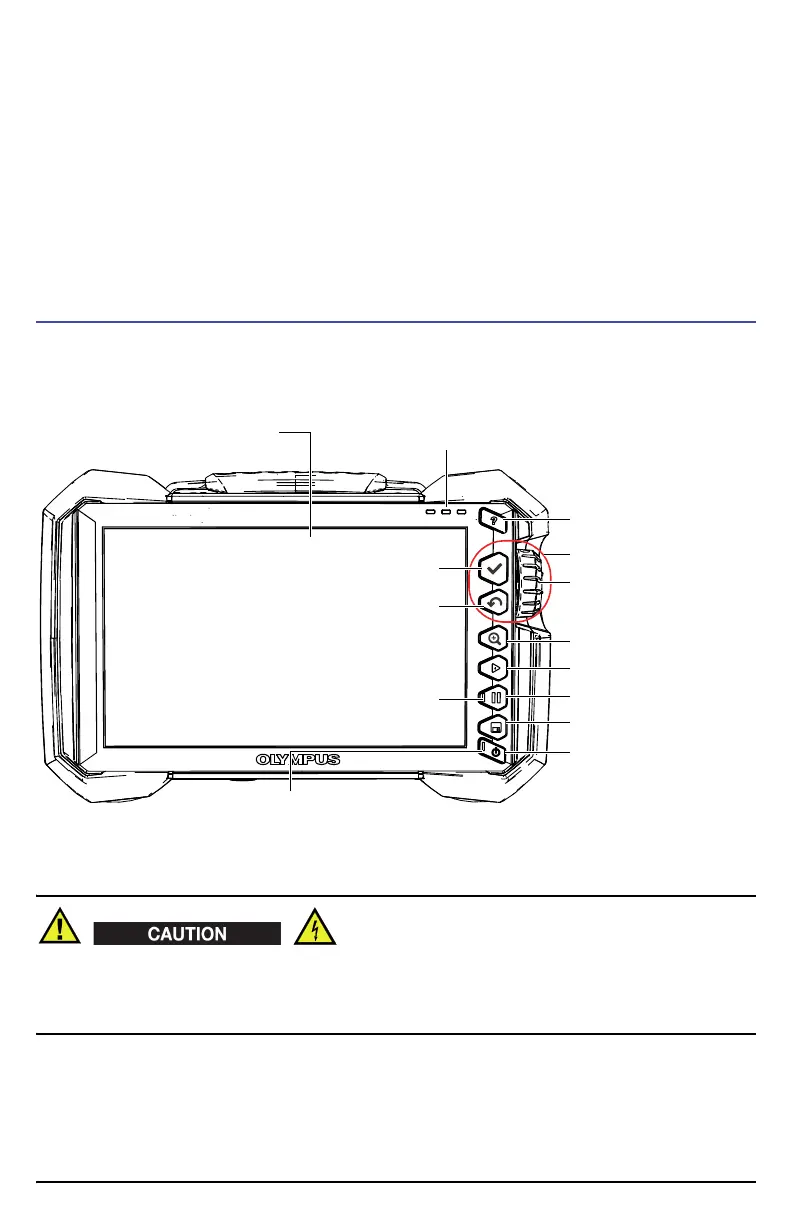
Instrument Overview and Connections
Review all safety information before use, including “Battery Precautions” on page 5 and “Electrical
Warnings” on page 6.
To avoid the risk of electric shock, do not touch the inner conductor of the probe connectors. Up to
350 V can be present on the inner conductor of the UT connectors, and up to 120 V can be present on
the PA connector. The warning symbols between the connectors in the illustration below warn of this
electric shock risk.
Scroll knob: rotate to select a
button or change a value.
Zoom key
Power key: press to start or
shut down the instrument.
Alarm indicator lights flash red to indicate trigger status of
alarms set within MXU software.
Display touch screen: touch lightly with
finger to select an interface element.
Pause key
Help key
Save key
Acquisition indicator light:
Off = Inspection mode
On = Analysis mode
Power indicator light:
Off = instrument turned off. Flashing orange = turned off and charging.
Orange = turned off and fully charged. Green = turned on, or turned on and charging.
Flashing red = critical factor, needs immediate attention.
Play key
Accept key: press to activate current
selection and move on in menu.
Cancel key: press to cancel current
selection and move back in menu.
Main controls