29
EN
Shooting using various functions
4
4
Press the shutter button all the way.
• In [!](Red-eye reduction flash), after the pre-flashes, it takes about 1 second
before the shutter is released. Do not move the camera until shooting is complete.
• [!](Red-eye reduction flash) may not work effectively under some shooting
conditions.
•
#
AUTO, $ can be set in A mode.
• The lens may cast shadows over objects close to the camera, causing vignetting, or
be too bright even at minimum output.
• To prevent photographs from being overexposed, select mode A or M and choose a
high f-number, or reduce ISO sensitivity.
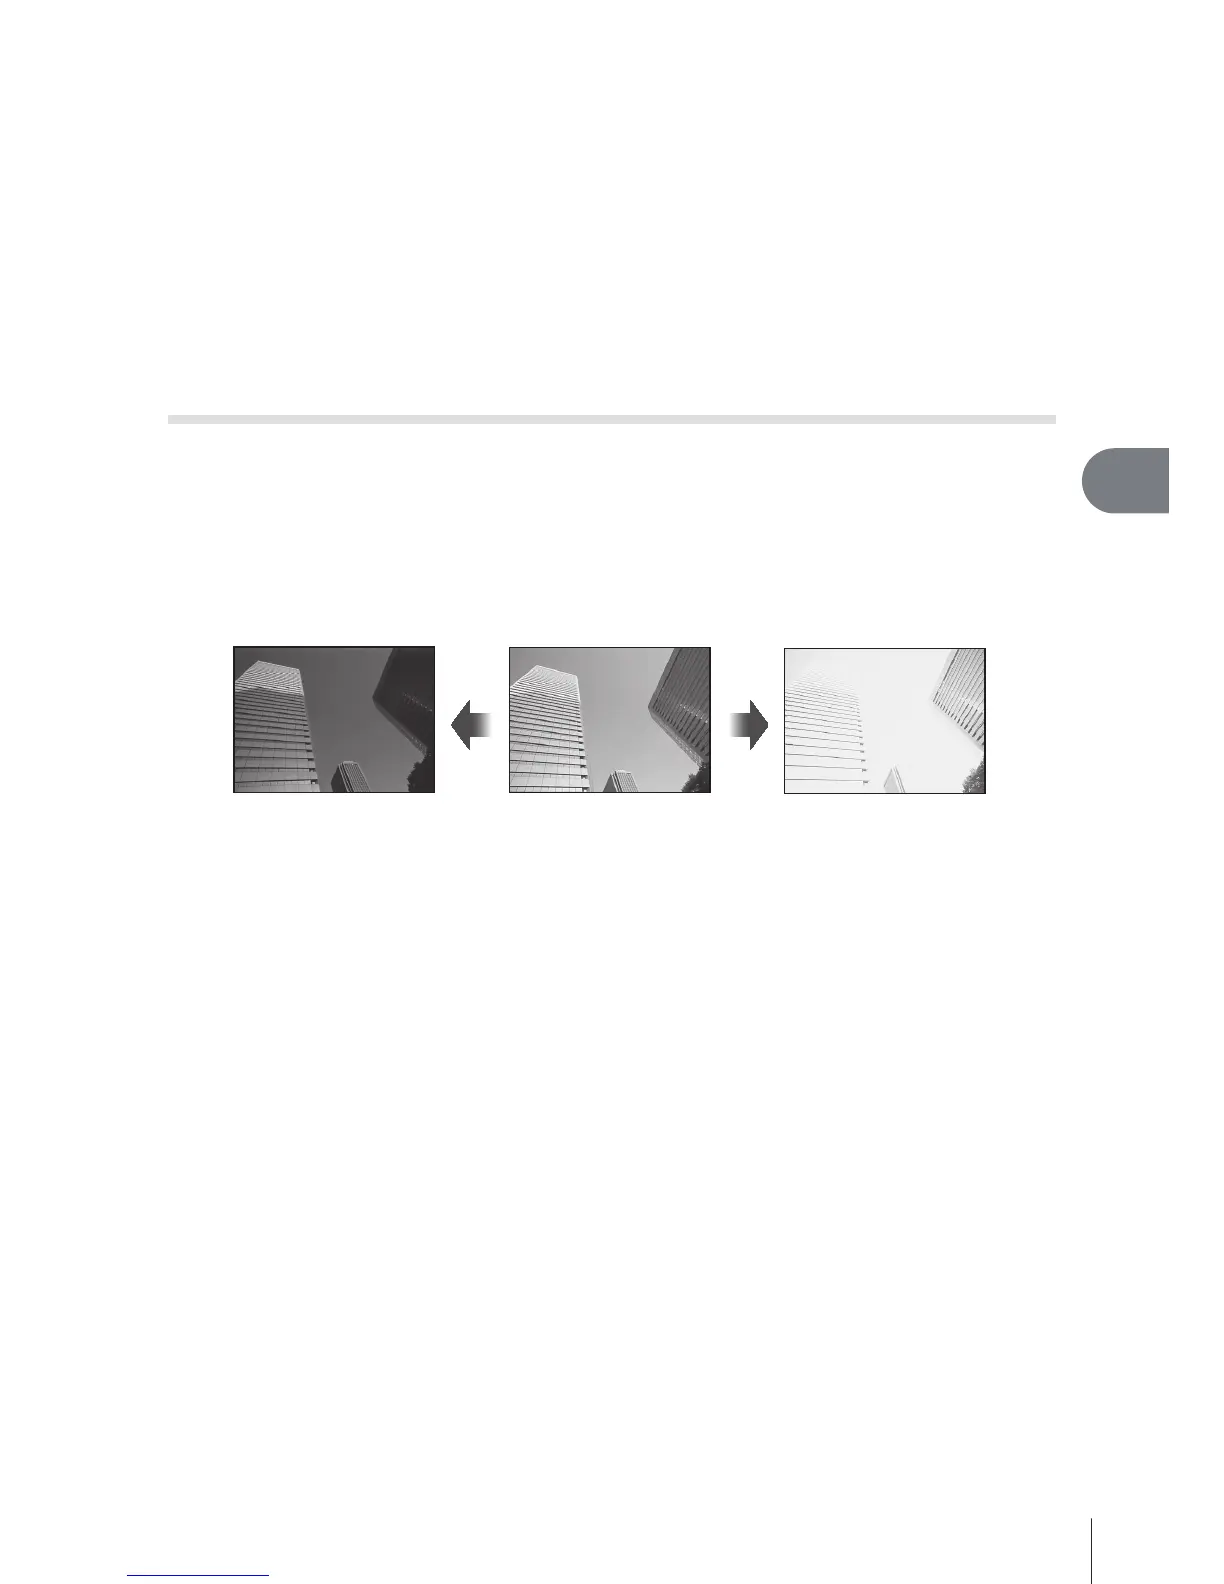
Exposure compensation
Compensates the brightness (appropriate exposure) adjusted by the camera.
1
Rotate the sub dial for the exposure compensation.
• Pressing the HI button after pressing the +/- button (F) can also perform the
adjustment.
• Choose positive (“+”) values to make pictures brighter, negative (“–”) values to make
pictures darker.
Negative (–) No compensation (0) Positive (+)
2
Shoot.