55
Connecting the camera to a computer
4
Pictures can be printed from the photo, index, postcard and calendar menus. The
explanation below uses the photo menu.
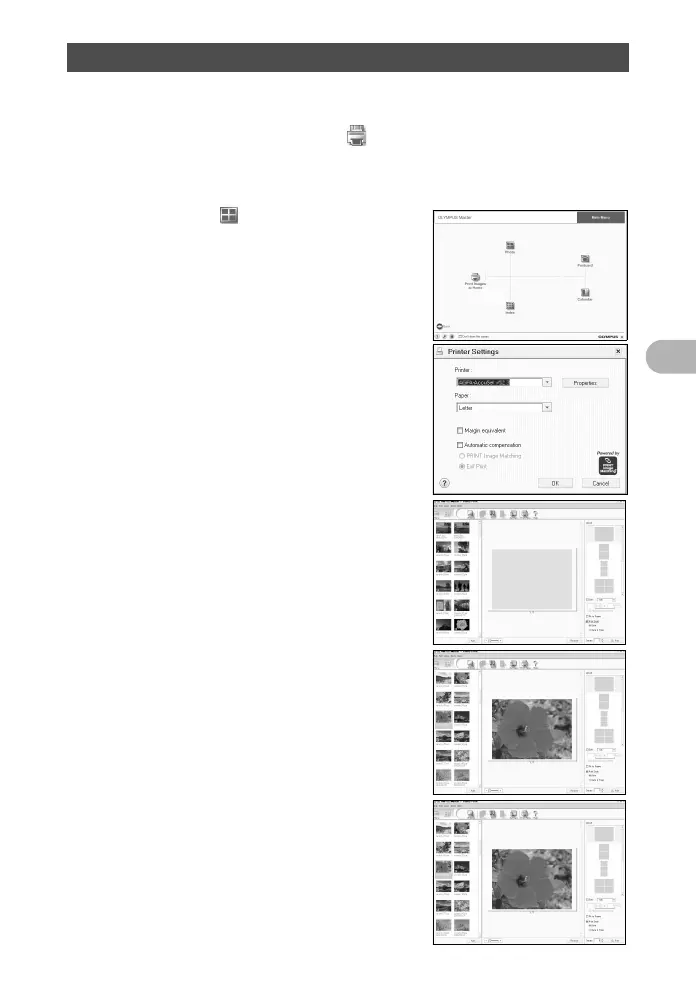
1 Click “Print Images at Home” on the OLYMPUS Master main
menu.
• The print menu is displayed.
2 Click “Photo” .
• The “Photo Print” window is displayed.
3 Click “Settings” in the “Photo Print”
window.
• The printer settings screen is displayed.
Make the necessary printer settings.
4 Select a layout and size.
• To print the date and time with your image,
check the box next to “Print Date”, and select
between “Date” and “Date & Time”.
5 Select the thumbnail image that you
want to print and click “Add”.
• A preview of the selected image is displayed
on the layout.
6 Select the number of copies.
Printing pictures
 Loading...