82
EN
Taking pictures with the
Olympus Wireless RC Flash
System
You can take pictures with a wireless ash when
using a ash compatible with the Olympus Wireless
RC Flash System. The camera’s built-in ash is used
for communication between the camera and ash.
• For details about operation of a wireless ash, refer
to the instruction manual for the special external
ash.
1
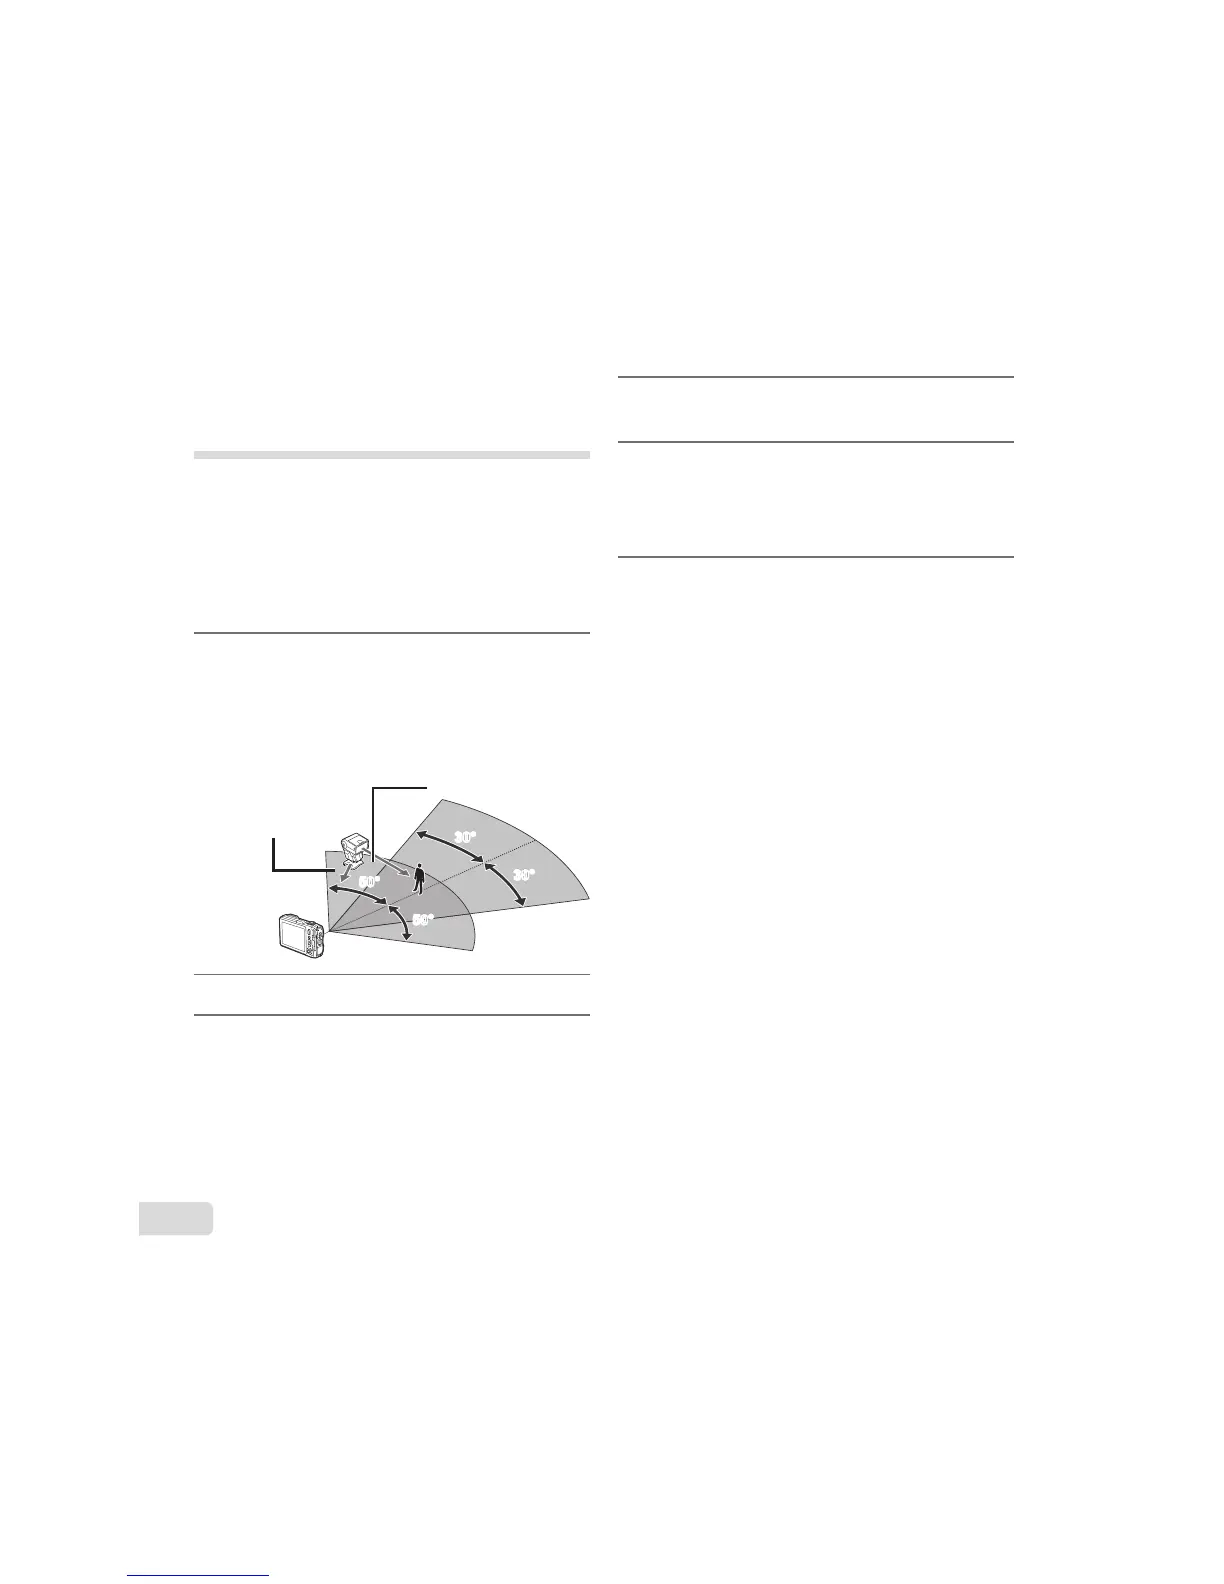
Set the wireless ash based on
the guidelines below.
Wireless ash setup range guidelines
• The setup range varies depending on the ambient
environment.
Point the remote
sensor toward the
camera
Flash direction
10m
30°
30°
5m
50°
50°
50°
50°
30°
30°
2
Turn on the wireless ash.
3
Use the MODE button on the
wireless ash to set to RC mode,
and make the channel and group
settings. (Channel: CH1, Group:
A)
4
Set [Remote Flash] (p. 41) on the
camera to [#RC].
5
Select the ash option in the
function menu, and then select
the remote control.
Ɣ “Using the ash” (p. 12)
6
Take a test shot to check the
operation of the ash and the
resulting image.
Ɣ Be sure to check the charge level of the
camera and wireless ash before taking
pictures.
Ɣ Although there is no limit on the number of
wireless ash units that are set up, usage of
a maximum of three units is recommended to
prevent malfunction due to interference with
each other.
Ɣ When the camera ash is set to [#RC], the
camera built-in ash is used for communication
with the wireless ash. It cannot used for
taking pictures.