43
OPTIMA 120
MANUTENZIONE ORDINARIA ROUTINE MAINTENANCE
SOSTITUZIONE LAMA
BLADE REPLACEMENT
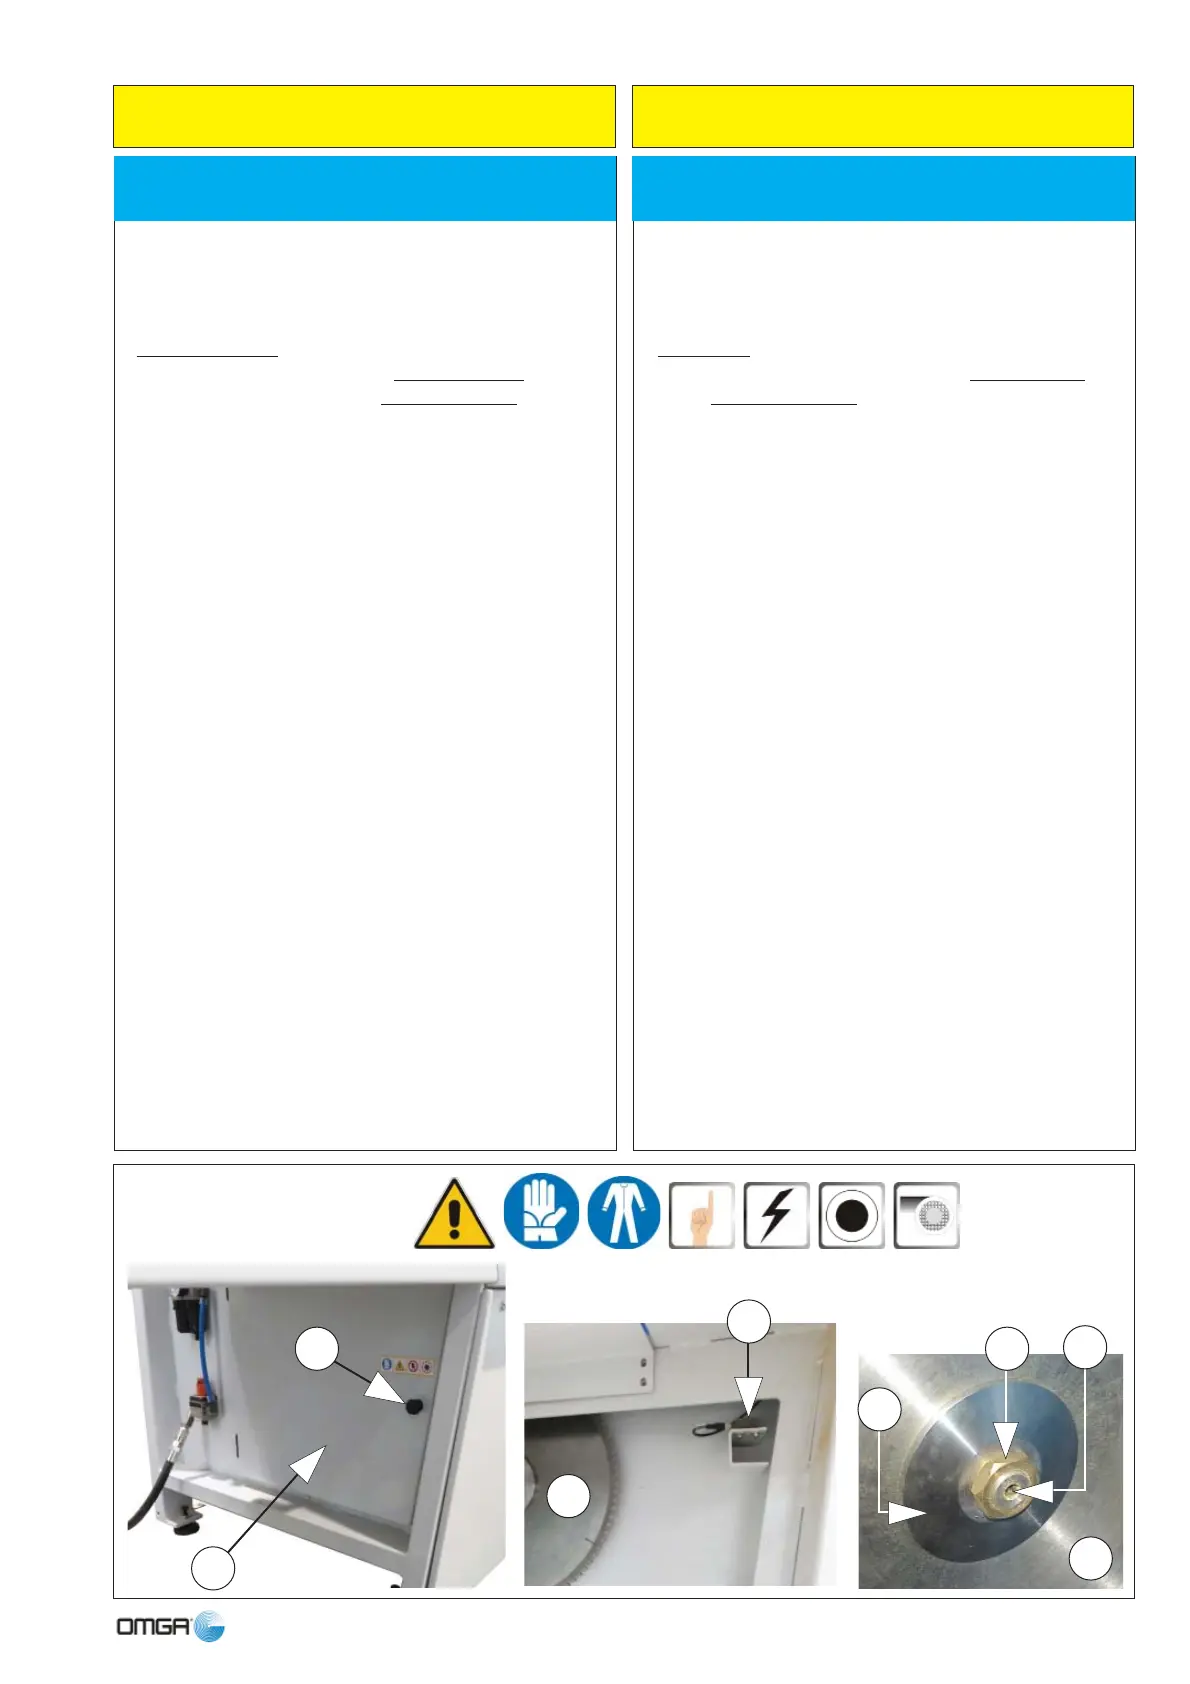
• trarre dalla busta chiavi in dotazione le due idonee per
bloccare l’albero mandrino (6) e per svitare il dado (5)
che blocca la fl angia esterna (4); togliere il dado (5) e
la fl angia esterna (4);
• si raccomanda di NON FAR CADERE la flangia
appena liberata dal dado (5); si raccomanda di riporla
con esso in luogo sicuro; si raccomanda di pulirla
accuratamente, accertando che non vi rimangano
incrostazioni di polvere o resina e/o veli di grasso;
• afferrare con entrambe le mani la lama (7) e sfi larla
delicatamente dalla sua sede verso l’esterno e
leggermente verso l’alto. Il carter (1) che copre il vano
lama non interferisce in alcun modo;
• riporre la lama dopo averla avvolta in robusta carta
da imballaggio per non provocare danni o ferite a
sè e ad altri;
• pulire accuratamente (sgrassare) sia la faccia del
mandrino sia la faccia della fl angia interna; non
utilizzare prodotti abrasivi o lamine;
• montare la lama nuova ponendo la massima
attenzione al senso di rotazione;
• rimontare la fl angia esterna (4);
• utilizzando le chiavi (in dotazione) riavvitare il dado
(5) sul mandrino (6).
Richiudere il carter (1) e avvitare a fondo il pomello (2).
L’operazione è conclusa.
• out of the tool bag supplied take the two wrenches to
lock the mandrel shaft (6) and to loosen the nut (5) that
holds the external fl ange (4) in place; remove the nut
(5) and the external fl ange (4);
• make sure that the fl ange that has just been released
by the nut (5) DOES NOT FALL; place it in a safe
place. Clean thoroughly to make sure that no encrusted
powder or resin or coatings of grease remain;
• grasp the blade (7) with both hands and delicately
remove it from its seat towards the outside and
slightly upwards. The guard (1) covering the blade
compartment does not interfere in any way;
• wrap the tool in tough packing paper so that it does
not cause damage or injure you or others;
• clean (degrease) the face of the mandrel and the
internal fl ange; do not use abrasive products
or abrasive strips or pads;
• fi t the new blade and make sure that its rotation
direction is correct;
• refi t the external fl ange (4);
• using the wrenches provided, tighten the nut (5)
on the saw spindle (6).
Close door (1) and lock it with knob (2).
The operation is now complete.
3
4
1
6
7
5
2
7


 To Next Page