Preparing for Initiation
■
While AID technology has been shown to improve overall glycemic control
3
, hypoglycemia
and hyperglycemia can still occur. Ensure the user is knowledgeable regarding hypoglycemia
prevention and treatment and troubleshooting hyperglycemia.
■
Set up realistic goals and a follow-up plan with the user to help ensure success.
■
Encourage the user to download the Omnipod 5 Simulator prior to
Omnipod 5 System start to experience a system overview
and interact with key features and functionality.
*See list of compatible devices at www.omnipod.com/compatibility.
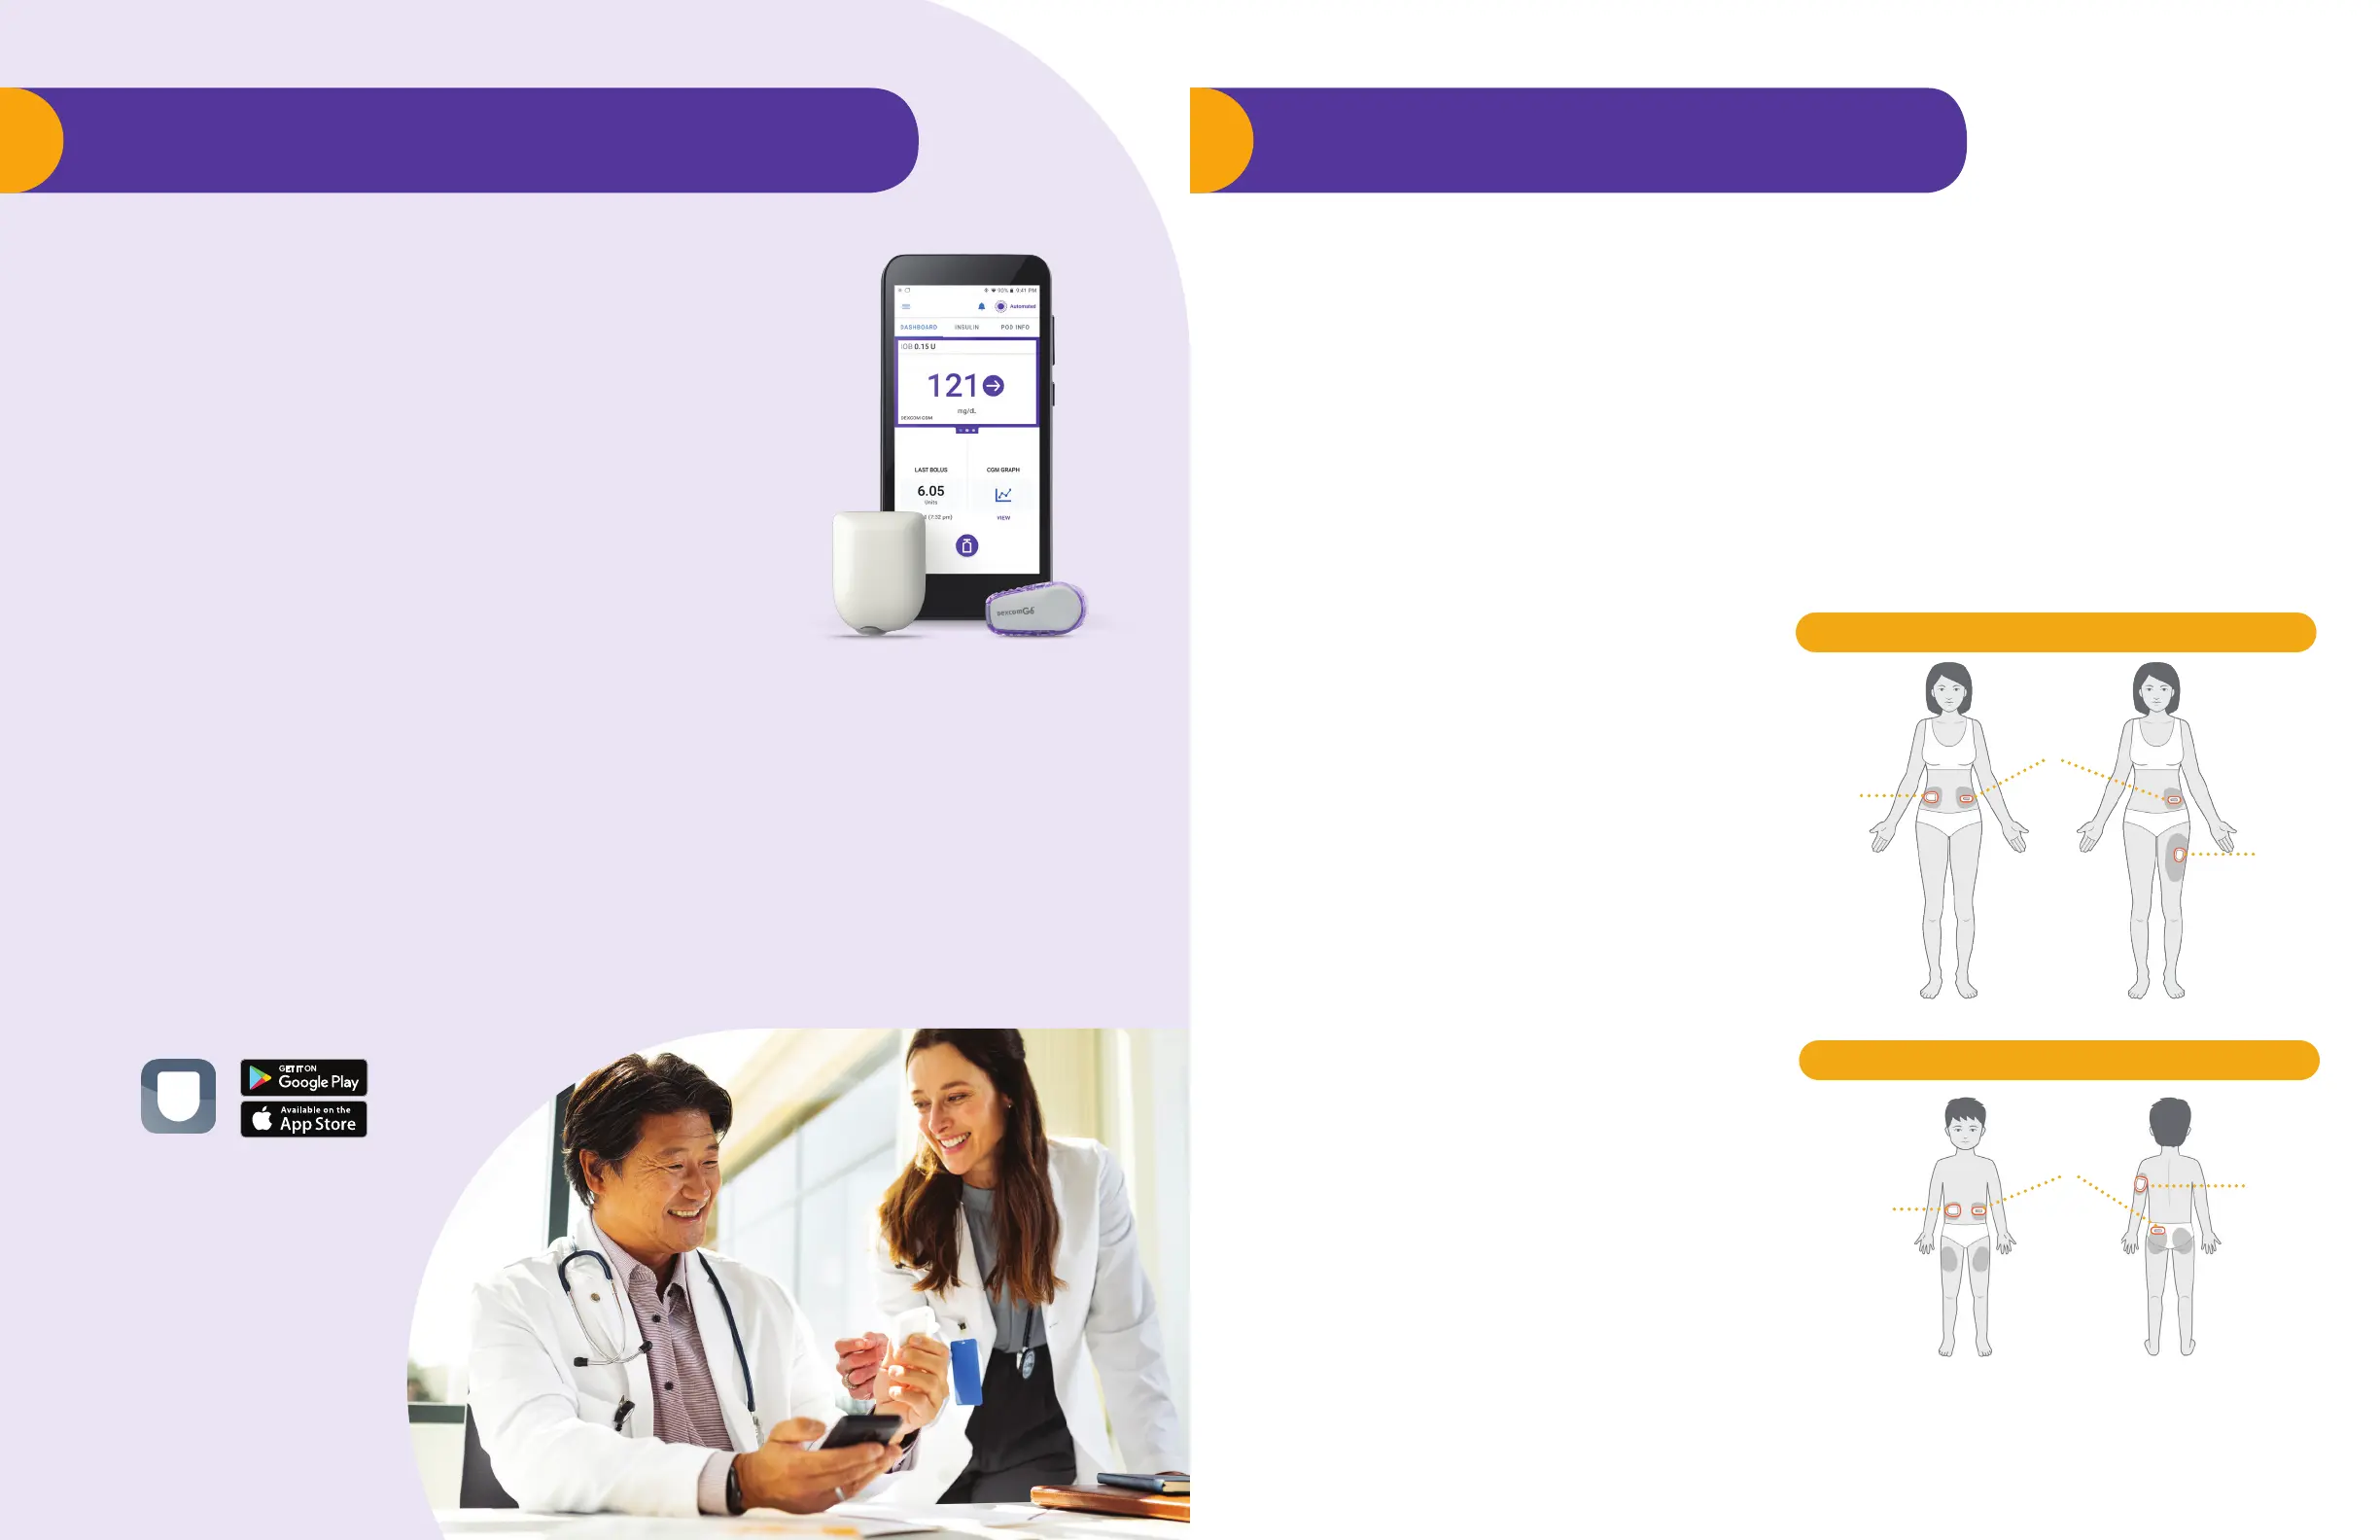
First Time Setup
The Omnipod 5 App can be downloaded to a
compatible* smartphone and is also integrated into the
Omnipod 5 Controller. If using the Omnipod 5 App on a
compatible smartphone, users will need to sign into the
Insulet-provided Controller rst.
Setting up the system for the rst time will include
signing in with an Omnipod ID and entering initial
insulin settings. To create an Omnipod ID, users will
visit Omnipod.com/setup to create their account,
Expectation Setting
Realistic expectation setting with users before initiating the
Omnipod 5 System is essential. Establishing expectations for
automated insulin delivery (AID) technology at initiation promotes
retention and optimal outcomes
2
.
Over time, the Omnipod 5 System will continue to adapt to the user’s
needs as it builds history on the user’s insulin requirements
1
.
The Omnipod 5 System is also known as a hybrid closed-loop
system since user intervention is required.
Prior to initiation, convey necessary user actions:
■
Need to deliver bolus for carbohydrate intake at meals and
snacks to minimize postprandial hyperglycemia.
■
Need to perform Pod & sensor changes.
■
Need to respond to alerts & alarms.
Pod shown without the
necessary adhesive.
Pod
Pod
CGM
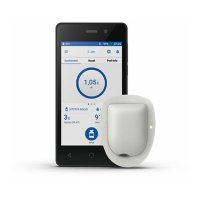
ADULT PLACEMENT EXAMPLES
PEDIATRIC PLACEMENT EXAMPLES
FRONT BACK
Pod
Pod
CGM
Pod Placement
Careful Pod and CGM placement are important
to optimize connectivity. Place the Pod so it is:
■
In direct line of sight of the CGM
■
At least three inches from the CGM
sensor site
■
Horizontal or diagonal on the abdomen,
hip, lower back, or buttocks
■
Vertical or at a slight angle on the upper
arm or thigh
■
Avoiding sites where belts, waistbands, or
tight clothing may rub against or dislodge
the Pod or CGM
■
Avoid placing the Pod over a mole, tattoo,
or scar, where insulin absorption could
be reduced
Connecting the CGM is done by entering the
Dexcom transmitter serial number into the
Omnipod 5 App. The connection process can take
up to 20 minutes.
Note: The Dexcom G6 receiver cannot be used
with the Omnipod 5 System because the Omnipod
5 System is compatible only with the G6 app on a
smartphone. All sensor and transmitter-specific
actions are controlled through the Dexcom G6 app.**
**Dexcom CGM sold separately. The Omnipod 5 System must be used with the Dexcom G6 mobile app and is not compatible with
the Dexcom receiver. All Dexcom G6 alerts are configured and driven by the Dexcom G6 app.
Omnipod
®
5 System Readiness Omnipod
®
5 System Start
link data management accounts, and learn about
training options.
After Omnipod 5 App setup is complete, the user will
then activate a Pod and connect their CGM to the
Omnipod 5 System.
The Pod should be changed at least once every
3 days or after delivering 200 units of insulin,
whichever comes rst.
6 7