00029011.DOC, Version 1.2
15/16
■ During charging, the orange LED ON for the corresponding compartment will light up. If the LED flashes,
the batteries in the transmitter are not correctly inserted or non-rechargeable batteries are used instead of
rechargeable batteries. In this case, remove the unit from the compartment immediately.
■ Charging is completed, when the green LED OK of the charging compartment lights up. You can remove
the transmitter from the charging compartment.
■ If possible, always use the entire capacity of the batteries. Short discharging/recharging cycles will reduce
the batteries‘ capacity.
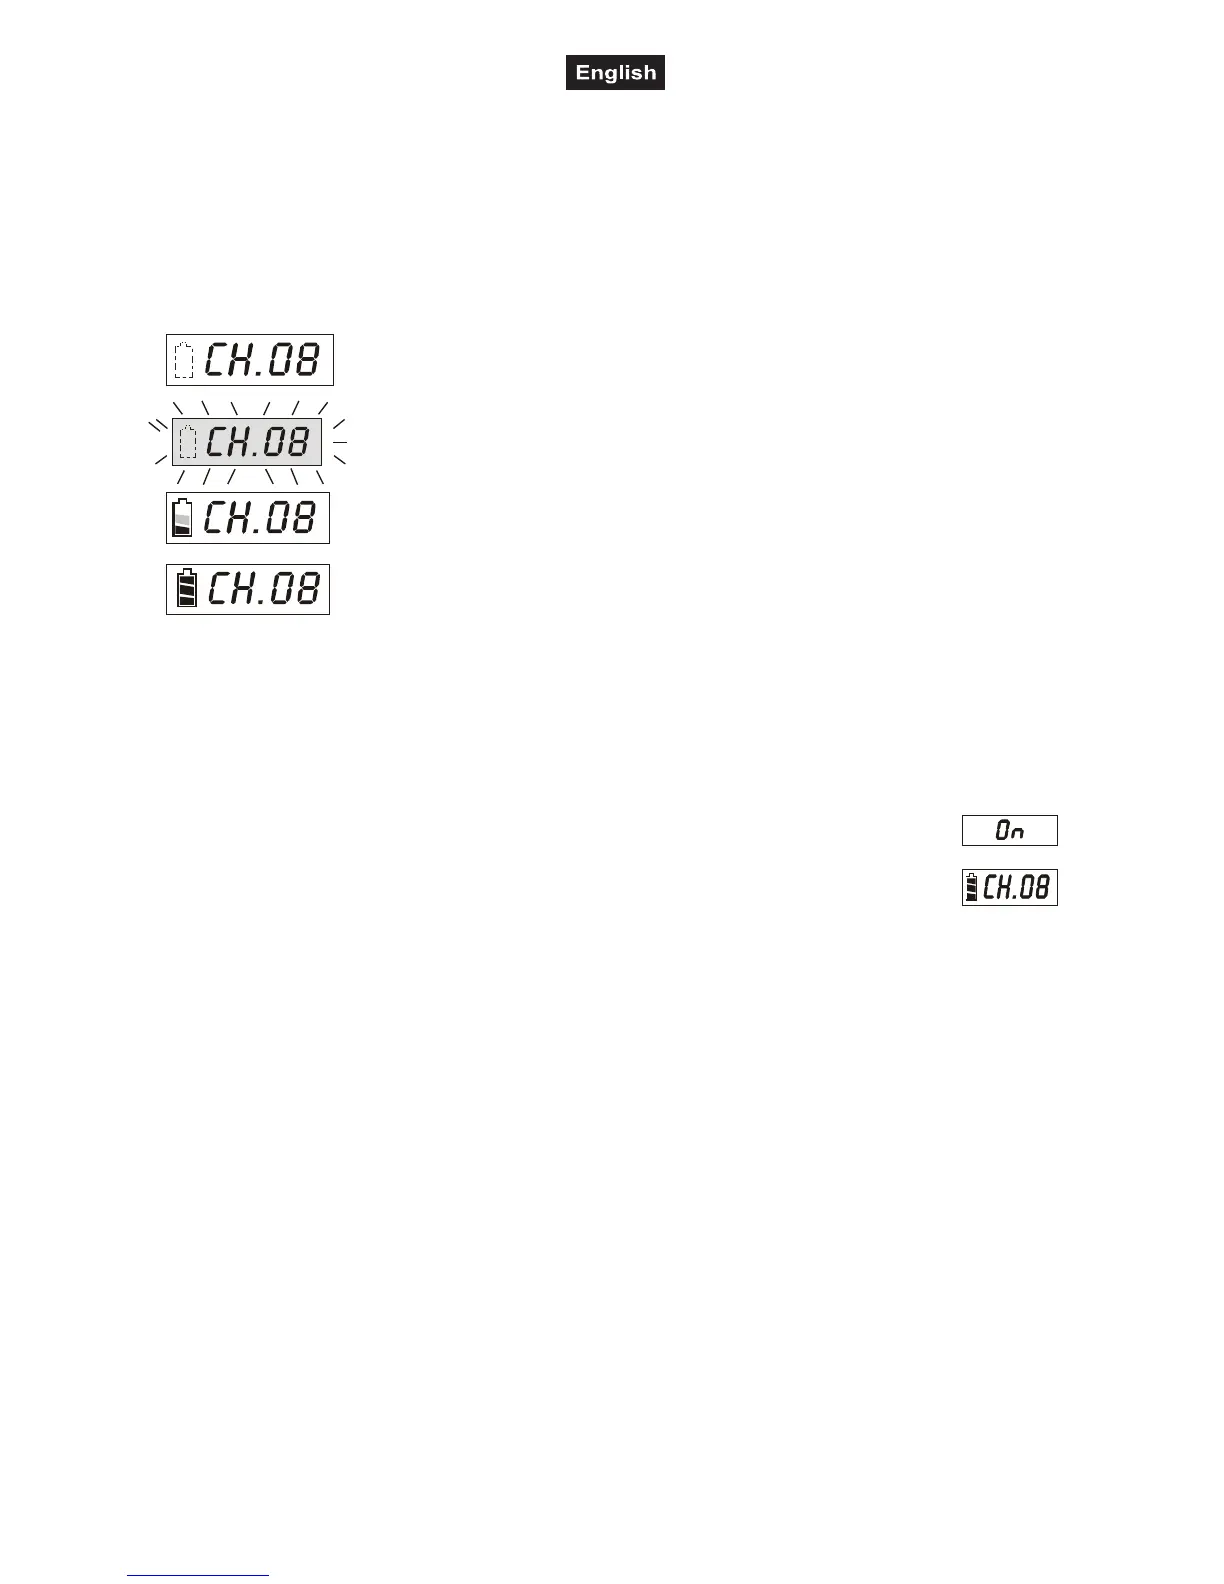
■ The battery charging status is indicated on the transmitter’s LCD screen:
6 OPERATION
6.1 Switching on
■ Pior to switching on the transmitter, first set the reciever unit RM-105 of the PA system W.A.M.S.-05
to a free transmission channel (see operating instructions of W.A.M.S.-05).
■ Set the POWER switch to ON to turn on the transmitter. The power indicator lights red. The
display indicates
On, followed by the channel adjusted and the battery status. The display goes
off if no button is pressed within 5 seconds. It can be switched on again by pressing any
button.
■ If the indicator does not light up when switching on, there is either no battery inserted or the poles are
wrong.
6.2 Frequency adjustment
■ Set the transmitter to the same transmission channel as the reciever unit RM-105: Keep the Set button
pressed until the channel indication starts flashing. It keeps flashing for approx. 10 seconds. During that
time, the channel can be adjusted with buttons ▲ and ▼. Press the Set button to confirm the channel
selection (within 10 seconds) otherwise the transmitter returns to the channel previously adjusted.
■ The display can indicate the radio frequency for the adjusted channel. As long as one of the buttons ▲ and
▼ is pressed, the display indicates the frequency instead of the channel. (Please refer to chapter 8.1
Channel configuration for a table listing which channel is assigned to which frequency).
6.3 Sensitivity
■ Speak into the microphone. The sensitivity of the transmitter can be adjusted in three steps with the
Sensitivity switch (upper position: high sensitivity, central position: medium sensitivity, lower position: low
sensitivity). Thus, the volume level of the transmitter can be readjusted. Reduce the sensitivity if the volume
of the transmitter signal is too high and thus distorted. Increase the sensitivity if the volume is too low and a
poor S/N ratio results.
6.4 Muting
■ To mute the transmitter during operation, set the Mute switch to its lower position. Then, no sound will be
transmitted.
If the battery symbol flashes, there are either no batteries at all or not
rechargeable batteries inserted. Check the batteries.
If the battery symbol flashes and the LCD screen lights up brightly, the
rechargeable batteries were inserted wrong or instead of rechargeable
batteries non-rechargeable batteries were inserted. Check the batteries
immediately.
If a bar inside the battery symbol is displayed, the batteries are presently
being charged.
If all three bars in the battery symbol are displayed, the batteries are fully
loaded and charging is completed.
 Loading...