
S
sharon08Aug 12, 2025
What to do if I move during measurement with Omron Blood Pressure Monitor?
- CcharleswrightAug 12, 2025
Repeat the measurement, remaining still and not talking during the measurement. Refer to “Taking a Measurement.”
What to do if I move during measurement with Omron Blood Pressure Monitor?
Repeat the measurement, remaining still and not talking during the measurement. Refer to “Taking a Measurement.”
What to do if 'E2' appears repeatedly on Omron 10 PLUS BP791IT Blood Pressure Monitor?
Inflate the cuff manually until it is 30 to 40 mmHg above your previous measurement result. Refer to “Taking a Measurement.”
What to do if my Omron 10 PLUS BP791IT Blood Pressure Monitor shows no display?
Replace all four batteries with new ones. Also, check the battery installation to ensure proper placement of the battery polarities.
How to fix air leaking from the arm cuff of my Omron 10 PLUS BP791IT Blood Pressure Monitor?
Replace the cuff with a new one.
What to do if the arm cuff was inflated above 299 mmHg on Omron Blood Pressure Monitor?
Do not inflate the cuff above 299 mmHg. Refer to “Taking a Measurement.”
How to fix clothing interfering with the arm cuff on Omron 10 PLUS BP791IT Blood Pressure Monitor?
Remove any clothing interfering with the arm cuff. Refer to “Applying the Arm Cuff.”
How to fix disconnected air plug on Omron 10 PLUS BP791IT Blood Pressure Monitor?
Insert the plug securely. Refer to “Applying the Arm Cuff”.
How to apply the arm cuff correctly on Omron Blood Pressure Monitor?
Apply the arm cuff correctly. Refer to “Applying the Arm Cuff.”
Explains symbols used to indicate potential hazards and their consequences.
Provides guidance on how to use the device safely and correctly, including important precautions.
Details precautions to avoid electrical shock when using the device.
Outlines instructions for proper cleaning, storage, and handling to protect the device.
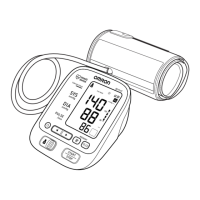
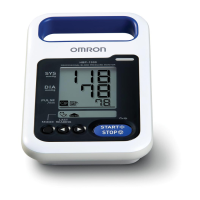
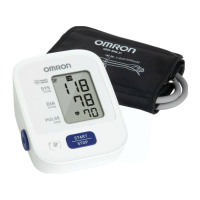
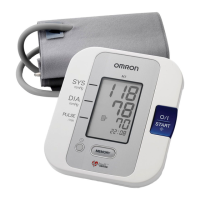
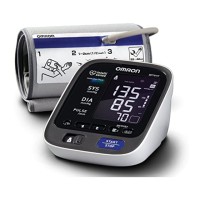
Details the different parts of the main monitor unit, including buttons and display.
Lists and illustrates all the items included in the product package.
Describes the symbol indicating an irregular heartbeat during measurement.
Explains the symbol indicating movement detected during measurement.
Identifies the symbol indicating the selected user profile for measurements.
Explains the symbol indicating high morning blood pressure readings based on weekly averages.
Describes the symbol that flashes with each heartbeat during measurement.
Indicates when an average reading is being displayed from memory.
Symbol indicating the display of morning average readings.
Symbol indicating the display of evening average readings.
Symbol indicating whether the arm cuff is applied correctly.
Step-by-step guide on how to connect the AC adapter to the monitor and power outlet.
Instructions on how to safely disconnect the AC adapter from the monitor and outlet.
Guidance on when and how to replace the batteries in the monitor.
How to initiate the date and time setting process on the monitor.
Procedure for setting the current year on the blood pressure monitor.
Procedure for setting the current month on the blood pressure monitor.
Procedure for setting the current day on the blood pressure monitor.
Procedure for setting the current hour (AM/PM) on the blood pressure monitor.
Procedure for setting the current minute on the blood pressure monitor.
Instructions on how to properly turn off the blood pressure monitor.
Detailed steps for applying the cuff correctly on the left arm.
Instructions for correctly applying the arm cuff on the right arm.
Explains the function and indicators of the calibration check system.
Describes how the monitor checks and indicates correct cuff application.
Instructions on how to take a measurement without storing data using the guest mode.
How to select between User A and User B for storing measurements.
Explains how to use the selected user ID for single or TruRead™ measurements.
Step-by-step guide to taking a single blood pressure measurement.
Instructions on how to perform measurements using the TruRead™ consecutive measurement mode.
Provides guidance for taking measurements under special conditions, like high systolic pressure.
Describes how the monitor calculates average readings from recent measurements.
Steps to view stored blood pressure and pulse readings from the memory.
Explains how the monitor calculates and stores weekly morning and evening averages.
Details the criteria and time window for morning average calculations.
Details the criteria and time window for evening average calculations.
How to view the stored weekly morning and evening average readings.
Shows how different symbols combine to provide information about averages and hypertension.
Instructions on how to erase all stored measurement data for a specific user.
Overview of connecting the device to a computer for data transfer.
Steps to download and set up Microsoft HealthVault for health data management.
Lists the system requirements for running Microsoft HealthVault on a PC.
Steps to download and install the Omron Health Management Software.
Lists the system requirements for the Omron Health Management Software.
Details specific error symbols displayed by the monitor and their meanings.
Provides solutions for common problems encountered with the blood pressure monitor.
Explains potential interference and methods to correct it for US users.
Explains potential interference and methods to correct it for Canadian users.
| Device Type | Upper Arm Blood Pressure Monitor |
|---|---|
| Measurement Method | Oscillometric |
| Measurement Range (Pressure) | 0 to 299 mmHg |
| Display | LCD |
| Connectivity | Bluetooth |
| Irregular Heartbeat Detection | Yes |
| Hypertension Indicator | Yes |
| User Profiles | 2 |
| Measurement Range (Pulse) | 40 to 180 beats per minute |
| Power Source | 4 AA batteries |
| Average Reading | Yes |
| Cuff Size | Fits arms 9" to 17" in circumference |