On some engines, it is possible that a groove from
the old head gasket fire ring may be impressed
into the head and/or block.
If
this is the case,
it
is
essential that the part be replaced or milled to
remove the imperfection.
If
all of the top six studs accepted 30 ft-lb of
torque without pulling out, the new head gasket
may be put on without replacement
of
the studs.
If
this is the case, skip steps
6
through 12.
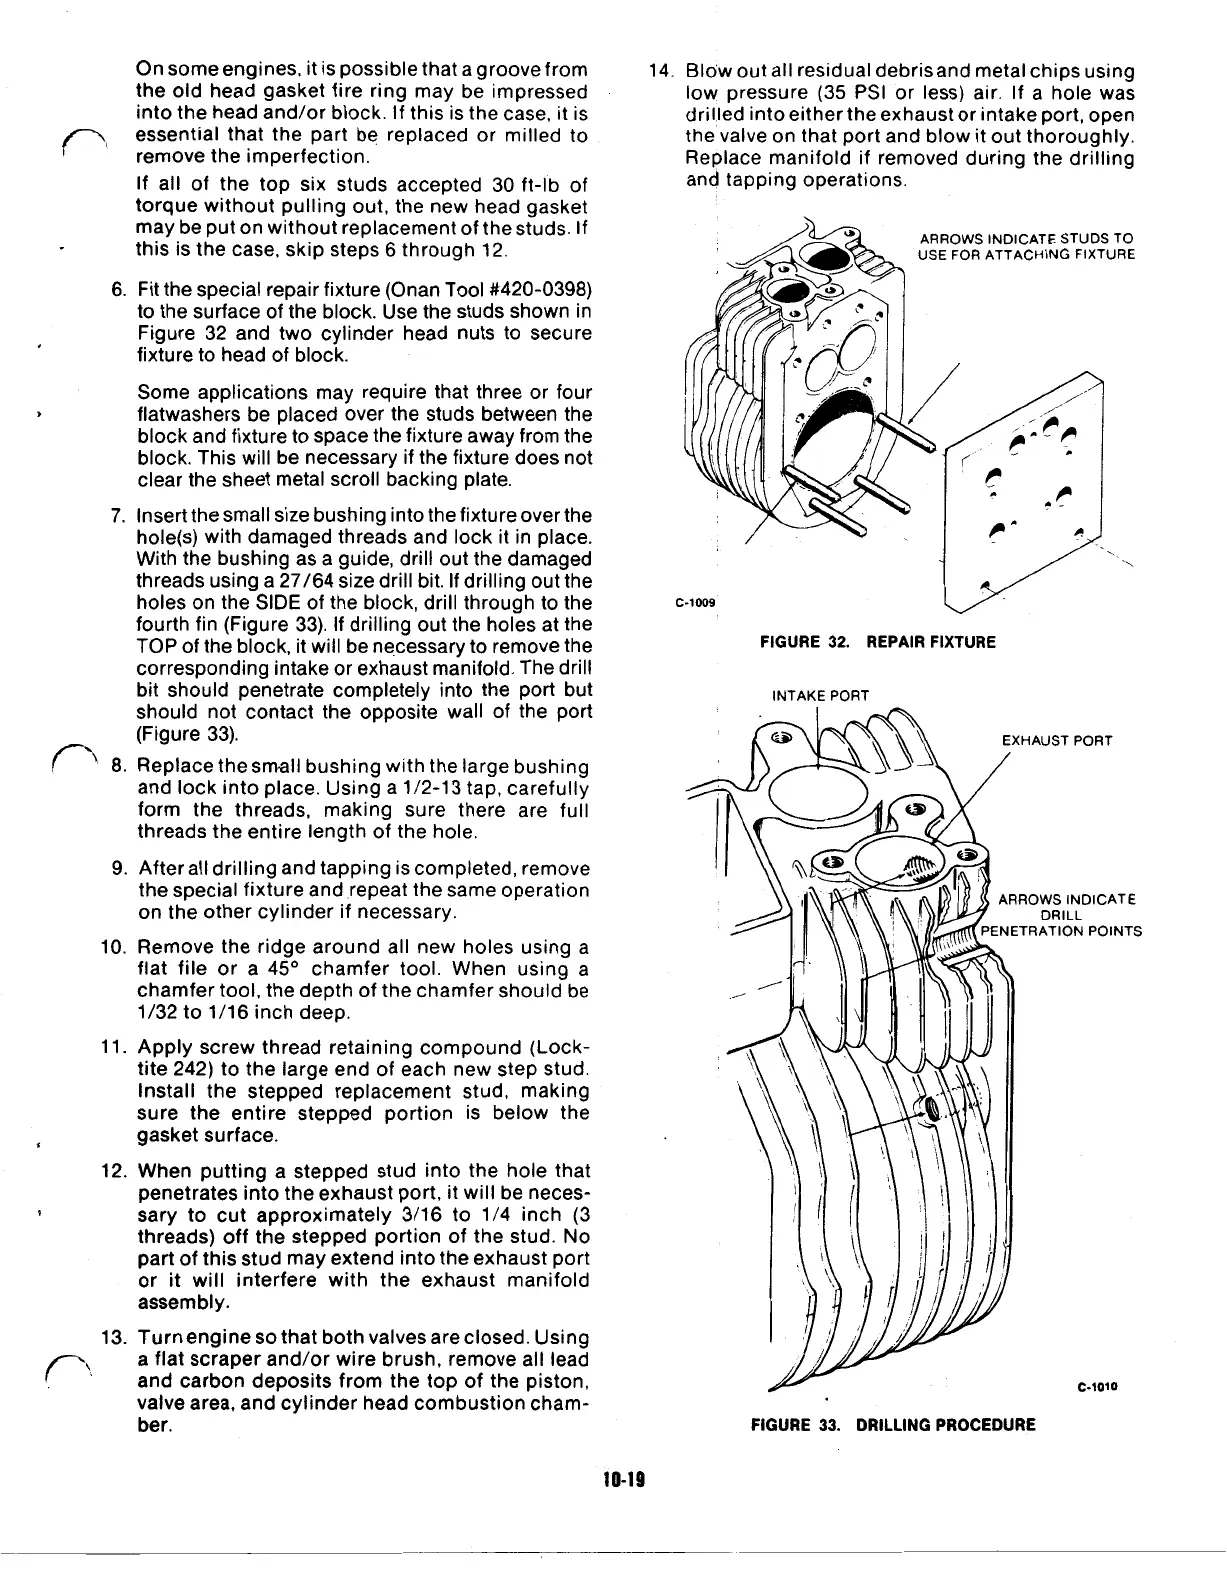
6. Fit the special repair fixture (Onan
Tool
#420-0398)
to
the surface of the block. Use the studs shown in
Figure 32 and two cylinder head nuts to secure
fixture to head
of
block.
Some applications may require that three or four
flatwashers be placed over the studs between the
block and fixture
to
space the fixture away from the
block. This will be necessary
if
the fixture does not
clear the sheet metal scroll backing plate.
7.
Insert the small size bushing into the fixture over the
hole(s) with damaged threads and lock
it
in place.
With the bushing as a guide, drill out the damaged
threads using a 27/64 size drill bit.
If
drilling out the
holes on the
SIDE
of the block, drill through to the
fourth fin (Figure 33).
If
drilling out the holes at the
TOP
of the block, it will be necessary
to
remove the
corresponding intake or exhaust manifold. The drill
bit should penetrate completely into the port but
should not contact the opposite wall of the port
(Figure 33).
8.
Replace the small bushing with the large bushing
and lock into place. Using a 1/2-13 tap, carefully
form the threads, making sure there are full
threads the entire length of the hole.
9. After all drilling and tapping is completed, remove
the special fixture and repeat the same operation
on the other cylinder if necessary.
10. Remove the ridge around all new holes using a
flat file or a
45"
chamfer tool. When using a
chamfer
tool,
the depth of the chamfer should be
1/32
to
1/16 inch deep.
11. Apply screw thread retaining compound (Lock-
tite 242)
to
the large end of each new step stud.
Install the stepped replacement stud, making
sure the entire stepped portion is below the
12. When putting a stepped stud into the hole that
penetrates into the exhaust port,
it
will be neces-
threads) off the stepped portion of the stud.
No
part
of
this stud may extend into the exhaust port
or it will interfere with the exhaust manifold
assembly.
gasket surface.
sary to cut approximately 3/16 to 1/4 inch (3
13. Turn engine
so
that both valves are closed. Using
a flat scraper and/or wire brush, remove all lead
and carbon deposits from the top
of
the piston,
valve area, and cylinder head combustion cham-
ber.
14.
Blow out all residual debris and metal chips using
low pressure (35
PSI
or less) air.
If
a hole was
drilled into either the exhaust or intake port, open
the valve on that port and blow
it
out thoroughly.
Replace manifold if removed during the drilling
and tapping operations.
ARROWS
INDICATE
STUDS TO
USE
FOR
ATTACHING
FIXTURE
c-1009
FIGURE
32.
REPAIR FIXTURE
INTAKE
PORT
c-I010
FIGURE
33.
DRILLING PROCEDURE
10-19
 Loading...

