Seite / Page 6
150 50 59 / 01 - 2004
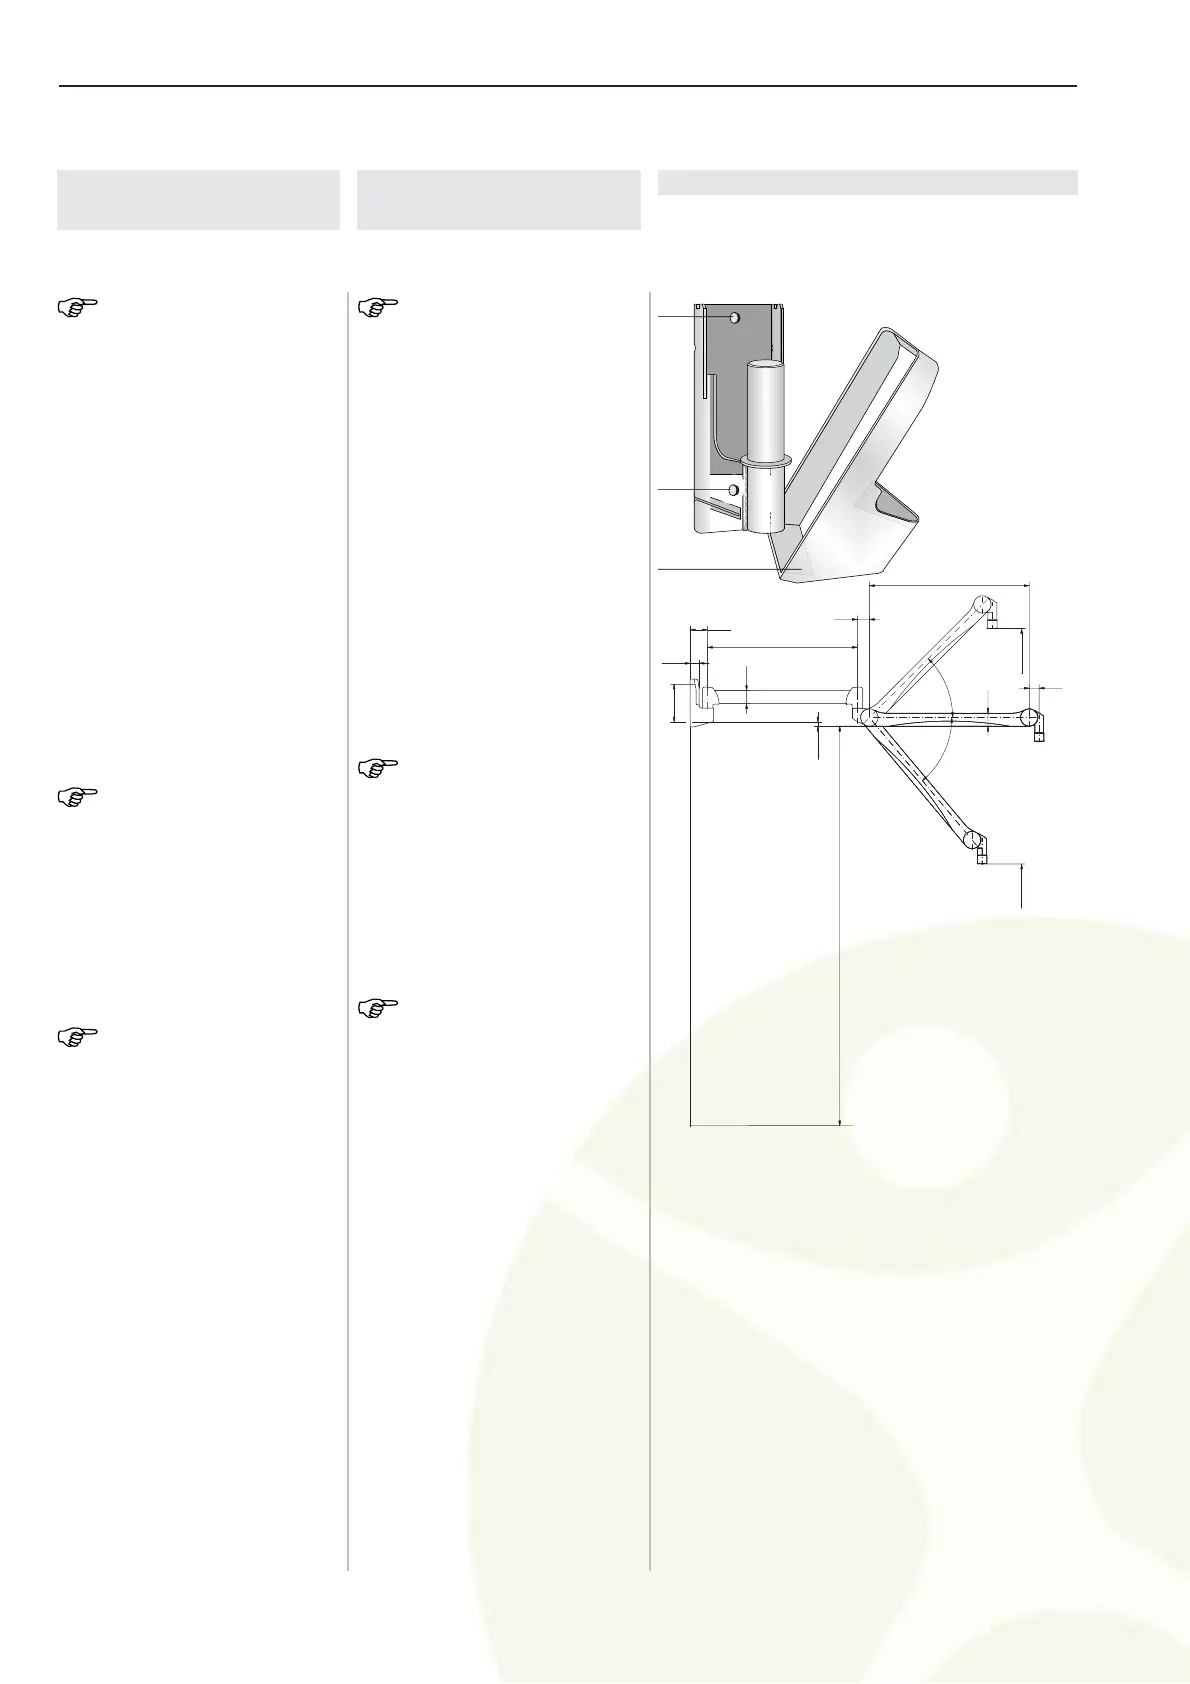
DeutschEnglish Abbildung / Figure
Figure / Abbildung 1
1 Plastic covers
Kunststoffabdeckteile
2 Holes
Bohrungen
2
1
1
90
300 / 600 /750 / 950
45
60
65
20,5
190
800
65
50
65
1310
H = 2000
2488
45°
50°
3 Wandlager
montieren
HINWEIS:
Für den Netzanschluß des Auslegers ist
eine ordnungsgemäß geerdete Steckdo-
se im Bereich des Wandlagers notwen-
dig. Die Netzleitung des Auslegers hat eine
Länge von 2 Metern.
1. Zwei Kunststoffabdeckteile
(1) abnehmen.
2. Nach Bohrschablone (vorletz-
te Seite) senkrecht anreißen.
3. Zwei Bohrungen nach Anga-
ben des Befestigungsmittel-
herstellers bohren.
4. Befestigungsmittel bündig mit
der Wand einsetzen.
HINWEIS:
Die Montage erst nach dem Aushärten des
Bindemittels fortsetzen.
5. Befestigungsmittel in die bei-
den Bohrungen (2) einstek-
ken und Wandlager senk-
recht anschrauben.
HINWEIS:
Mit einem Wandarm-Anschlagbegrenzer
(optional) kann der Schwenkbereich des
Auslegers seitlich begrenzt werden.
Die Montage des Wandarm-Anschlagbe-
grenzer ist im Kapitel 4 beschrieben.
6. Die beiden Kunststoffab-
deckteile (1) aufsetzen und si-
cheren Sitz prüfen.
3 Installing the wall
bearing
NOTE:
For the mains connection of the extension
arm, a properly grounded socket in the
vicinity of the wall bearing is required. The
power supply cable of the extension arm
is 2 meters long.
1. Remove the two plastic co-
vers (1).
2. Make the vertical markings
using the drilling template on
page 13.
3. Drill two holes according to
the specifications of the faste-
ning agent's manufacturer.
4. Install the fastening agent
flush with the wall.
NOTE:
Do not continue the installation before the
binding agent has hardened completely.
5. Insert the fastening agent into
the two holes (2) and tighten
the wall bearing in a vertical
position.
NOTE:
You can use a stop (optional) to limit the
lateral swiveling range of the extension arm.
The installation of the stop is described in
chapter 4.
6. Install the two plastic covers
(1) and check them for firm
seating.
 Loading...