Seite / Page 8
150 50 59 / 01 - 2004
DeutschEnglish Abbildung / Figure
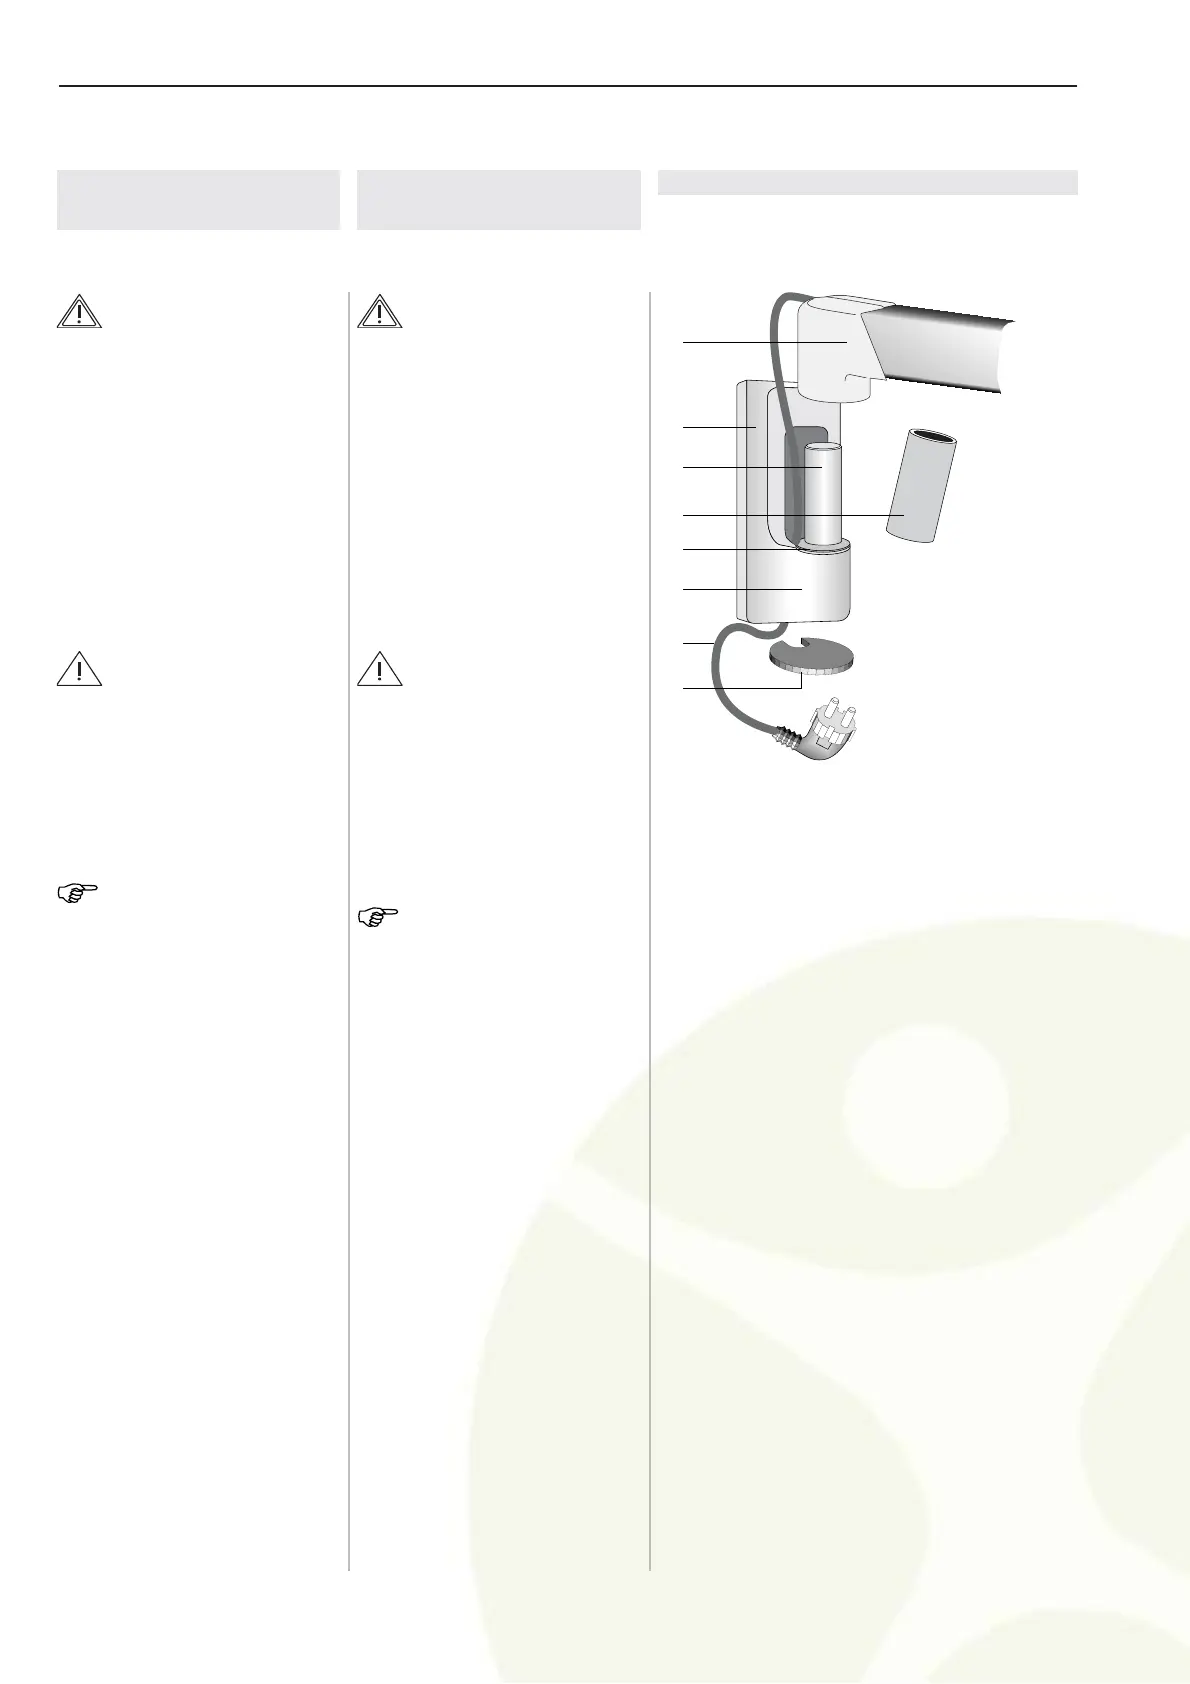
Figure / Abbildung 3
1
2
3
4
5
6
7
8
5 Ausleger mit Feder-
arm montieren
WARNUNG -
STROMSCHLAG:
Bauseitige Spannungsversorgung
spannungslos schalten, gegen Wie-
dereinschalten sichern.
1. Abdeckhülse (4) vom Zapfen
des Wandlagers (3) abneh-
men.
2. Netzleitung (7) durch die Ver-
kleidung (6) des Wandlagers
(2) führen.
VORSICHT -
SCHÄDEN AM GERÄT:
Wird der Zapfen des Wandlagers (3)
vor der Montage des Auslegers (1)
nicht gefettet, wird die Lagerung zer-
stört.
Den Zapfen des Wandlagers (3)
gleichmäßig fetten (Fetttyp: Optimol-
Optipit).
HINWEIS:
Kontrollieren Sie vor dem Aufschieben des
Auslegers, daß die Laufscheibe Æ 48 mm
(5) montiert ist.
3. Ausleger N (1) auf den Zap-
fen des Wandlagers (3) schie-
ben.
4. Kappe (8) aufdrücken.
5. Sicheren Sitz des Auslegers
N (1) prüfen.
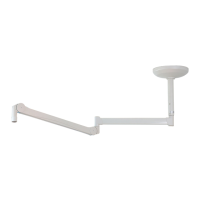
1 Extension arm N
Ausleger N
2 Wall bearing
Wandlager
3 Wall bearing pin
Zapfen des Wandlagers
4 Sleeve
Abdeckhülse
5 Disk Æ 48 mm
Laufscheibe Æ 48 mm
6 Cover
Verkleidung
7 Power supply cable
Netzleitung
8 Cap
Kappe
5 Installing extension
arm with spring arm
WARNING -
ELECTRICAL SHOCK:
Power off the on-site power supply
and protect it from being switched
on again.
1. Remove the sleeve (4) from
the pin of the wall bearing
(3).
2. Route the power supply ca-
ble (7) through the cover (6)
of the wall bearing (2).
CAUTION -
DAMAGE TO THE DEVICE:
If the pin of the wall bearing (3) is not
greased before installing the exten-
sion arm (1), the bearing will be da-
maged.
Grease the pin of the wall bearing (3)
evenly using Optimol-Optipit grease.
NOTE:
Before sliding on the extension arm, make
sure that the disk Æ 48 mm (5) is installed.
3. Slide the extension arm N (1)
onto the pin of the wall bea-
ring (3).
4. Push on the cap (8).
5. Check the extension arm N
(1) for firm seating.
 Loading...