1-8-1 E5WF0_(3D)_AIR
ADJUSTMENT INSTRUCTIONS FOR BD MAIN CBA OR
BD MECHANISM ASSEMBLY REPLACEMENT
When replacing either BD Main CBA or BD Mechanism Assembly, the unique OPU DATA of the BD Mechanism
needs to be written into the BD Main CBA. Follow the procedure below for OPU DATA write operation.
Equipments:
• PC (OS: Windows XP strongly recommended)
• Barcode reader
• COMTOOL jig relay board + 6PIN FFC cable
• USB cable Type AB
• Device driver for COMTOOL jig (CDM 2.06.00 WHQL Certified)
• Specialized application (OpuDataWriter)
Caution:
•
Always turn the unit power off before connecting the FFC cable or removing the FFC cable from the BD Main CBA
.
1. Preparation Of Work Environment
1-1.
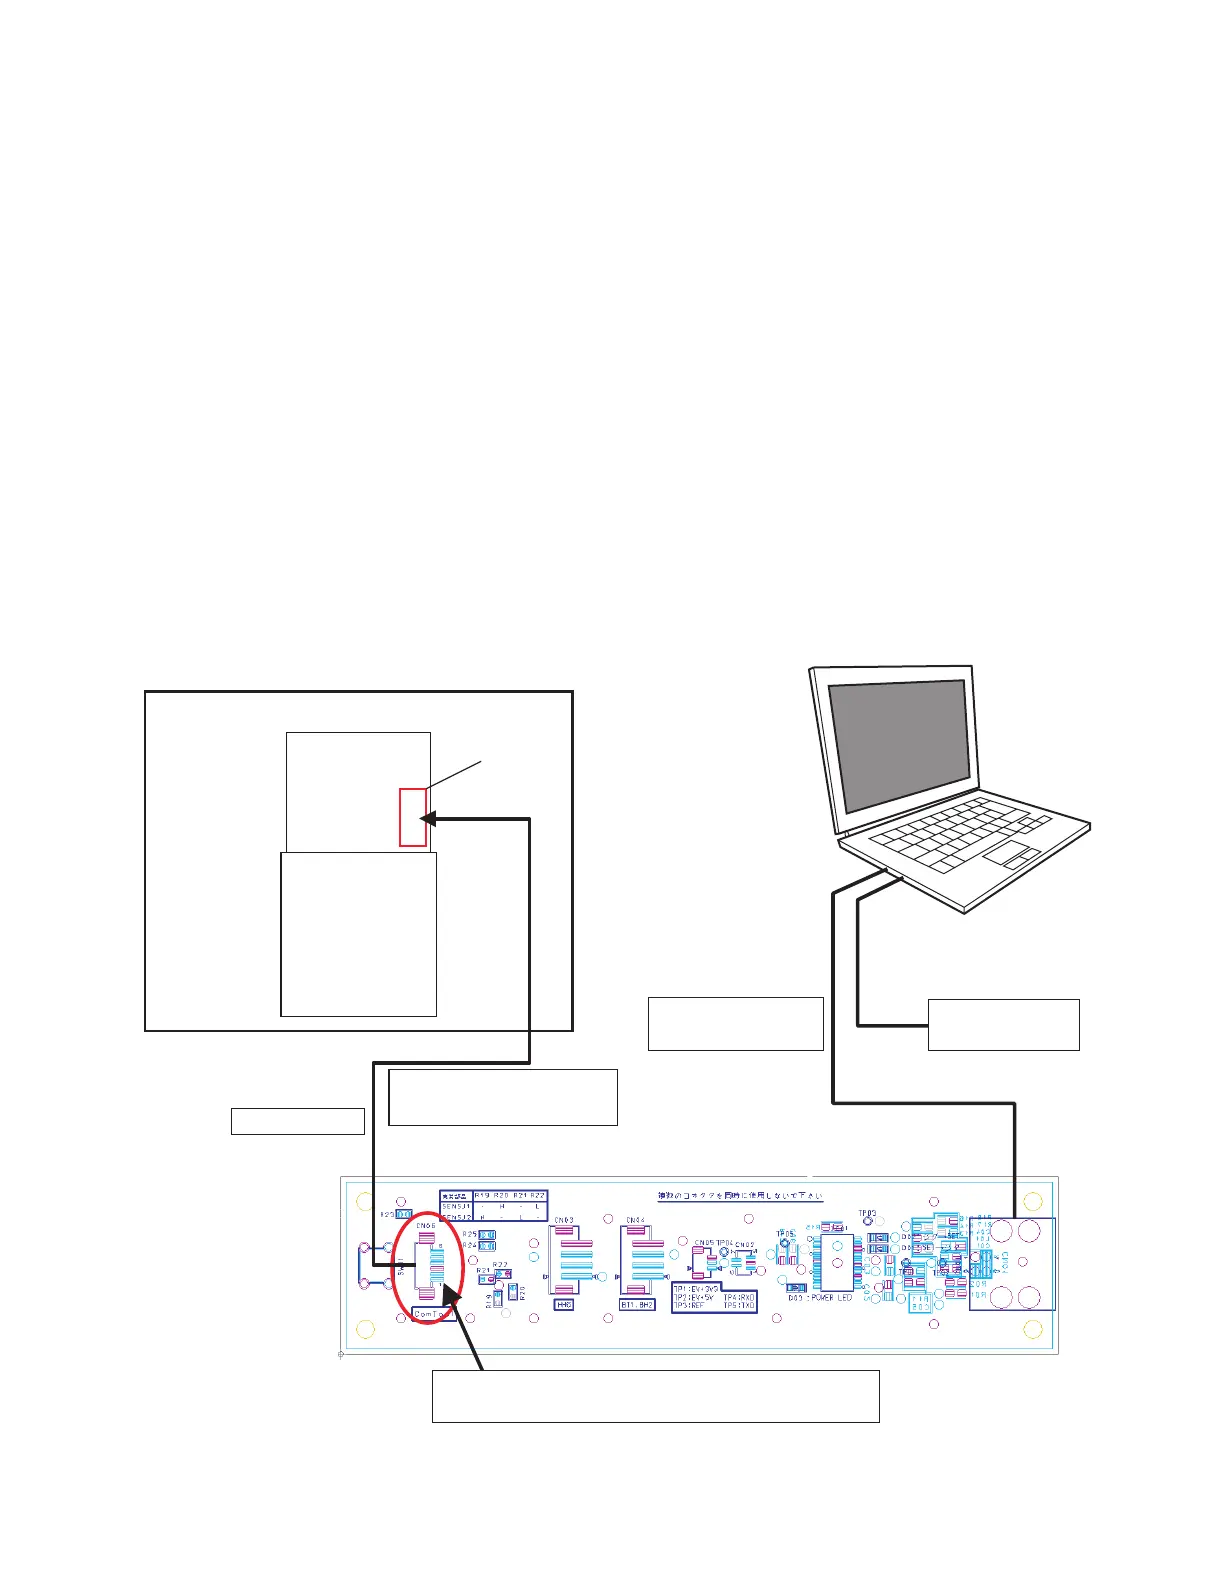
For the OPU DATA write operation, refer to the connection diagram and connect each device as shown below.
Note: The unit configuration may differ depending on model types.
Connection Diagram
COMTOOL Jig Relay Board
USB cable Type AB
(To USB Port)
PC
Barcode Reader
(To USB Port)
Location of Pin 1 on COMTOOL Jig Relay Board
Lower side of Ref. No CN06 is pin 1 (printed 1 by silk)
Unit (Completed product)
BD Main CBA
BD Mechanism
Assembly
6-pin FFC cable
6-pin
connector
Connect to 6-pin connector
of BD Main CBA

 Loading...