Safety instructions for the kitchen furniture fitter
• Veneers, adhesives or plastic coverings of adjacent furniture must be temperatureresistant (min.
75°C). If the veneers and coverings are not sufficiently temperatureresistant, they may deform.
• The use of solid wood wall end strips on the worktop behind the hob is permitted, provided that the
minimum distances are observed in accordance with the installation sketches.
• The minimum distances of the recess cut-outs to the rear according to the installation sketch must be
observed.
• For installation directly next to a tall cabinet, a safety distance of at least 50 mm must be maintained.
The side surface of the tall cabinet must be covered with heatresistant material. For technical
reasons, however, the distance should be at least 300 mm.
• The packaging materials (plastic foils, polystyrene, nails, etc.) must be taken out of the reach of
children, as these parts represent possible sources of danger. Small parts could be swallowed and
foils pose a suffocation hazard.
Ventilation
• The induction hob has a fan that automatically switches on and off. If the temperature values of the
electronics exceed a certain threshold, the fan starts at a low speed. If the induction hob is used
intensively, the fan switches to a higher speed. If the electronics have cooled down sufficiently, the
fan reduces its speed and switches off again automatically.
• The distance between the induction hob and kitchen furniture or built-in appliances must be chosen
so that sufficient ventilation of the induction is guaranteed.
To ventilate the hob electronics, open the rear wall of the base cabinet in the area of the hob. The front
crossbar of the base cabinet must be removed over the entire width of the hob. In addition, an air gap of
at least 3 mm at the front below the worktop is mandatory.
Safety instructions for the kitchen furniture fitter
Veneers, adhesives or plastic coverings of adjacent furniture must be temperature-
resistant (min. 75°C). If the veneers and coverings are not sufficiently temperature-
resistant, they may deform.
The use of solid wood wall end strips on the worktop behind the hob is permitted,
provided that the minimum distances are observed in accordance with the
installation sketches.
The minimum distances of t
he recess cut-outs to the rear according to the
installation sketch must be observed.
For installation directly next to a tall cabinet, a safety distance of at least 50 mm
must be maintained. The side surface of the tall cabinet must be covered with heat-
resistant material. For technical reasons, however, the distance should be at least
300 mm.
The packaging materials (plastic foils, polystyrene, nails, etc.) must be taken out of
the
reach of children, as these parts represent possible sources of danger. Small
parts could be swallowed and foils pose a suffocation hazard.
Ventilation
The induction hob has a fan that automatically switches on and off. If the
temperature values of the electronics exceed a certain threshold, the fan starts at a
low speed. If the induction hob is used intensively, the fan switches to a higher
speed. If the electronics have cooled do
wn sufficiently, the fan reduces its speed
and switches off again automatically.
The distance between the induction hob and kitchen furniture or built-in appliances
must be chosen so that sufficient ventilation of the induction is guaranteed.
To ventilate the hob
electronics, open the rear
wall of the base cabinet in
the area of the hob. The
front crossbar of the base
cabinet must be removed
over the entire width of
the hob.
In addition, an air gap of at
least 5 mm at the front
below the worktop is
mandatory.
EN
16
3
Note: Minimum distances should be maintained.
"A" hob - upper cabinet > 600 mm
"B" hob - side cabinet > 300mm
To avoid water steam damage, we recommend
placing a panel behind the wall cupboards.
This will prevent accumulation of moisture between
the cabinets.
1. Remove the front or drawers
2. Define and mark the positions forthe cut-out on the kitchen worktop. Please pay attention to
minimum distances and minimum web width ! These may vary depending on the material and
material properties! (Under certain circumstances use auxiliary crossbar "Reinforcement").
3. Saw out the cut -out on the worktop. Pay attention to straightness and freedom from burrs ! For "�
ush installation", mill out the recess.
4. Seal milled surfaces
5. If necessary, make cut -outs in the base cabinet �oor and plinth.
6. Adjust rear drawer panels if necessary.
7. PU sealing tape 3x10 mm at the mount bearing surfaces all around. Flush mounting also possible in
the countersink. Consider the height of the glass plate. Level adjustment if required.
8. Installation instructions for OPERA hobs with downdraft fan. If the underlay has to be carried out, this
underlay must be carried out evenly according to the specification below.ù Milling must be checked
for evenness after assembly of the worktop . ! We accept no liability for incorrectly placed hobs !
Insert 12x shims in the hob cut-out according to the dimensions
9. Remove the furniture drawers or remove the front of the kitchen unit.
10. Check base cut-out for dimensions and flatness and adjust if necessary
11. Unscrew the handle and outlet nozzle of the Nivel Professional.
12. Insert the Nivel Professional hob extractor. Make sure that the seal is
placed properly. Observe and compensate for height di�erences. Here
the highest caution is required - danger of breakage !
13. Align the hob, fill the joint (e.g. Novasil® or Ottoseal®) and smooth.
14. Create duct connection. If the silencers are installed, then also the height of the intake silencer must
be considered when measuring X.
Installation, important notes!
• Excessive heat development from below, e.g. from a baking oven without cross-flow fan, should be
avoided.
• If pyrolysis operation takes place at built-in cookers, the induction hob must not be used.
• When installing above a drawer, care must be taken to ensure that no sharp objects are stored in the
drawer. These could tilt on the underside of the hob and block the drawer.
• If there is an intermediate bottom below the hob, sufficient ventilation of the hob inductors must be
ensured.
• The cooktop must not be installed above refrigerators, dishwashers, washing machines or dryers.
• It must be ensured that no flammable, easily flammable or heat deformable objects are placed
directly next to or below the hob due to the risk of fire.
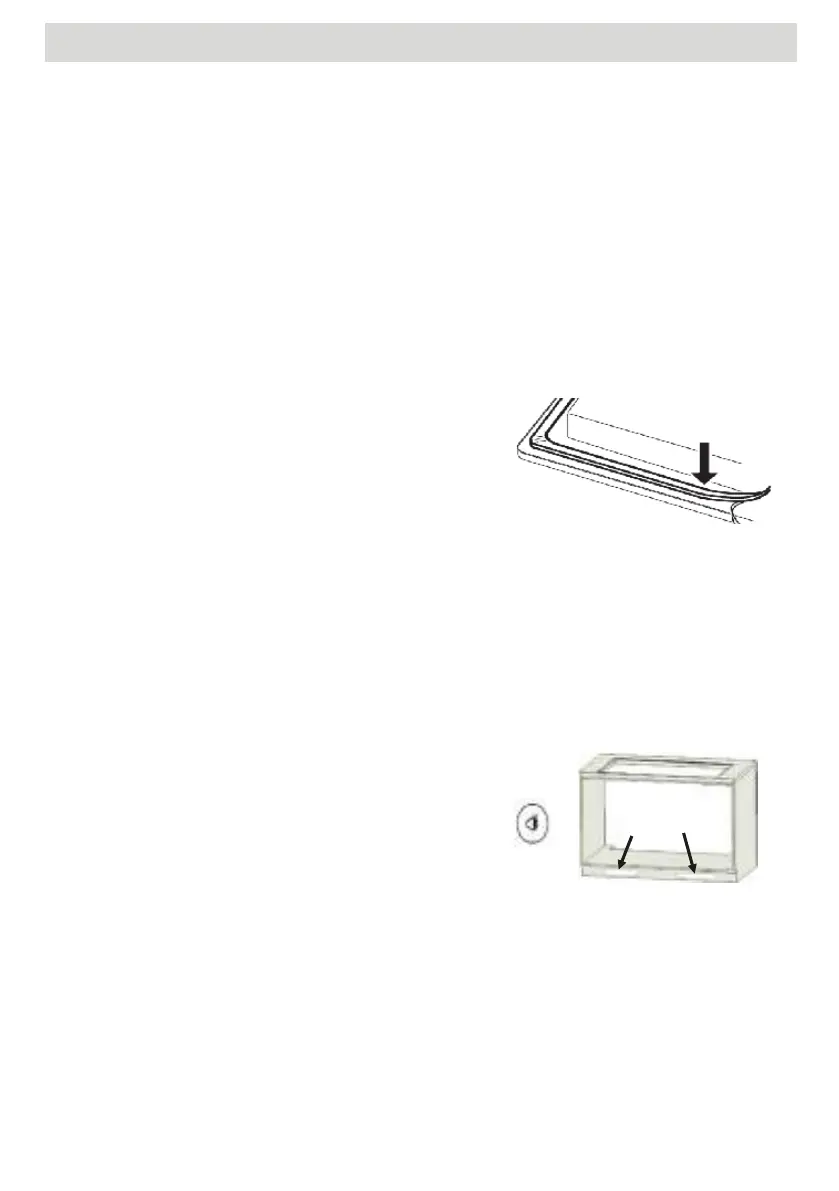
Hob gasket
Wood worktops must be sealed on the cut surfaces.
Before installation, the enclosed cooktop gasket must be inserted without gaps.
• It must be prevented that liquids can penetrate between
the edge of the hob and the worktop or between the
worktop and the wall into any electrical appliances
installed underneath.
• If the hob is installed in an uneven worktop, e.g. with a
ceramic or similar covering (tiles, etc.), the cooking
surface must be sealed against the worktop with plastic
sealing materials (e.g. Novasil® or Ottoseal® ).
Note: If sealing adhesive is used for sealing and fixing, a later,
non-destructive removal of the hob cannot be guaranteed.
Worktop cut-out
The cut-out in the worktop should be made as accurately as possible with a good, straight saw blade or a
router. The cut surfaces should then be sealed to prevent moisture from penetrating.
The cut-out for the hob is made according to the illustrations. The glassceramic hob surface must be flat
and flush. Tensioning can cause the glass plate to break. Check the seal of the cooking surface for a
perfect fit and complete support.
Exhaust air - outlet opening
The cross-section of the wall boxes and the cut-out in the
plinth panels should at least correspond to the exhaust air
opening. There must be one or more air outlet openings of at
least 500cm² in
total. Shorten the height of the skirting boards or insert
corresponding openings.
Installation, important notes!
- Excessive heat development from be-
low, e.g. from a baking oven without
cross-flow fan, should be avoided.
- If pyrolysis operation takes place at
built-in cookers, the induction hob
must not be used.
- When installing above a drawer, care
must be taken to ensure that no
sharp objects are stored in the dra-
wer. These could tilt on the underside
of the hob and block the drawer.
- If there is an interm
ediate bottom be-
low the hob, sufficient ventilation of
the hob inductors must be ensured.
- The cooktop must not be installed
above refrigerators, dishwashers,
washing machines or dryers.
- It must be ensured that no flammable,
easily flammable or heat deformable
objects are placed directly next to or
below the hob due to the risk of fire.
Hob gasket
Wood worktops must be sealed on the
cut surfaces.
Before installation, the enclosed
cooktop
gasket must be inserted without gaps.
- It must be prevented that liquids can
penetrate between the edge of the hob
and the worktop or between the worktop
and the wall into any electrical appli-
ances installed underneath.
- If the hob is installed in an uneven
worktop, e.g. with a ceramic or similar
covering (tiles, etc.), the cooking surface
must be sealed against the worktop with
plastic sealing materials (e.g. Novasil®
or Ottoseal® ).
Note:
- If sealing adhesive is used for sealing
and fixing, a later, non-destructive re-
moval of the hob cannot be guaranteed.
Worktop cut-out
The cut-out in the worktop should be
made as accurately as possible with a
good, straight saw blade or a router.
The cut surfaces should then be sealed
to prevent moisture from penetrating.
The cut-out for the ho
b is made accord-
ing to the illustrations. The glass-
ceramic hob surface must be flat and
flush. Tensioning can cause the glass
plate to break. Check the seal of the
cooking surface for a perfect fit and
complete support.
Exhaust air - outlet opening
The cross-section of the wall boxes and
the cut-out in the plinth panels should at
least correspond to the exhaust air ope-
ning. There must be one or more air
outlet openings of at least 500cm² in
total.
Shorten the height of the skirting
boards or insert corresponding ope-
nings.
> 500mm²
EN
17
Installation, important notes!
- Excessive heat development from be-
low, e.g. from a baking oven without
cross-flow fan, should be avoided.
- If pyrolysis operation takes place at
built-in cookers, the induction hob
must not be used.
- When installing above a drawer, care
must be taken to ensure that no
sharp objects are stored in the dra-
wer. These could tilt on the underside
of the hob and block the drawer.
- If there is an interm
ediate bottom be-
low the hob, sufficient ventilation of
the hob inductors must be ensured.
- The cooktop must not be installed
above refrigerators, dishwashers,
washing machines or dryers.
- It must be ensured that no flammable,
easily flammable or heat deformable
objects are placed directly next to or
below the hob due to the risk of fire.
Hob gasket
Wood worktops must be sealed on the
cut surfaces.
Before installation, the enclosed
cooktop
gasket must be inserted without gaps.
- It must be prevented that liquids can
penetrate between the edge of the hob
and the worktop or between the worktop
and the wall into any electrical appli-
ances installed underneath.
- If the hob is installed in an uneven
worktop, e.g. with a ceramic or similar
covering (tiles, etc.), the cooking surface
must be sealed against the worktop with
plastic sealing materials (e.g. Novasil®
or Ottoseal® ).
Note:
- If sealing adhesive is used for sealing
and fixing, a later, non-destructive re-
moval of the hob cannot be guaranteed.
Worktop cut-out
The cut-out in the worktop should be
made as accurately as possible with a
good, straight saw blade or a router.
The cut surfaces should then be sealed
to prevent moisture from penetrating.
The cut-out for the ho
b is made accord-
ing to the illustrations. The glass-
ceramic hob surface must be flat and
flu
sh. Tensioning can cause the glass
plate to break. Check the seal of the
cooking surface for a perfect fit and
complete support.
Exhaust air - outlet opening
The cross-section of the wall boxes and
the cut-out in the plinth panels should at
least correspond to the exhaust air ope-
ning. There must be one or more air
outlet openings of at least 500cm² in
total.
Shorten the height of the skirting
boards or insert corresponding ope-
nings.
> 500mm²
Note: Minimum distances should be maintained.
"A" hob - upper cabinet > 600 mm
"B" hob - side cabinet > 300mm
To avoid water steam damage, we recommend
placing a panel behind the wall cupboards.
This will prevent accumulation of moisture between
the cabinets.
1. Remove the front or drawers
2. Define and mark the positions forthe cut-out on the kitchen worktop. Please pay attention to
minimum distances and minimum web width ! These may vary depending on the material and
material properties! (Under certain circumstances use auxiliary crossbar "Reinforcement").
3. Saw out the cut -out on the worktop. Pay attention to straightness and freedom from burrs ! For "�
ush installation", mill out the recess.
4. Seal milled surfaces
5. If necessary, make cut -outs in the base cabinet �oor and plinth.
6. Adjust rear drawer panels if necessary.
7. PU sealing tape 3x10 mm at the mount bearing surfaces all around. Flush mounting also possible in
the countersink. Consider the height of the glass plate. Level adjustment if required.
8. Installation instructions for OPERA hobs with downdraft fan. If the underlay has to be carried out, this
underlay must be carried out evenly according to the specification below.ù Milling must be checked
for evenness after assembly of the worktop . ! We accept no liability for incorrectly placed hobs !
Insert 12x shims in the hob cut-out according to the dimensions
9. Remove the furniture drawers or remove the front of the kitchen unit.
10. Check base cut-out for dimensions and flatness and adjust if necessary
11. Unscrew the handle and outlet nozzle of the Nivel Professional.
12. Insert the Nivel Professional hob extractor. Make sure that the seal is
placed properly. Observe and compensate for height di�erences. Here
the highest caution is required - danger of breakage !
13. Align the hob, fill the joint (e.g. Novasil® or Ottoseal®) and smooth.
14. Create duct connection. If the silencers are installed, then also the height of the intake silencer must
be considered when measuring X.
53
ENFITTING REQUIREMENTS


 To Next Page
 Loading...

