A
B
C
D
E
F
2000 (6'7")
G
H
I
J
186 (7")
360 (1'2")
152 (6")
840 (2'9")
1650 (5'5")
252 (10")
593 (1'11")
89 (3")
911 (3')
K
L
M
N
O
407 (1'4")
1275 (4'2")
770 (2'6")
1684 (5'6")
1180 (3'10")
2300 (7'6")
214 (8")
414 (1'4")
175 (7")
966 (3'2")
1898 (6'2")
645 (2'1")
141 (6")
1010 (3'4")
506 (1'8")
1428 (4'8")
924 (3')
1900 (6'3")
1395 (4'7")
1
2 1 2
1 2
1 2
15 Sec 30 Sec 60 Sec 120 Sec
OPERATION INDICATOR
THRESHOLD AREA
SENSITIVITY
POTENTIOMETER
MaxMin
SWING AREA
SENSITIVITY
POTENTIOMETER
0deg
+5deg
‑5deg
DEEP
SHALLOW
SWING AREA DEPTH ADJUSTMENT
0deg
+5deg
‑5deg
DEEP
SHALLOW
FREQUENCY SWITCH
1
3
2
3
Each number of Area
can be eliminated
by using each dip‑SW
.
AREA WIDTH SWITCH
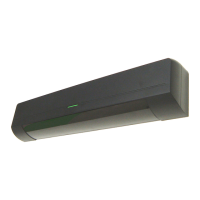
OA-603
DEEP
SHALLOW
DEEP
SHALLOW
DEEP
PATTERN
SHALLOW
PATTERN
THRESHOLD AREA DEPTH ADJUSTMENT
AUTO LEARNING TIMER
1 2
15SEC.
1 2
1 2
1 2
6
DEEP
6
SHALLOW
AREA DEPTH
MaxMin
5
NORMAL
5
SNOW
SNOW MODE
30SEC. 60SEC.120SEC.
:Stand‑by
:Doorside Det.
Green
Red Blink
Red
Yellow Blin
k
:Teaching
:Presence Det.
OPERATION INDICATOR
4
NORMAL
4
RAIN
RAIN MODE
Active Inactive
1 2 3
4 5
6 7 8
CONNECTOR
CONNECTOR
DEEP
PATTERN
SHALLOW
PATTERN
HINGE SIDE
7
RIGHT SIDE
7
LEFT SIDE
SENSOR SIDE
SWING SIDE APPROACH SIDE
8 8
These DipSW(7,8) are only for door mount.
5728770
OPERATION INDICATOR
THRESHOLD AREA
SENSITIVITY
POTENTIOMETER
MaxMin
SWING AREA
SENSITIVITY
POTENTIOMETER
0deg
+5deg
‑5deg
DEEP
SHALLOW
SWING AREA DEPTH ADJUSTMENT
0deg
+5deg
‑5deg
DEEP
SHALLOW
FREQUENCY SWITCH
1
3
2
3
Each number of Area
can be eliminated
by using each dip‑SW.
AREA WIDTH SWITCH
OA-603
DEEP
SHALLOW
DEEP
SHALLOW
DEEP
PATTERN
SHALLOW
PATTERN
THRESHOLD AREA DEPTH ADJUSTMENT
AUTO LEARNING TIMER
1 2
15SEC.
1 2
1 2
1 2
6
DEEP
6
SHALLOW
AREA DEPTH
MaxMin
5
NORMAL
5
SNOW
SNOW MODE
30SEC. 60SEC.120SEC.
:Stand‑by
:Doorside Det.
Green
Red Blink
Red
Yellow Blin
k
:Teaching
:Presence Det.
OPERATION INDICATOR
4
NORMAL
4
RAIN
RAIN MODE
Active Inactive
1 2 3
4 5
6 7 8
CONNECTOR
CONNECTOR
DEEP
PATTERN
SHALLOW
PATTERN
HINGE SIDE
7
RIGHT SIDE
7
LEFT SIDE
SENSOR SIDE
SWING SIDE APPROACH SIDE
8 8
These DipSW(7,8) are only for door mount.
5728770
Adjusting the Sensitivity
Threshold Area
Sensitivity
Potentiometer
Swing Area
Sensitivity
Potentiometer
(Factory setting : Midpoint)
(Factory setting : Midpoint)
Two different frequencies can be set by adjusting Dipswitches 3 .
When two or more sensors are mounted close to each other, they
may interfere. When that happens, change Frequency .
Setting the Auto Learning Timer
(1) Select the Auto re-learning time.
(2) Turn the power on.
(3) Wait for 15 seconds to complete the initial setting.
(Factory setting : 30sec)
2-1
2-2
Setting the Frequency Function
(Interference Prevention)
1,2: Auto Learning Timer
3: Frequency
Dipswitches
Mode Dipswitch Settings(Left Bank)
2-3
Setting the Rain Mode
Setting the Snow Mode
2-4
Set this switch to Rain if the sensor is used in a region with a lot of rain.
Set this switch to Snow if the sensor is used in a region with snow or
a lot of insects.
4: Rain Mode
5: Snow Mode
Prior to initial set up set learn time to 30seconds or longer.
ADJUSTMENTS
H
J
L
N
Sensor Pattern
B
C
D
E
F
G
I
K
M
O
A
[mm (feet)]
The sensor pattern shown is when the Swing & Threshold
area depth adjustments are set to 5 degrees. When the
sensor system performs an intial setup to its operating
environment detection
areas may vary slightly
from this chart.
2-5 2-6
Setting the Hinge Side
Setting the Sensor Side
2-7
Setting the Area Depth
6
DEEP
6
SHALLOW
7
RIGHT SIDE
7
LEFT SIDE SWING SIDE
8 8
APPROACH SIDE
Change this switch to SHALLOW
if false detections occur from cross traffic/side
traffic/or close
by objects.In SHALLOW Mode the
shallow pattern is applied only during the opening
and closing cycles.
6
DEEP
6
SHALLOW
7
RIGHT SIDE
7
LEFT SIDE SWING SIDE
8 8
APPROACH SIDE
6
DEEP
6
SHALLOW
7
RIGHT SIDE
7
LEFT SIDE SWING SIDE
8 8
APPROACH SIDE
When facing the OA-603 sensor head, if the hinge is to
the right of the sensor set dipswitch to "RIGHT SIDE".
If hinge is to the left of the sensor set the dipswitch to
"LEFT SIDE".
If you installthe OA-603 sensor head on swing side,
choose
'SWING SIDE',
if non-swing side,choose 'APPROACH SIDE'.
Sensor system does not operate when these Dipswitches are set the same on both sides of door.
1-5