6 7
4
Open position
Closed position
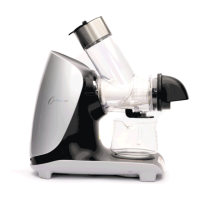
STEP 2: ADD THE ASSEMBLED TOP PART TO THE BASE
To close the lid, hold the hopper in one
hand and the bowl in the other; then turn
the lid clockwise until the ‘lock’ mark and
triangle linesup.
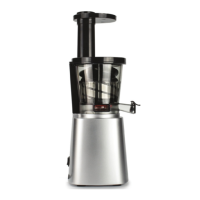
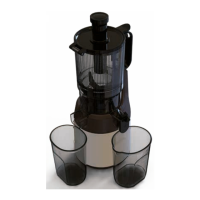
Position the juice cup directly
beneath the juice outlet and the place
the pulp cup directly underneath the
pulp outlet.
IMPORTANT: the drum lid will not
close unless the juicing screw has
locked properly (see Step 3).
IMPORTANT: Never place your
fingers in the Food Chute.
DIRECTIONS FOR USE
Prepare your juicing ingredients. The wide mouth of your Optimum 700
Advanced means you don’t need to chop ingredients, but we do recommend
washing them first. Additionally:
For foods with hard seeds or pips (e.g. mango or stonefruit): remove any
hard parts from each ingredient before you juice it.
For leafy or fibrous vegetables (e.g. spinach or celery): separate the
leaves from the stems, and remove any tough, fibrous outer stems before
juicing the innerparts.
For frozen fruits and berries: ensure your ingredients are completely
thawed – beforejuicing.
NOTE: If you are unsure about which ingredients to use we recommend
following the recipes within the recipe book provided.
Plug the juicer in. If your hands are still wet from Step 1, ensure you dry them
before touching the power cord, plug or wall socket.
Start the juicer. Press the “On” button to turn the juicer on. While it remains
on, the juicer will slowly pull ingredients from the feeding tube into the
juicingbowl.
Insert the ingredients into the feeding tube one by one. Using the clip
positioned on the outer rim of the feeding tube unlock the safely lock which
provides access to the wide 8cm x 8cm feeding tube and self-feeding wings.
Insert larger ingredients such as whole apples and oranges (peeled or
unpeeled) into the wide tube with the assistance of the self-feeding wings.
The self-feeding wings are designed to lock into the safety position when not
in use and when using the smaller feeding tube.
Feed longer ingredients such as celery and kale into the smaller
feedingtube.
You may occasionally need to gently use the pusher to move ingredients
to the bottom of the feeding tube when using the smaller feeding chute.
Avoid using it continuously, however, or your juice quality may suer.
1
2
3
4
ASSEMBLY INSTRUCTIONS, CONTINUED