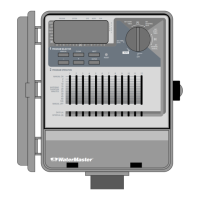
The controller has three programs that control a variety of watering plans.
Depending on your needs, you can use one or all programs.
Enter the Watering Schedule in Any Order
You have the option of entering your watering schedule in whatever order
you like. This feature makes it very easy to review and change your watering
schedule. Your settings can be changed at any time—while you’re setting up
the initial schedule or even after years of operation.
Start Times for Program A or B
Note: A cycle start time is the time of day that the program begins watering the
first station, and all other programmed stations will then follow in sequence. There
are not separate start times for each station. Cycle start times do not correspond to
specific stations. If you enter more than one cycle start time, all stations pro-
grammed to operate will water again (in sequence).
The way you set the cycle start time is the same for all programs. To set the
cycle start times for each program you will be using, do the following:
Tu rn the rotary selector to set the CYCLE START TIMES position in the program
that you want to set up. The display will show an A or B depending on
which program you have selected. The display will show —— : —— and
a blinking cursor will appear in START 1 location [See Figure 5].
Set the time you want to begin watering for cycle start time 1 using the + or
– buttons, then press the ENTER button. For additional cycle start times, sim-
ply press NEXT to advance to the next cycle start time and repeat this proce-
dure by using the + and – buttons to enter the time and then press ENTER.
Generally, only one cycle start time is required for each program (A, B).
FIGURE 5: LCD Display with Start Time
Note: You cannot set a cycle start time for each station. Stations can be assigned to either
Program A or B or both A and B. Each program can have up to four cycle start times.
Stations assigned to either program will turn on sequentially according to the cycle start
times assigned. Generally only one cycle start time is required for each program (A, B).
Program A Setup
Program A is a two-week daily schedule. Watering may be scheduled for each of
the 14 days. After 14 days, the A program continues to repeat itself—there is no
need to reselect the watering days. To set the watering days, [Note Figure 6]
Set start times as outlined in the previous column (Start Times for Program
A or B).
Tu rn the rotary selector to SET WATERING DAYS. The cursor (—) will blink
above the current day in the first week. Any or all days in the two-week
schedule can be programmed to water.
To program a day to water, press ENTER. An arrow will be displayed above
programmed days and the cursor will move to the next day. To advance to
a specific day, press NEXT. To clear a day, press NEXT until the cursor is above
that day, then press CLEAR.
FIGURE 6: Program A Setup for Two-Week Schedule
Program B Setup
Program B is used to water an interval from 1 to 28 or on odd or even days.
An interval of 1 will water every day; an interval of 2 will water today and
then every other day, etc. The odd or even schedule is based on the date. If
the time of day and the date are set correctly, the controller will only water on
even or odd days. If selected, the controller has leap-year compensation to
ensure conformance to the odd or even schedule.
To set the watering interval,
Set start times as outlined in the previous column (Start Times for Program
A or B).
Tu rn the rotary selector to SET WATERING INTERVAL. The cursor will blink to
the right of the word INTERVAL. [Note Figure 7.]
FIGURE 7: Program B Setup for Fixed Schedule
When selecting an interval of days, press the + or – buttons to the desired
interval. (Example: If you want to water once every ten days, the interval
will be set for 10.) To program the interval, press ENTER.
To select either odd or even day watering, press NEXT. This moves the cur-
sor to the odd or even setting. Then press ENTER.