Complete
Sprinkler System Kit
For instructions in Spanish, visit: orbitlonline.com
Para instrucciones en español, visite: orbitonline.com
WARNING: Check Local Codes
It is important that you check with your city, county, state, and municipal water agencies to learn the local codes
and permit requirements for sprinkler systems. Call utility providers to mark utility lines. Call before you dig; in
most areas dial 8-1-1. Call days in advance to give the utility companies time to mark their lines on your property.
CAUTION:
In order to keep your drinking water safe and free of hazards, all faucets must be protected against the
possibility of water flowing backwards from this irrigation system, into the home. If your faucet does not have
a backflow device, such as a vacuum breaker, make sure to install one before attaching this sprinkler system.
The home’s backflow device must be compliant with local and federal plumbing codes. Orbit is not responsible
for damage or harm caused by not installing and maintaining the appropriate backflow prevention device.
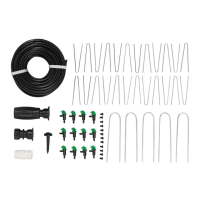
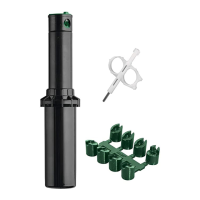
One Zone Kit Product List
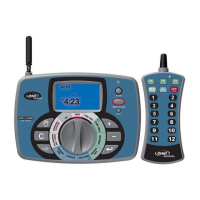
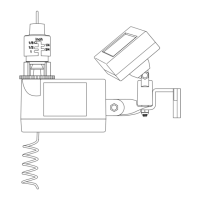
HOSE FAUCET
TIMER
1
HOSE TO 1/2"
BLU-LOCK
®
ADAPTER
1
HOSE TO 1/2"
BLU-LOCK
®
ADAPTER
1
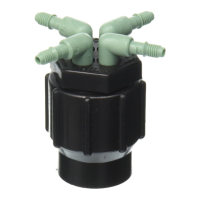
BLU-LOCK
®
AUTO-DRAIN
2
BLU-LOCK
®
AUTO-DRAIN
2
125' X 1/2"
BLU-LOCK
®
PIPE
1
125' X 1/2"
BLU-LOCK
®
PIPE
1
BLU-LOCK
®
THREADED TEE
6
BLU-LOCK
®
THREADED TEE
6
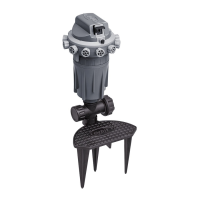
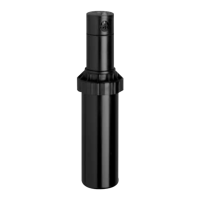
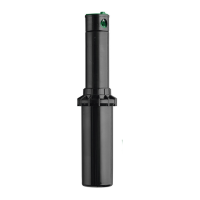
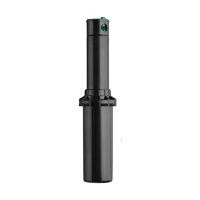
SATURN
GEAR DRIVE
SPRINKLER WITH
.75 GPM NOZZLES
6
SATURN
GEAR DRIVE
SPRINKLER WITH
.75 GPM NOZZLES
6
BLU-LOCK
®
ELBOW
2
BLU-LOCK
®
ELBOW
6
PIPE CUTTER
1
BLU-LOCK
®
TEE
1
BLU-LOCK
®
TEE
1
BLU-LOCK
®
COUPLING
2
BLU-LOCK
®
COUPLING
2
PRESSURE GAUGE
1
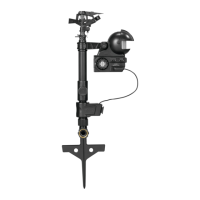
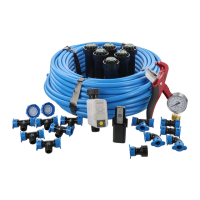
2-Zone Kit Additional Product List
If you purchased the Complete 2-Zone Sprinkler System Kit you will have these additional items:
!
!
STEP 9
Adjust Your Sprinklers
Watch each sprinkler head as it rotates to ensure
desired coverage. You can also improve your
coverage by moving sprinkler heads, or adjusting
the sprinkler with a flat head screw driver.
See the enclosed Saturn III, Gear Drive Sprinkler manual for
complete instructions on how to adjust the sprinkler head.
STEP 10
Digging
Once you are satisfied with your system coverage,
it is time to dig down to bury the pipe.
• Start by removing your sod, dig down a few inches in
rectangular or square shapes and pry up your sod. Set
the sod aside so that it can be put back in place later.
• Dig down through your soil a total of eight inches. The top
of the sprinkler head should be level with the ground.
• Auto-Drains should be installed at the lowest
elevation point in the system so that water
can properly drain from it. Dig the auto-drain
locations deeper than the rest of your pipe.
STEP 11
Clean Up
Bury your trenches. Shovel and rake soil back into the
trench it came from, making sure to compact your
trench so soil will not settle and create a trip hazard
in your yard. Replace sod back over your trenches.
Clean up any extra material from your yard.
STEP 12
Program Your Timer
See the included timer instruction manual
on how to program your timer.
DistanceArc
Need more help?
Try our online videos at orbitonline.com/support/
We have many helpful videos such as:
· How to Perform a Water Pressure Test
· Saturn III Gear Drive Sprinkler by Orbit
· How to Program an Orbit Hose Faucet Timer
(find the timer model number appropriate for your system)
· How to Winterize a Sprinkler System
For help with your sprinkler design try: www.design.orbitonline.com
Orbit
®
North Salt Lake, UT 84054
1-800-488-6156 orbitonline.com
©2019 Orbit
®
Inc. All rights reserved.
50020-24 rA